
How to Make Easy Sourdough Discard Sandwich Bread
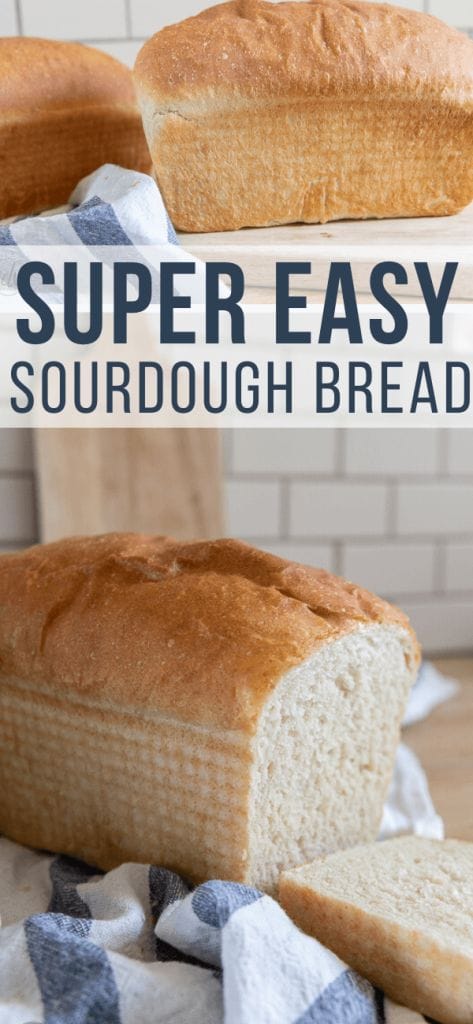
I have spent a lot of time down a rabbit hole of sorts. I have been spending so much time with my sourdough starter, we could be considered BFFs. I mean, really at this point in our social distancing routine, being friendly with a sourdough starter cannot be all that weird! Plus, it has given me so many amazing breads lately! Today I want to share one of my most favorite ones right now! My super easy sourdough discard bread!
My sister and I were talking on the phone the other day and was saying how she doesn’t really like sourdough. I told her I never liked it! Wait, what? I don’t like sourdough but I have been making sourdough everything? That doesn’t make sense. Well, believe it or not, not all sourdough is created equal, and your starter has a lot to do with how your bread ends up tasting.
Having a super sour sourdough starter will in turn create a more sour bread, and that is great, if that is what you want! Mixing in the “hooch” or liquid that can sometimes form on the starter will make it more sour. I always pour mine off because I do not want a super sour starter.
So, when I, who is not a big fan of sourdough cannot get enough of these sourdough breads, you can know its so so good!
Before we make this super easy sourdough sandwich bread, lets talk a bit about some fundamentals of bread making.
Not sure where to start with sourdough? Check out this post all about how to make your own sourdough starter!
Using the right kind of flour:
It is important to use the right kind of flour for what you are making. You want to use a bread flour when making bread. You can use all purpose flour but the rise and texture will be different. But still, totally possible. If you want the best results, use bread flour. Bread flour has more protein. This helps with the gluten development, as well as the structure and texture of the bread.
If you do not have bread flour, you can also use vital wheat gluten with your all purpose flour to give it more protein.
Proper kneading of your dough:
This is something I kind of slacked on for a while. I didn’t realize that the kneading was a vital element in creating a great rising bread. You have to knead the dough to properly develop the gluten which helps the internal structure of the bread. Once all your ingredients are combined, you need to knead the dough for enough time to get that elasticity in the dough, usually 4-5 minutes in an electric mixer.
Raising or proofing of the dough:
Once your dough has been kneaded it is ready for a rest. The amount of time is dependent on the dough itself. Some of my doughs rise really fast, in about 30 minutes and some take longer. Allowing 2 rises for some breads improves the structure and adds more of an even texture to the bread. It results in a smaller crumb, and prevent huge gaping air holes in your bread. It also does something very important, which is adds flavor. The fermenting of the yeast and flour as it rises improves the flavor of breads.
So, while in a pinch most breads can do with only one rise, its nice to give it a second rise depending on the kind of bread. I have an enriched roll recipe that rises twice, and it makes the bread so much more flavorful. To make the dough rise a second time, you need to punch down the air to get all the bubbles out, then it will rise up once again.
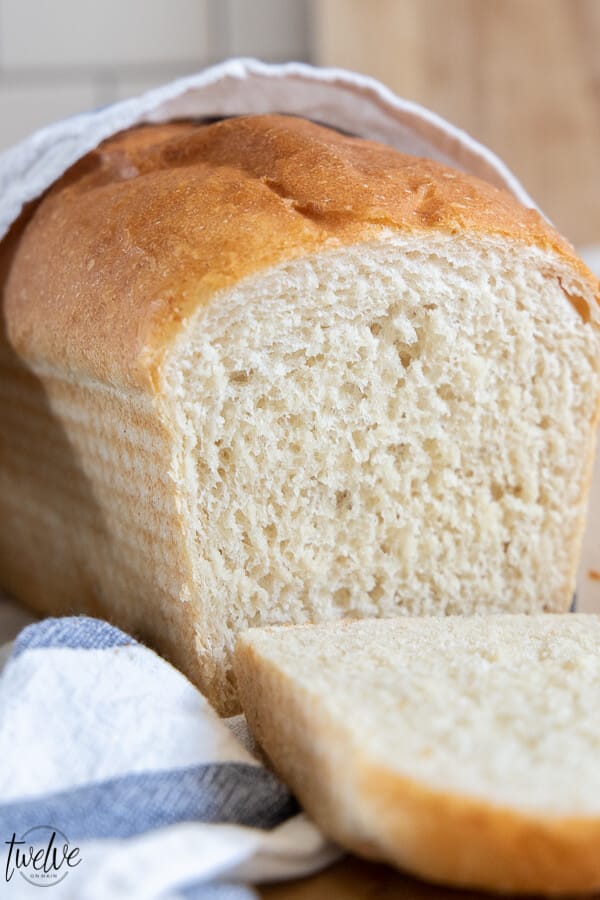
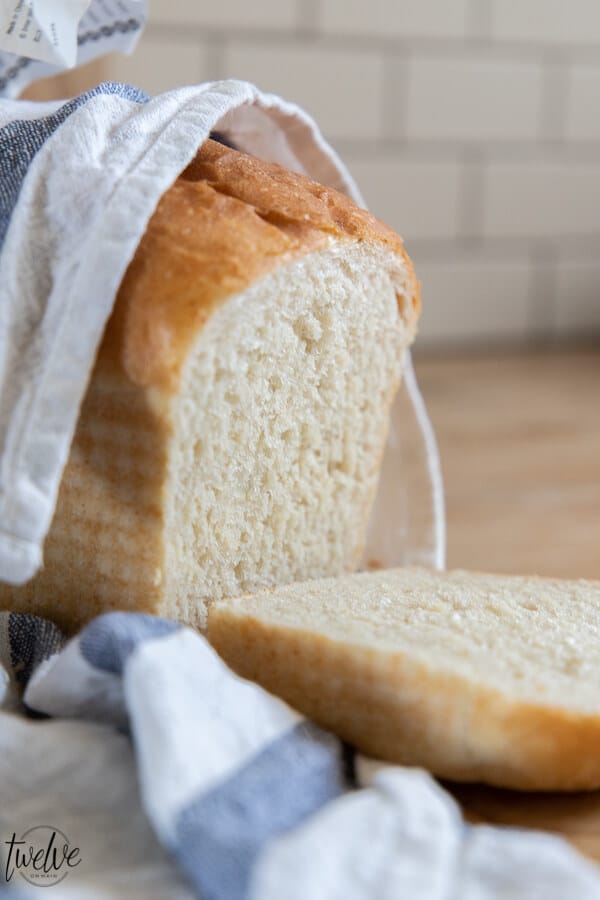
This sourdough sandwich bread only really needs one rise, but I may experiment with adding another rise, since it can make it a more fine crumb, which is nice for sandwich breads.
HOW TO MAKE THIS SOURDOUGH DISCARD BREAD:
First, let me explain that this is not exactly a true sourdough, since it does have a small amount of yeast in it. But, this is what makes it a more manageable bread and can be made in less time. A true sourdough bread takes many more hours to prepare. So, while this doesn’t take hours and hours to proof and rise, it does make a flavorful and delicious bread.
To begin making this sourdough discard bread, you want to warm your milk. Do not get it too hot, about 110-115 degrees. Pour your milk, honey, sourdough starter and yeast in the mixer and let it sit while you gather up your other ingredients.
Add the coconut oil, salt, baking soda, and 2 cups of flour and begin mixing. all of the ingredients together. Slowly add the rest of the flour until all is combined.
Next, you need to knead the dough for 4-5 minutes on low/medium speed. Make sure to do this process. You can check to see fi the gluten development is taking place by doing the WINDOW PANE TEST. This is where you take a small amount of dough and stretch it carefully. If you can stretch it thin enough to see through it, you have great gluten development.
When it is to this point, you can take the dough and let it rise in a bowl for about 1 hour, or until it doubles in size. I like to do this by rubbing a small amount of oil to the dough to prevent it from drying out. Then I cover the bowl with plastic wrap and place it somewhere warm. I often let my bread rise on the hearth of my fireplace.
Once the bread has risen, its time to shape the dough and put the loaves into the pans. First, make sure you grease or spray the loaf pans inside and the tops of them. They can stick to the top of the loaf pans.
This is how I like to shape my bread loaves:
You can also roll out your dough the width of the bread pan and about 14 inches long and then roll it up and tuck the ends under and pinch them to stay.
The last ting you need to do it let the loaves rise inside the pan. This could take about 20 minutes. You do not want to over proof the loaves or else your bread loaves will fall in the oven resulting in a flat bread.
How to know if your bread is under proofed or over proofed:
There is a fine line between under proofed and over proofed dough. Your dough should double in size and this will give you a good base point for if your dough is proofed.
You can test your dough by gently pushing in on the side of the loaf. If the indentation quickly pops back out, it needs more time to raise. If the indent stays indented, it is proofed and ready to be put in a hot oven.
How to bake your bread:
It may seem simple, put bread in oven, cook. Well yes! But I want to give a few tips!
- Make sure your oven had been preheated and is nice and hot! Let it heat for a bit extra before putting bread in the oven to give it maximum heat.
- Set up your oven rack at the lowest position or second lowest. I like to bake mine on the lower rack. I think that having it lower allows the heat to hit the bottom of the dough, forcing it to rise a bit more from the bottom of the loaf. I have no real evidence to prove this, but I think it produces a more even bake on your bread.
- I like to use my convection as well to even out the bake. This helps if you have a hot spot in your oven. You can also rotate your loaves half way through to help even out the bake if this is needed.
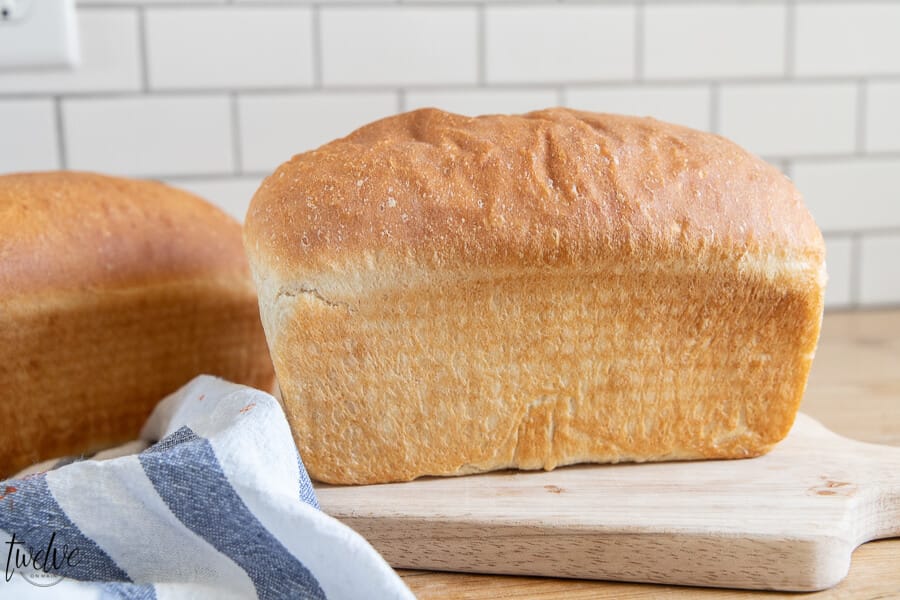
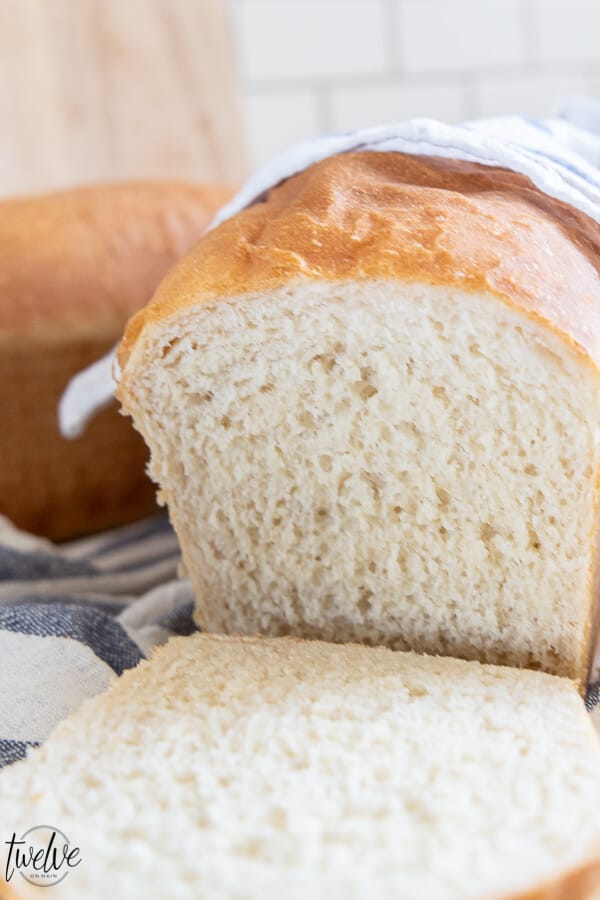
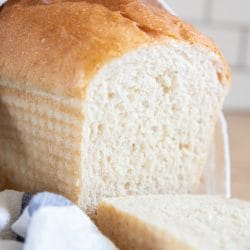
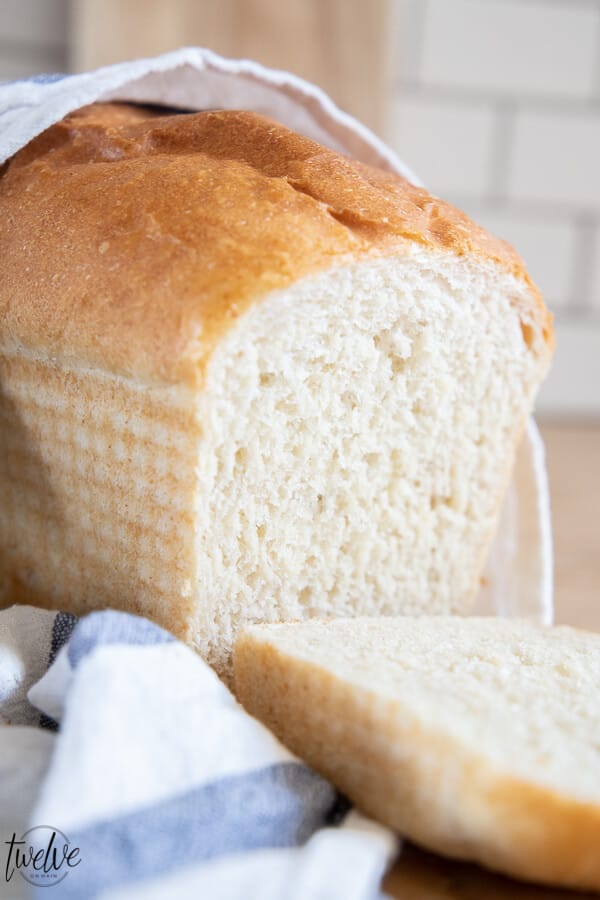
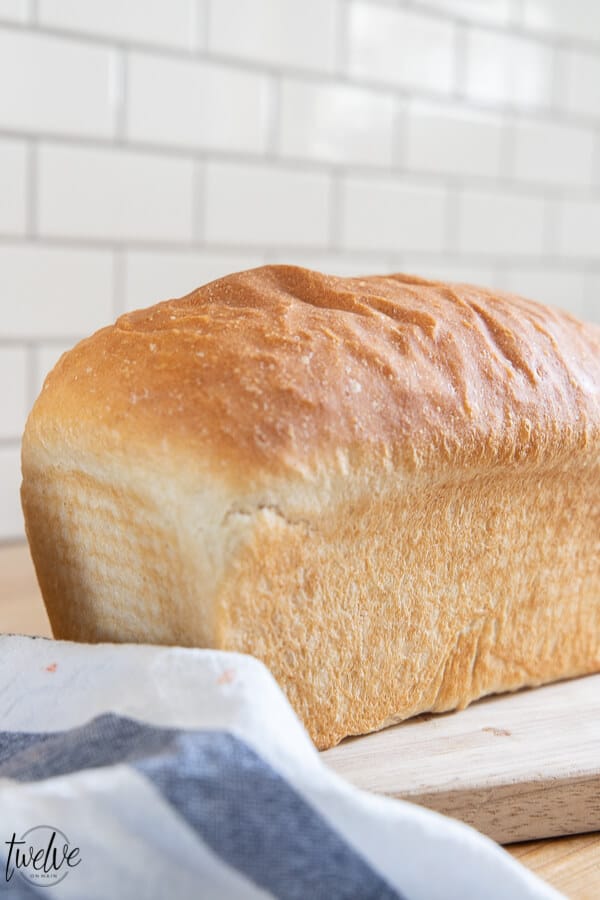
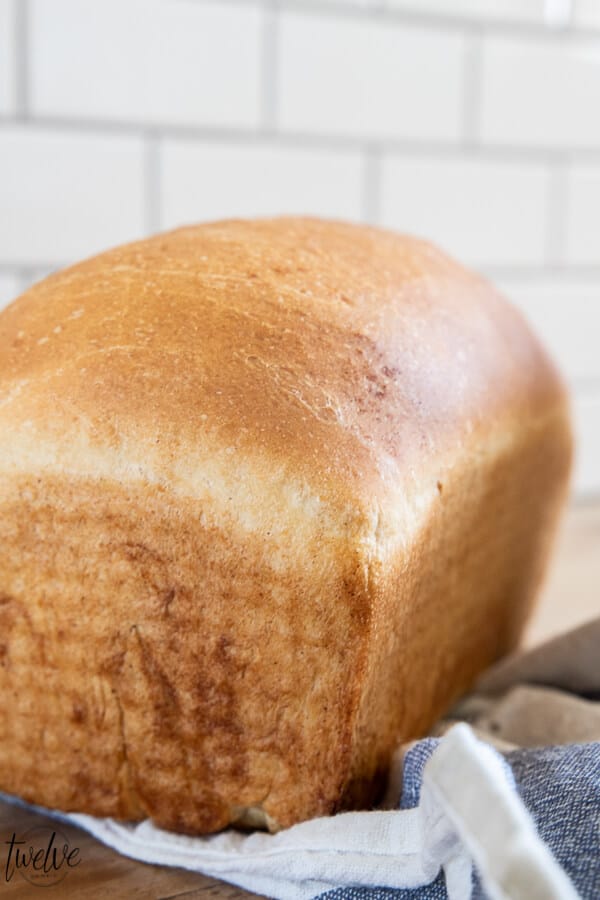
- You loaf is done baking when you tap on the top and it sounds hollow. You bread should have a nice browned top.
- Once your sourdough discard bread is done, carefully take them out of the pans and let them cool on a rack. If you cool them on a solid surface they will sweat and make a soft bottom.
- Wait until your bread has cooled before cutting or it will be much harder to cut.
WANT OTHER SOURDOUGH RECIPES? CHECK THESE OUT:
Sourdough English Muffins With All Those Nooks and Crannies
Easy and Delicious Flakey Biscuits Using Sourdough Discard
Light, Fluffy and Super Yummy Sourdough Pancakes
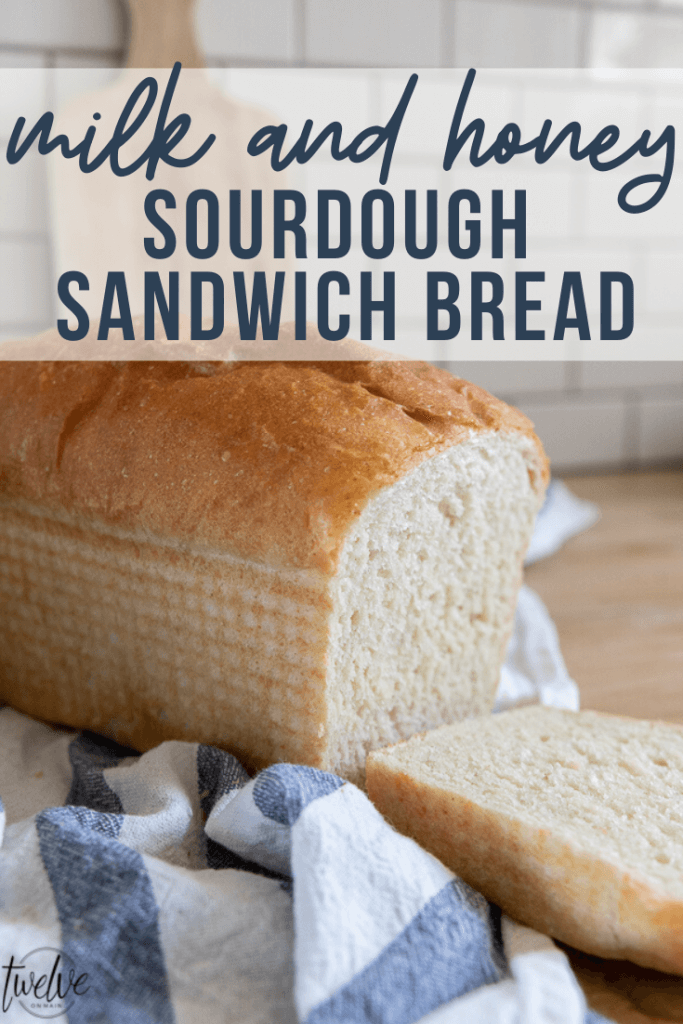
Easy Milk and Honey Sourdough Discard Bread
Milk and Honey Sourdough Sandwich Bread
Ingredients
- 1 1/2 cup warmed milk
- 2 1/2 tsp yeast
- 1 cup sourdough starter
- 1/4 cup coconut oil ( you can also use butter)
- 1 tsp salt
- 1 tbsp honey
- 4 1/2 cup bread flour
- extra oil for working with the dough
- 1/2 tsp baking soda
Instructions
- Put the warmed milk (not hot, if its too hot it will kill the yeast) in your mixer.
- Add the yeast, honey and sourdough starter and let it sit while you gather the rest of your ingredients.
- Add coconut oil, salt, baking soda and 2 cups of flour and begin mixing.
- Once it is just mixed, add one cup of flour at a time slowly. The dough should be a bit sticky still.
- If you feel it is too sticky, add 1 tbsp of flour at a time. You do not want to add too much flour or it will be stiff and heavy bread.
- Once all the flour is mixed in, knead it for 4-5 minutes or until it becomes elastic.
- Once it is done kneading, put it in a bowl to rise. I put a small amount of oil on the dough and rub it around to cover the surface. Then I cover with plastic wrap and let it raise for about 45 minutes or until it has doubled in size.
- Once it has risen, take it out of the pan and cut it into two equal sections.
- It is time to form it into a loaf. There are a couple ways to do this. First, you can roll in out as wide as the bread pan, and about 14 inches long. Roll it up, tuck the sides under and pinch them, then add it to your greased bread pans.
- I like to roll my dough in in itself, set the smooth side down in the greased bread pan, punch the air out, gather the sides and pinch while rolling it over to hide the seam and reveal the smooth side of the dough. You can see how I do this with my wheat bread here.
- Preheat the oven to 400 degrees
- Let these loaves raise for about 20 minutes or until they have doubled in size. You can tell if they are ready if you push a finger lightly into the side, it will sink and and not bounce back. If you push lightly into it and it bounces back immediately, it is not ready to go in the oven.
- There is a fine line between under proofed and over proofed dough so make sure to watch it! If it is over proofed it will fall in the oven and you will end up with a slightly flat loaf.
- I like to let it bake in the oven at 400 for up to 30 minutes. I will usually wait until they have baked for 20 minutes and take a pastry brush and brush butter on the top of the loaf. This will give it a nice brown color.
- Let the bread cool for about 20 minutes before cutting into it. Otherwise hot bred is very difficult to cut and not totally ruin the loaf.
- This sourdough sandwich bread makes amazing toast, grilled panini sandwiches, french toast, and of course, sandwiches!
- I store mine in simple plastic bread bags you can get at the store with twist ties. This bread also freezes really well!

MAKE SURE TO SHARE THIS RECIPE!

This turned out amazing! Great recipe. It’s a keeper! 😊
Can I leave out the yeast and just allow more time for the dough to rise using only the sourdough starter?
Yes
New to bread making here. Why add yeast if using starter?
Because sourdough takes hours to product the bubbles involved in getting it to rise. The yeast in this is a small amount and helps give the dough a boost so it is not taking 12 hours to rise.
This sounds great! Have you ever tried this recipe with kamut flour or maybe part kamut/part bread flour?
Thank you!
No I have not.
Is the sourdough starter active or is it discard?