
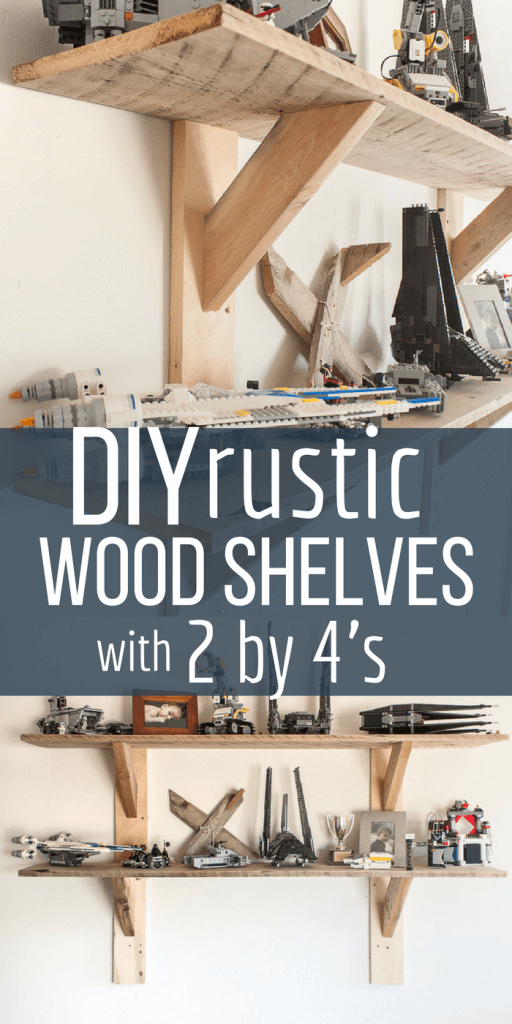
How to Make Stylish Rustic Shelves with 2 by 4’s
Want a unique set of shelves that don’t break the bank? Create these simple and easy stylish rustic shelves with 2 by 4’s and you will be laughing at how easy they can be!

2 by 4’s are generally known for their structural quality. They are a staple in building a structure and used with a very functional use in mind. But, it is so very easy to take these functional pieces of wood and turn them into something stylish and decorative for your home.
I love to use 2 by 4’s when I am building things, whether a table, desk, picture frame, or shelves. They have so many uses, the possibilities are nearly endless to your imagination.
So when I asked my husband to help me create some shelves I had drawn up, he was a bit skeptical when I asked to use 2 by 4’s for them.
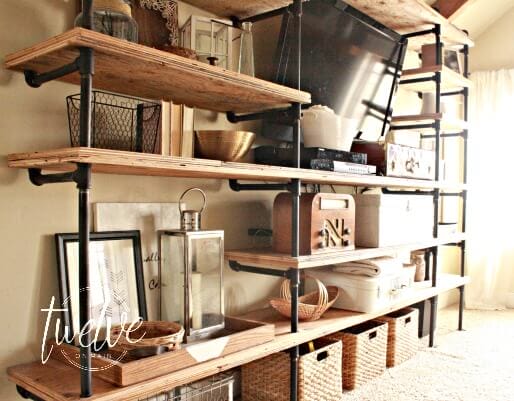
I am a big fan of rustic shelves, but I like them to have a bit of a chic look. I recently wrote a post about the rustic wooden shelves in my bathroom and I wrote one about my reclaimed shelves in my dining room about 2 years ago. Over the past 2 years we have built many different kinds of shelves.
All of them have a bit of a rustic look, but still chic in some way. They may have nail holes, or knots in the wood, or maybe even some big gouges in the wood. But, each and every one of those features adds to the rustic look that I desire.
I think the key to adding rustic shelves to your homes decor is to combine them with some chic, clean lines. I like to contrast the rustic look with delicate features and accessories.
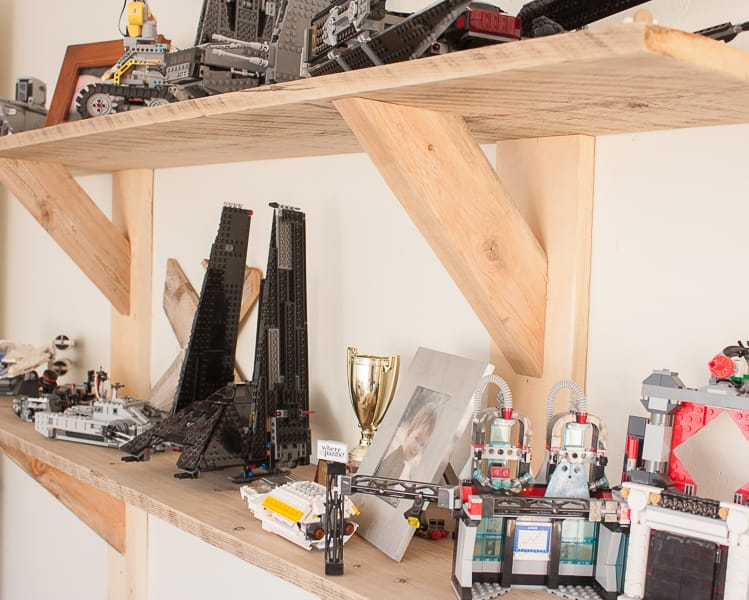
Rustic shelves for storage and display
So, I have 4 kids. 3 boys and one girl. My three boys are absolutely and completely obsessed with everything Lego. I tell you this for a few reasons. If you have kids like mine that love Lego’s, they love to build things and then display them. And, there are only so many horizontal spaces in the home that they can be displayed.
Soon enough, their bedrooms become a black hole of Lego figures. My coffee tables and consoles become display spaces. My kitchen island and table become a smorgasbord of lego treats. And my floor….well it becomes a battleground of sharp, painful little bombs, ready to tear apart your feet.
We finally got to a point where we needed somewhere to put them. I tried convincing them to take them all apart and box them up, but they all looked at me like I had a third eye…and that included my husband…one of the worst offenders of them all!
My oldest son has a bit more of the organizing gene in him, and he really wanted a place to display some of his favorites. I was happy to oblige.
So we built him some super easy rustic shelves with 2 by 4’s.
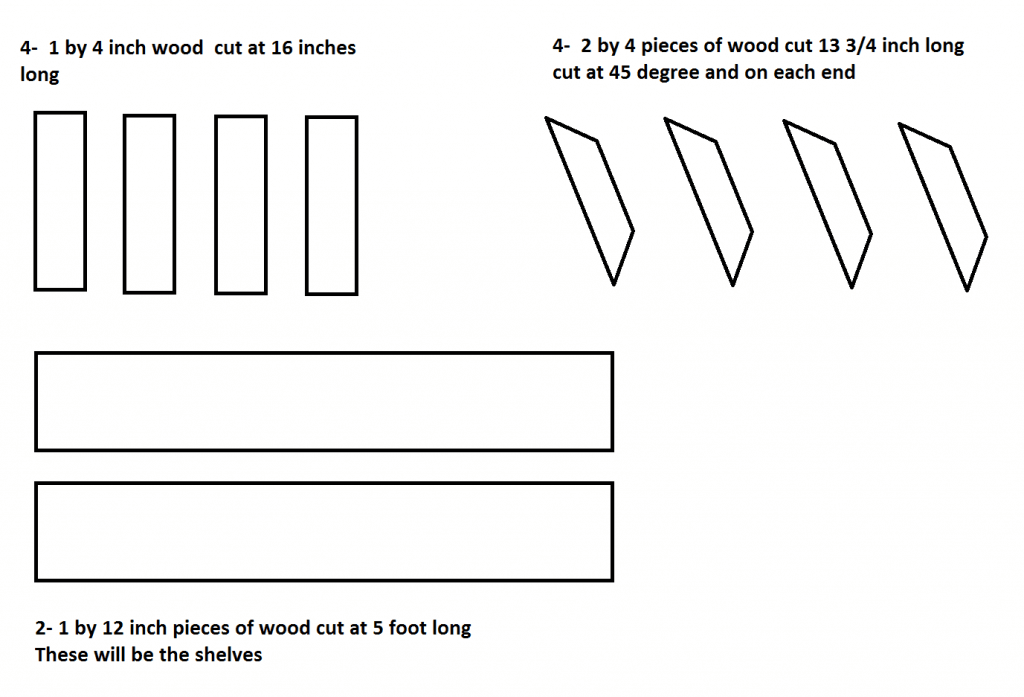
Supplies you will need to build rustic shelves with 2 by 4’s:
- 4- 1 by 4 inch pieces of wood cut at 16 inches long
- 4- 2 by 4 pieces cit at 13 3/4 inch long cut at 45 degree on each end.
- 2- 1 by 12 inch pieces of wood cut at 5 ft long. You can adjust as needed. Any longer and I would recommend and extra shelf bracket.
To cut and assemble my rustic shelves I use:
- miter saw
- cordless drill and impact driver
- 1 inch and 2 inch screws
- stud finder
- level
I have drawn up a quick chart showing you what you need to build these rustic shelves with 2 by 4’s/
Now, before you get started, check to make sure you have something to secure them to. We always make sure to look for studs in the wall before we install any shelves. If we get lucky and can use them to our advantage and adjust our bracket spacing we will. If not, we will make sure to install drywall anchors.
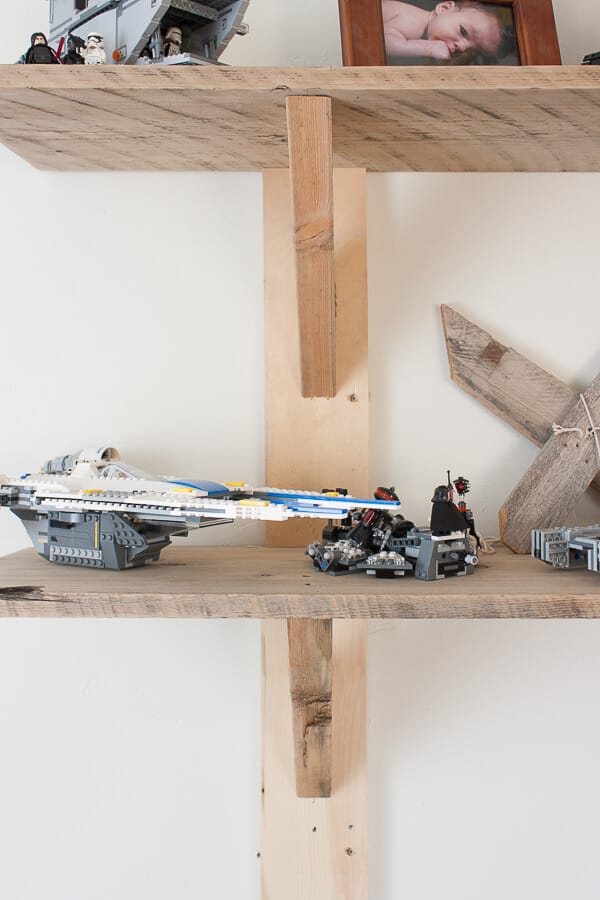
To build these rustic shelves, its really quite easy. The completed look is to make it all look like one shelf.
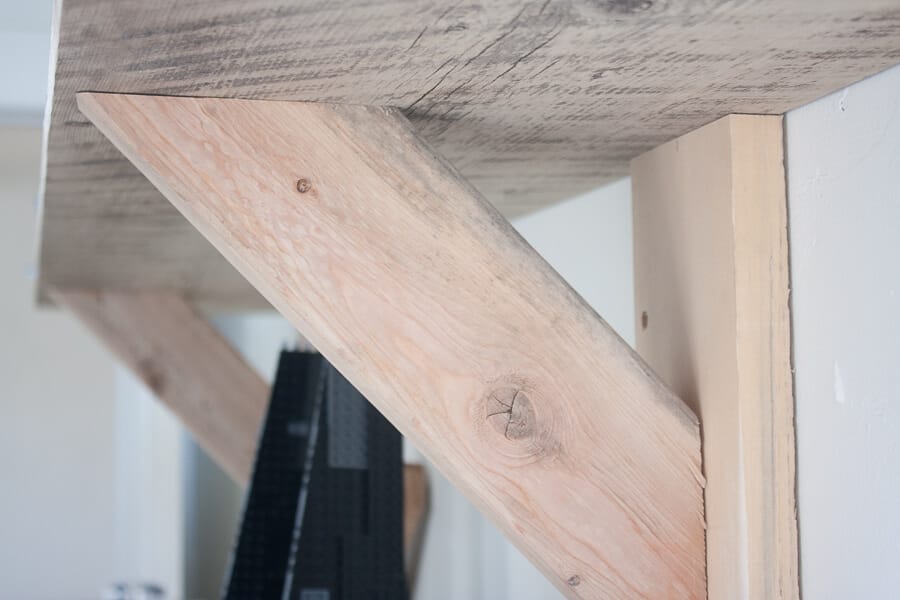
You want to secure the 16 inch long pieces to the underside of the 1 by 12 shelf. I screwed them from the topof the shelf.
Laying these down on the ground makes this really easy. Now you want to take your angled pieces and dry fir them between the top shelf piece and the back piece like the picture below.

We installed ours 5 inches from the bottom of the 16 inch piece. This allowed of a half of an inch clearance at the top of the shelf. You can see in the picture below how it looks.
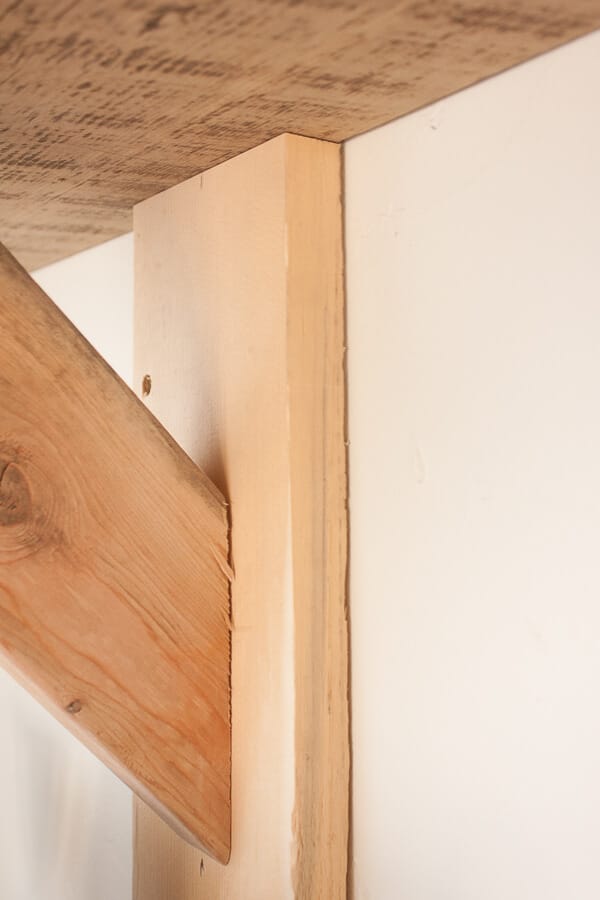
We centered the stud in the middle of the wall piece. You can measure to make sure it is in the correct spot every time, or you can eyeball them. There is a lot of room for error.
Once you have the shelf bracket connected, you can do the same to the second shelf. With this method you can create as many as you would like. We were originally going to do 4 shelves, but decided on less.
Once they are both assembled, you simply need to install one, using a level and stud finder to make sure that it will be secure and straight. Next you will install the second shelf directly below or above the first one depending on where you want it to go.
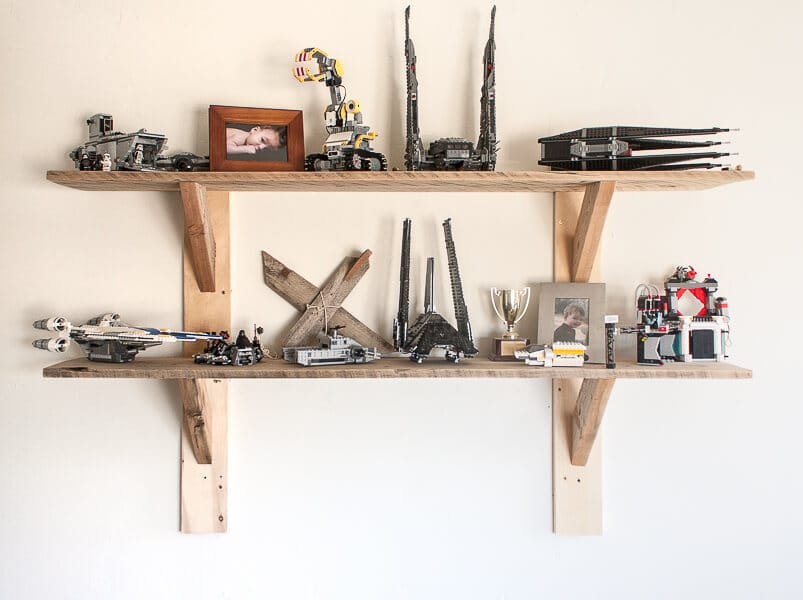
The end result looks like one solid rustic shelf. I just really love the look! We gave everything a good sanding to make sure there aren’t any slivers and then stained it with my DIY weathered wood stain. It gives it just enough of a patina, and doesn’t compromise the grain and character of the wood.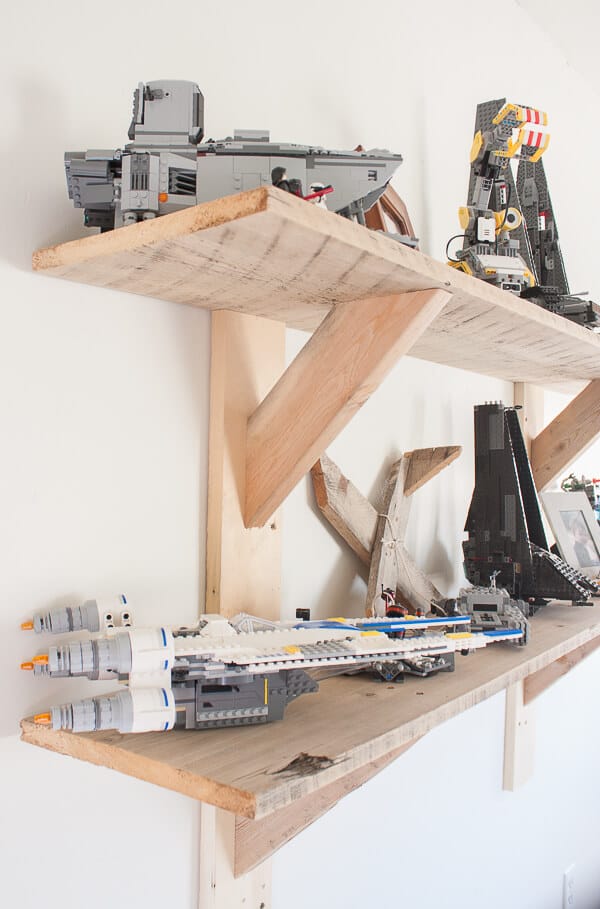
Doesn’t his Lego collection look great on them? (and just so you know, this is not all of them?) Can you tell they are Star Wars fans as well?
There are so many options that you can do with the same fundamental style. You can make them shorter to fit a smaller space, or lengthen them out and create a massive wall of shelves.
There are so many advantages to building yourself rustic shelves. They can be super inexpensive. Common white board can cost only a few dollars and 2 by 4’s are next to nothing, and you really only need one for this project anyways.
I hope you enjoyed this tutorial on rustic shelves as much as I love them myself!
Make sure you save it for later and share it with friends!

If you like this post, check out these other great DIY projects:
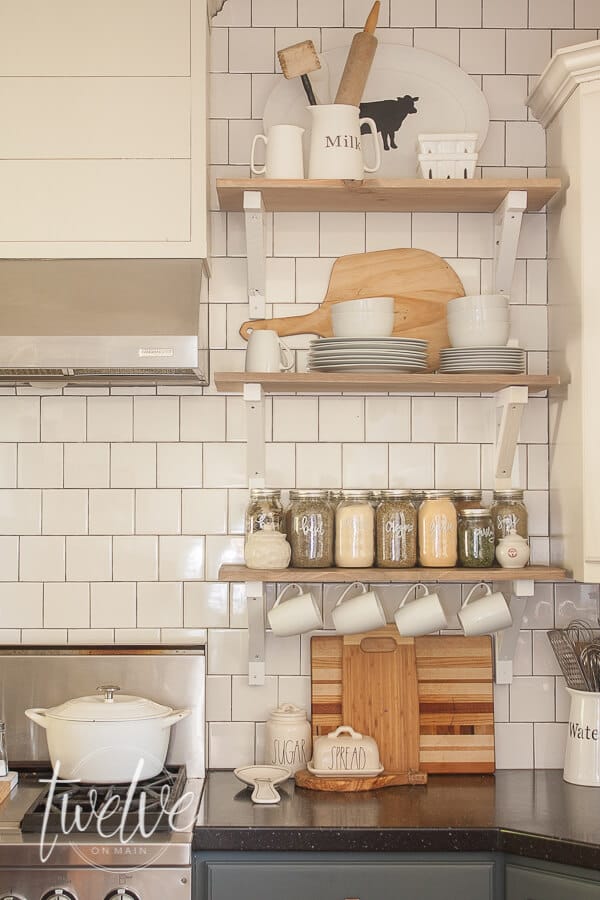
Want Open Shelves in the Kitchen?
How to Style Decorative Shelves Like a Designer
25 Farmhouse Shelf Brackets for Your Home
You are so talented, I love all these ideas with the shelving.
Maria