
Styling Tips and DIY Chalk Paint
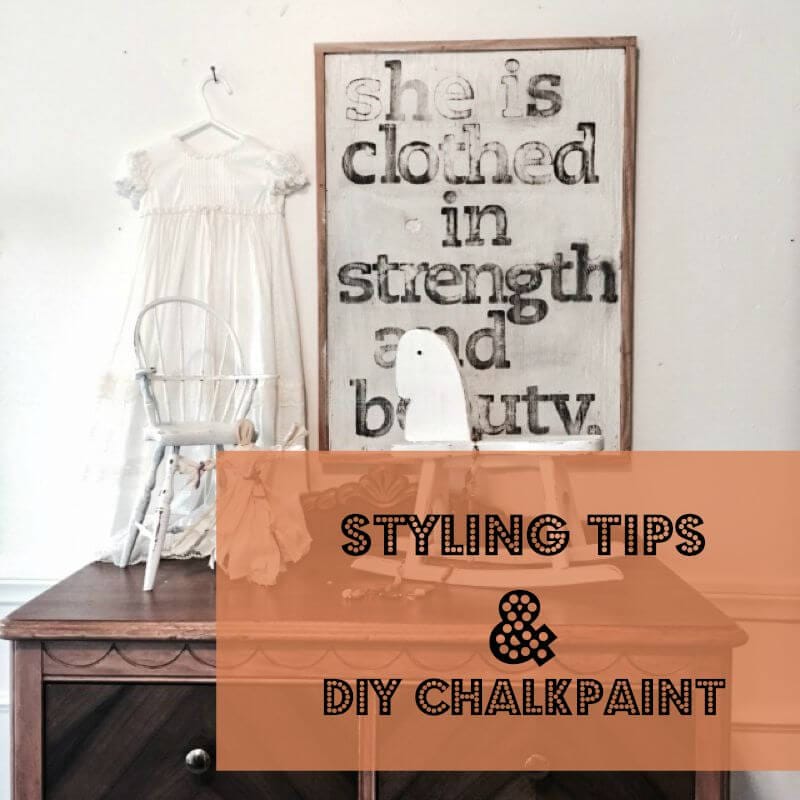
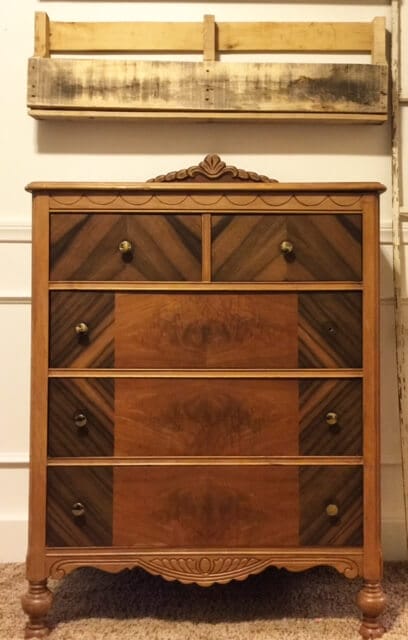
So I am currently working on my daughters new room. Slowly but surely it is getting done. I had to do a fun little post on one corner of her room that was created with everything from a thrift store. Its for bragging rights ya? Okay let me break it down. See this dresser? A pretty glorious thrift store find if I do say so myself. This is exactly as is. The only thing I have changed is the knobs. But the character and style, that was already there. I paid 50 dollars for this lovely thing. BONUS.
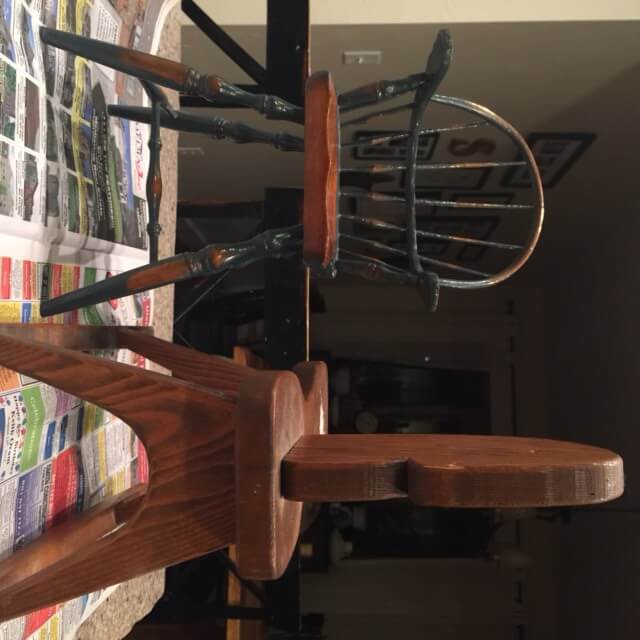
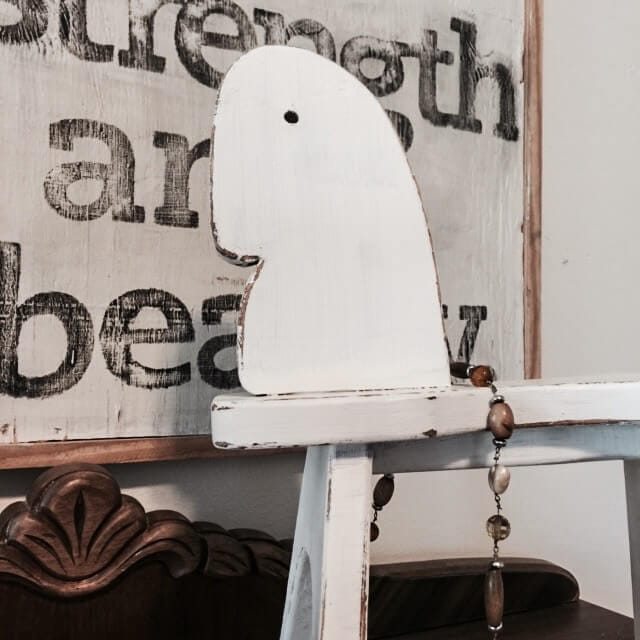
This rocking horse and small chair were both found at thrift stores. The rocking horse was found at Savers and the chair was found at our local hospital thrift store. I paid a total of 3 dollars for both. Now the transformation begins.
The first thing I am going to do is clean any dust, dirt etc off both pieces. There was some old yarn remnants from an old mane and tail. I pulled out the left over pieces and called it good.
The first thing I am going to do is clean any dust, dirt etc off both pieces. There was some old yarn remnants from an old mane and tail. I pulled out the left over pieces and called it good.
Now, this is where I get creative…or lazy, whichever you want. I love to make my own chalk paint. I’ve seen many different recipes on Pinterest. The one I like the most is with Plaster of Paris.
This is all you will need:2 Cup Latex Paint
1/3 cup Plaster of Paris
2 TBSP water
This is all you will need:2 Cup Latex Paint
1/3 cup Plaster of Paris
2 TBSP water
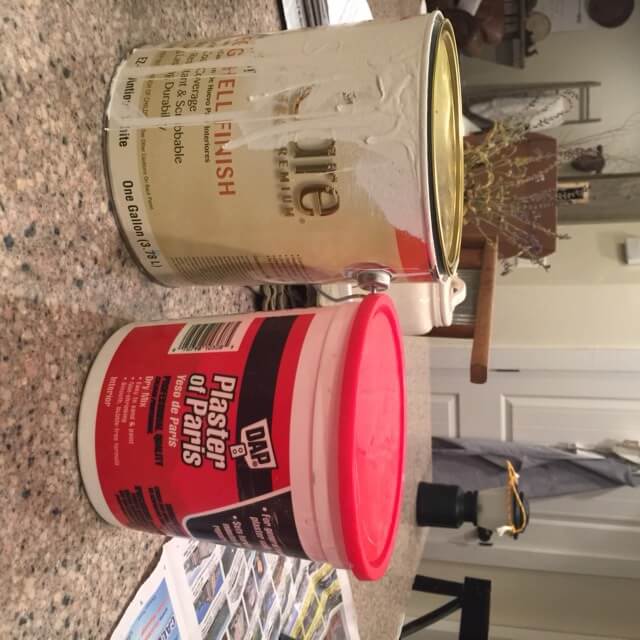
As you can see I have plenty of white paint laying around my house. I am never without it.
Now….before you say, wouldn’t spray painting these things be easier? Yes, probably. But sometimes, I am out of spray paint, and I don’t want to spend any money, and its late at night, and I just want to get it done, and, and, and. And hey, sometimes it just doesn’t look as good in my opinion. So yes, you can just spray paint. But, I like using paint.
Now….before you say, wouldn’t spray painting these things be easier? Yes, probably. But sometimes, I am out of spray paint, and I don’t want to spend any money, and its late at night, and I just want to get it done, and, and, and. And hey, sometimes it just doesn’t look as good in my opinion. So yes, you can just spray paint. But, I like using paint.
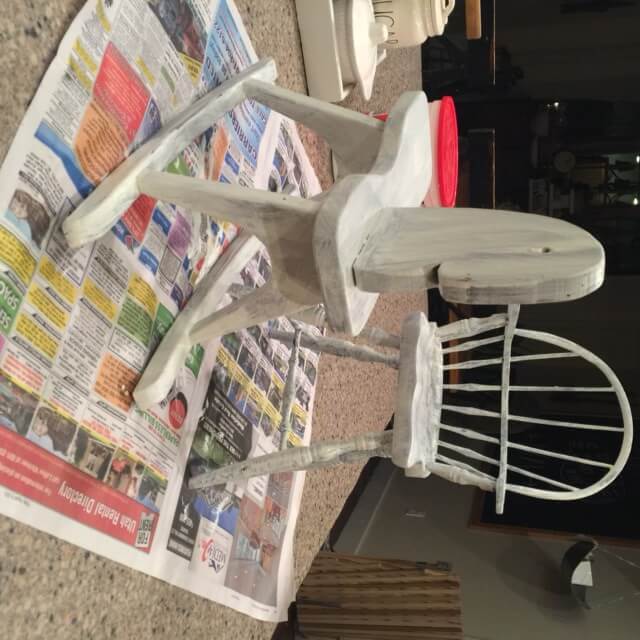
Here they are after one coat. Still looking a little rough but on their way.
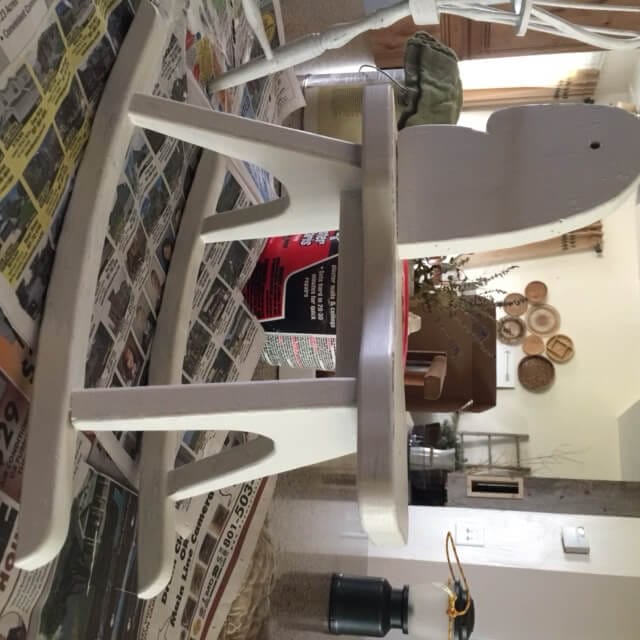
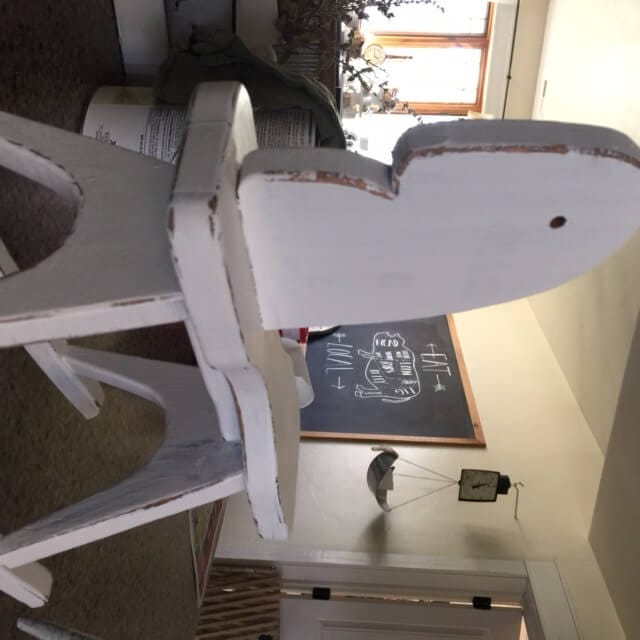
Second coat is done, and now on to a little sanding to add some character. Sanding is one of the simplest ways to add age and character to something. Very rarely to I leave something perfectly painted. Another bonus to this technique is that it gives you a lot of forgiveness. If you havn’t painted it perfectly, nobody will ever know once you do a little sanding and antiquing. I promise, it makes painting something so much more rewarding.
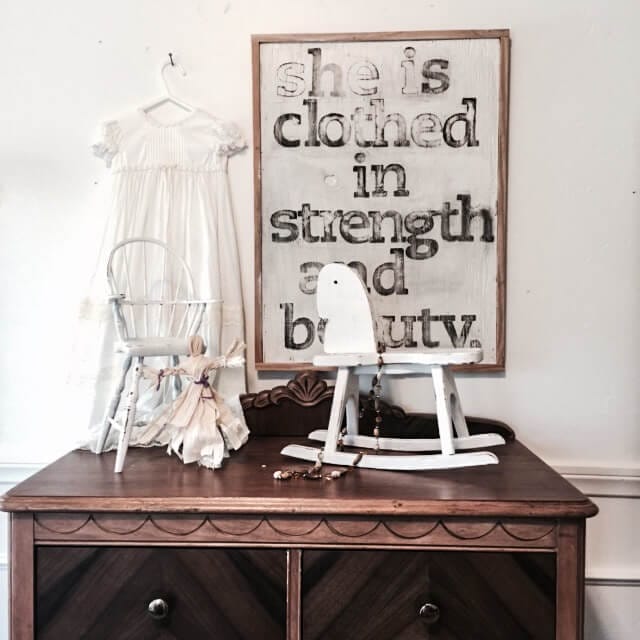
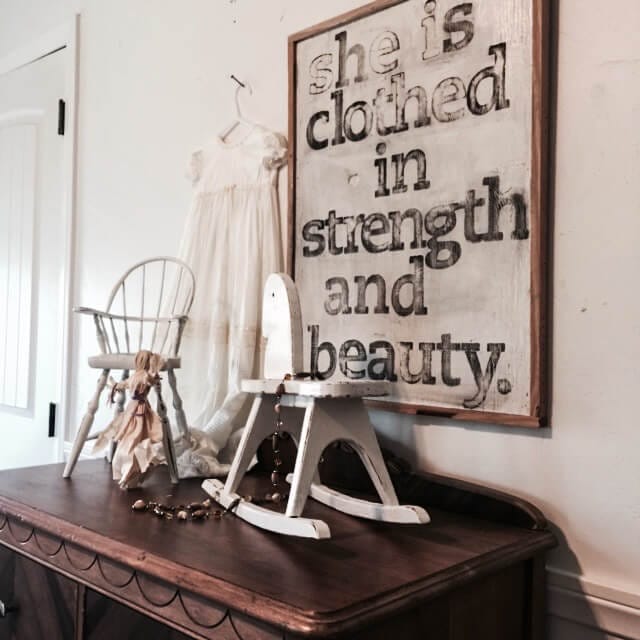
Now, lets discuss styling. My first goal when I am looking to style something is: color. You first need to decide what color/colors you want to focus on. Obviously I went for white and natural wood. Shocking right? Hey, its just where I’m at. My second goal is: focal point.
I started with a large print I made to anchor the space. This creates something to launch off of and add to. Next, I like to add texture. I found the exact thing I was looking for with my daughters blessing dress. I then like to find other small, supporting items to add some interest.
I started with a large print I made to anchor the space. This creates something to launch off of and add to. Next, I like to add texture. I found the exact thing I was looking for with my daughters blessing dress. I then like to find other small, supporting items to add some interest.
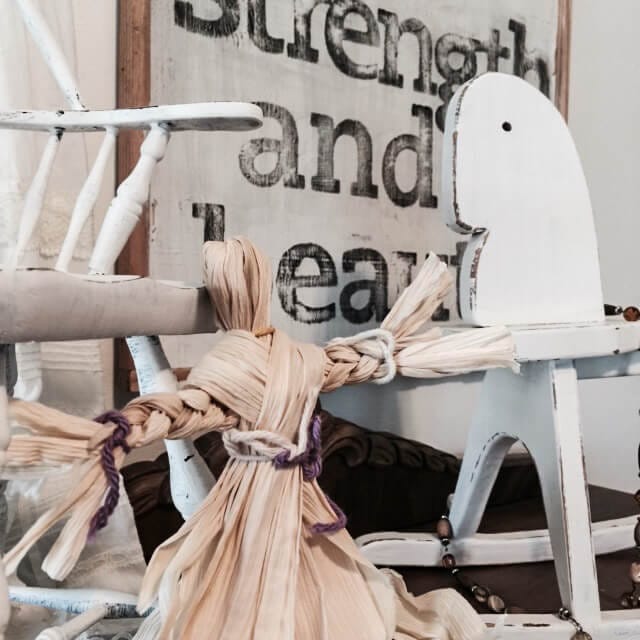
This is where I added my chalk paint items, as well as a small corn husk doll my daughter and I made at a pioneer celebration. I had never made one and was super excited to learn how!
The last thing I added was a beaded necklace of mine that my daughter stole from me a while ago. She loves to wear it, and the bonus is that it goes perfectly with my other items. My recommendation is before you head out to purchase any and all accessories you would like to decorate or style with, look around your home. Think outside the box.
So lets review…..
1. Color. Decide what color/colors you want to work with. This will make the next steps easier once you know what colors you want to combine.
2. Focal Point. When styling anything, I look for one or two items that will anchor the vignette or space. Here the focal point is the print and the supporting role belongs to the blessing dress.
3. Texture. my goal is to combine different textures whenever I am styling. It creates so much interest and drama. My different textures come from the blessing dress and the corn husk doll. even the necklace adds a third texture.
4. Smaller accessories. Finally I like to add smaller items to create a cohesive look. This is accomplished with my chalk paint items and the necklace.
I am very happy with the finished product! Everything came together perfectly. One more spot in my daughters room that is done! Just a few more things to do and I will be ready to reveal the whole room. I hope you’ve enjoyed checking out my styling process. I love to design and style. My brain is always thinking, and creating different ideas and options. I hope that my steps can help you to jump at it and get creative! I would love to see some of your finished areas that you have styled! Go follow me on Instagram at twelve.on.main and tag me in a photo! Use the hashtag #twelveonmainstyled and I will feature some of you on my feed! I hope everyone has a great Thursday! Don’t forget to sign up for my email list and receive exclusive updates!
Very nice styling I love your use of the chalk paint. It makes the objects look sweet and whimsical.
Thanks You! I was going for more of a whimsical style since it was in my daughters room. Thanks for stopping by!
Thank you for stopping by!