
French Onion Sourdough Focaccia Bread
My sourdough focaccia bread recipe is one of my most popular breads to make. I have so many different recipe ideas and today I want to share my french onion sourdough focaccia bread recipe. This is savory and so flavorful.

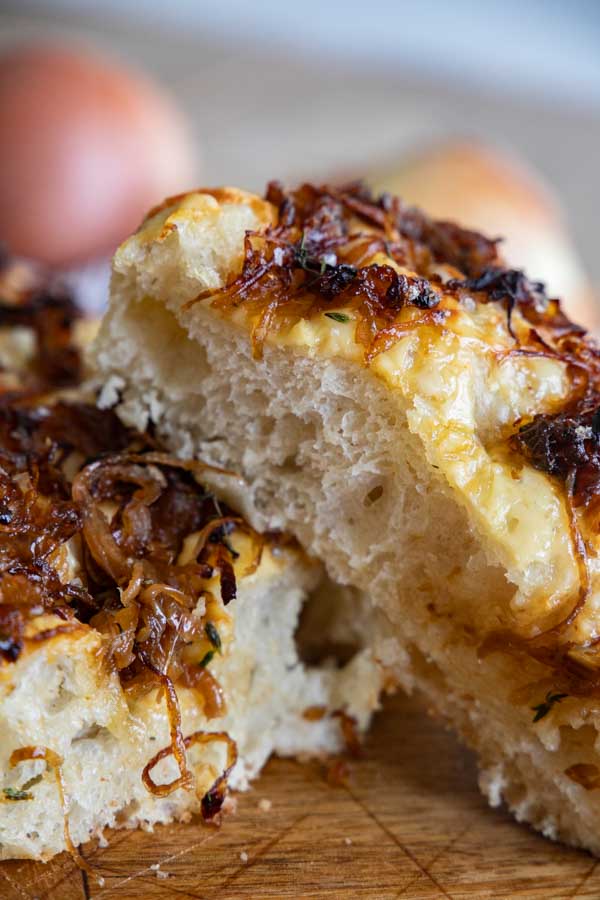
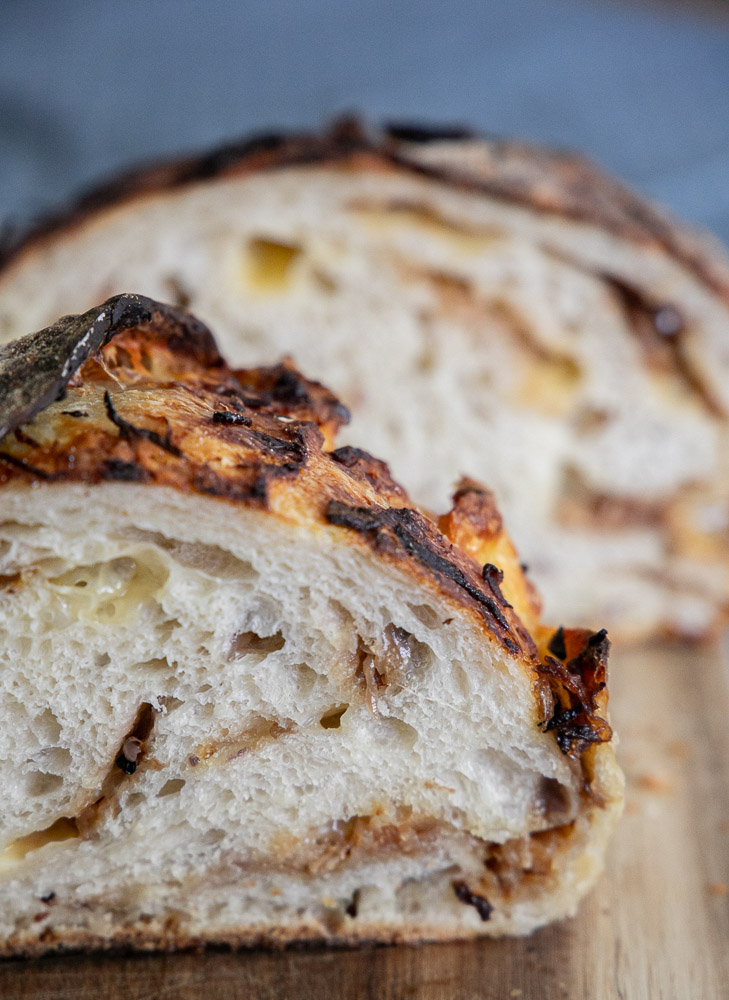
This airy sourdough focaccia bread along with the sweet, flavorful onions, creamy gruyere cheese and fresh herbs creates the most amazing combination. My son actually thought of this and begged me to create it. I was so glad that he did.
I knew how much they liked caramelized onions and knew it would be a hit. If you havent ever made caramelized onions, they are probably the one thing that takes a bit of time the day you make this bread. The onions need to cook low and slow, developing that caramelized flavor as well as softening the onions. It brings out their natural sweetness.
My favorite bread making tools:
TOOLS YOU’LL NEED

Get my French Onion Sourdough Focaccia bread recipe below:
French Onion Sourdough Focaccia Bread Recipe
Ingredients
- 100 Grams active sourdough starter
- 400 Grams water (plus 3 tbsp) also 400g
- 55 Grams honey
- 15 Grams salt
- 550 grams bread flour
- 2-3 tbsp extra virgin olive oil for the bowl
- 3 tbsp extra virgin olive oil for the bread ( you can use less or more as needed)
Toppings (all optional)
- 1 large onions sliced thin
- 6-8 sprigs fresh thyme
- 4 tbsp butter
- 1-2 cups gruyere or swiss cheese grated
- flakey sea salt optional
Instructions
- First, you need to get a large mixing bowl. It can be plastic or glass but not metal. Metal can react to the starter. I like to use a glass bowl and transfer it all into my proofing container with a lid when its time for its bulk fermentation.
- Take your sourdough starter and water and mix them in the bowl(it does not need to be warm water). I like to use a digital scale to measure these out. Once they are combined, add your honey, salt and bread flour(you can use all purpose flour but I prefer bread flour). Mix this until it is well combined. I like to use my danish dough whisk but you can use a wooden spoon. At a certain point it will become easier to mix it with your hands.
- Once it is combined well, cover the bowl with a towel or plastic wrap and let it sit for about 30 minutes. After about 30 minutes, you want to do your first knead or stretch and fold. With wet hands, take the dough from one of the sides of the bowl, lift it, and fold it over the dough. Repeat this, rotating the bowl and raising the dough and laying it across itself. I do this to all sides and then let it rest. This should be a very wet dough. If it is tough, add a bit more water to it. Only 1 tablespoon at a time.
- Its time to let the wild yeast do its thing. You can let it sit at room temperature to let it bulk ferment, but if I have time I will make sure to repeat the kneading process a couple more times. If I make it in the evening, I have plenty of time to do this since there is not a lot of active work, it only takes about 10 minutes of my evening to get my dough going.
- If you want to bake your bread the next morning I would recommend leaving it out on your counter at room temperature, covered.If you want to wait and bake it the next evening, I would put your dough in the fridge to allow the yeast to slow down overnight. I have woken up to dough that has burst the lid and it spilling over the side of the bowl. If you choose this route, you simply need to take the dough out a couple hours prior to baking
- So for ease with these instructions, I will be going with the first option which is what I usually do(bulk fermenting on the counter overnight). With either option you want to cover bowl with plastic wrap to prevent the dough from drying out.
- In the morning, the dough should have at least doubled in size, mine often quadruples in size. This is from the longer fermentation process. This long rise is what will give your bread its amazing flavor.
- Oil the counter and gently let the dough drop out of the bowl or container onto your countertop. You want to try to avoid popping all those bubbles. I gently spread the dough, pulling the corners to make it larger. I will then fold the dough over itself once or twice. Then I will make sure to oil my 9 by 13 cake pan with a 1-2 tablespoons of olive oil.
- Transfer dough carefully in the sheet pan and gently pull it so that it starts to fill the pan. You do not to stress about it too much because it will spread and once we poke those holes in it, it will fill the entire pan.
- At this point I like to cover the pan with a towel and let the dough rise once again until it doubles its original size. This can take about 30 minutes to 1 hour. It will totally depend on how active your starter was. Its time to make your onion topping
French Onion topping
- Add the butter, sliced onions and fresh thyme to a skillet and slowly cook the onions down on medium heat. You want to slowly caramelize the onions. This brings out the sweetness of the onions. Once the onions are cooked down turn the stove off and set aside to cool.
- Once it has doubled in size, I pour about 2 -3 tablespoons of the olive oil onto the focaccia dough and gently spread it over the dough with my hands. This is the best part!
- Now its time to poke those holes in the focaccia bread.
- FIRST PREHEAT YOUR OVEN TO 425 DEGREES F.Take your fingers and gently begin pushing into the dough creating little creators. The olive oil will spill into the holes. The goal is to gently do this while not deflating the dough.
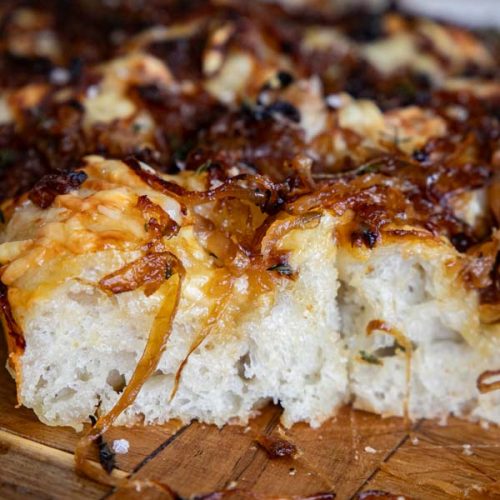
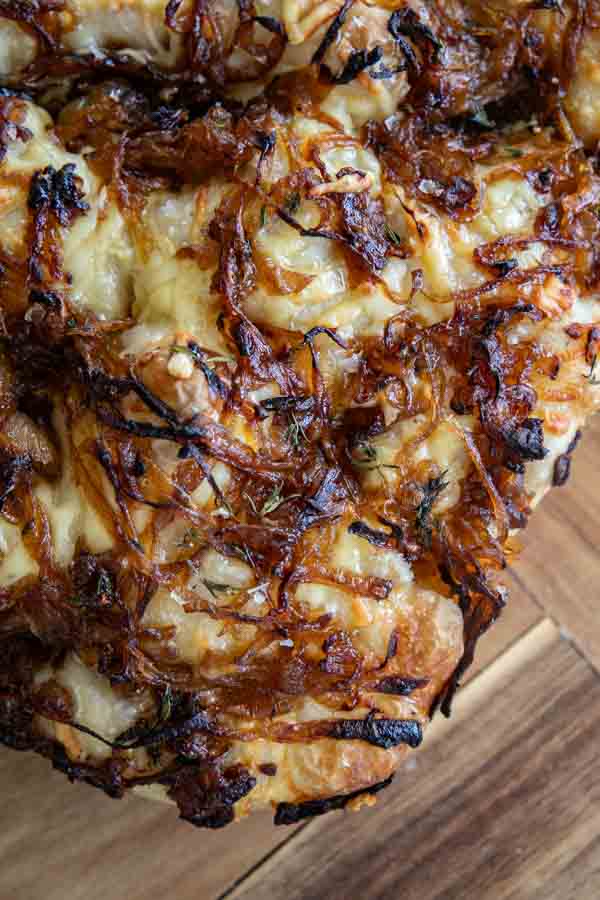
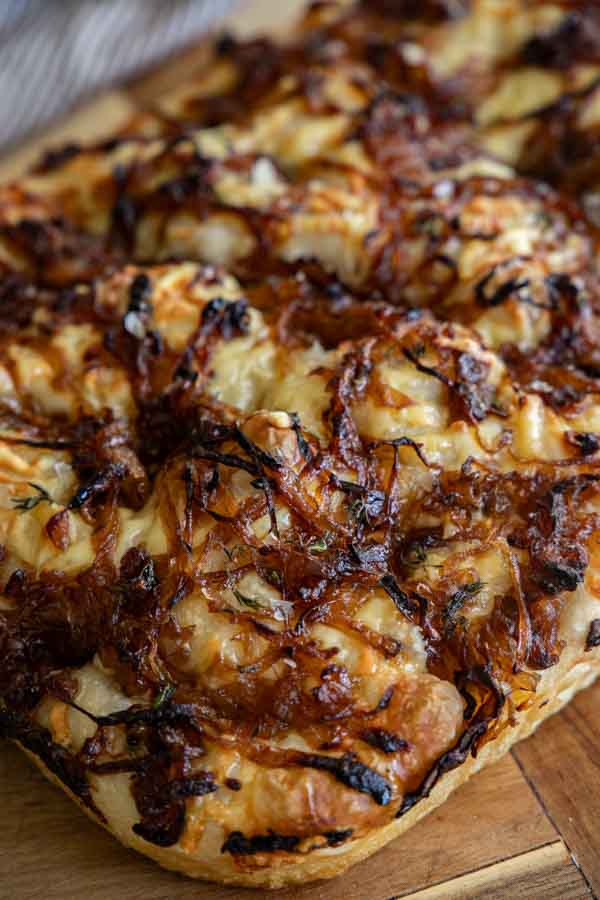
- Now its time to spread the gruyere cheese onto the bread. Sprinkle and spread the onions over the top of the cheese. You can carefully add some more dimples into the bread, so that the toppings get into those holes.
- Once you have added your toppings, put the bread in the hot oven and bake on the middle shelf for about 20-25 minutes. You are looking for a nice darker golden brown color on the top and the bottom will be nice and crispy.
- When it is done, take the focaccia out of the oven, take it out of the pan and let it cool on a wire rack. Do not let it sit in the pan, it will sweat and lose its crisp, which is an amazing part of the bread.
- Once the bread has cooled you can store it in a bread bag or air tight container. Enjoy this bread with soups, make it into deep dish pizzas, with pastas or on its own!
Notes
Our Favorite
Sourdough Focaccia Bread Recipes
I made this amazing french onion sourdough focaccia bread recipe for my family and my kids just about flipped. They love caramelized onions and this is the ultimate treat with caramelized onions and gruyere cheese. Its like french onion soup but in bread form! It would be the perfect bread to eat with that soup as well!
Want more sourdough recipes? Check these out below!


Make sure to follow me on Pinterest where I share tons of amazing recipes, DIY, gardening and more! Click here for more!
Don’t forget to pin this for later!

This is a recipe you really should try out. This sourdough focaccia base recipe is such a great one to keep in your collection. You can create so many different combinations of flavors.