
Create Distressed Furniture Using an Orbital Sander
In under 5 minutes you say? Well, yes, I say yes! The other day when I has just finished painting my vintage church pew, I was short on time, but I wanted to give my pew a distressed look, but I didn’t have 50 years to let it age, nor did I have an hour to distress it by hand. So I decided to try creating distressed furniture using an orbital sander. It took less than 5 minutes!
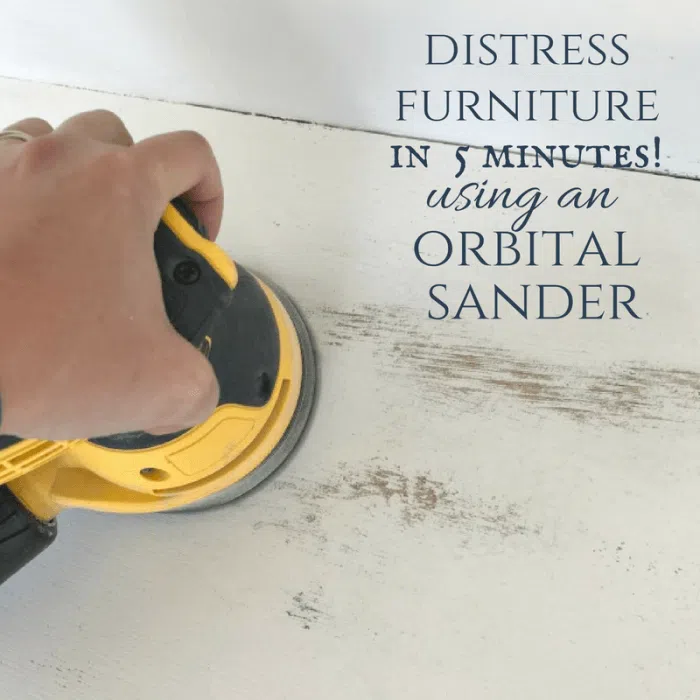
I know what you’re thinking, an orbital sander? Doesn’t that seem too aggressive? Well, yes that is what I thought. But, it actually was the easiest way I have ever distressed furniture! There are just a few simple things to keep in mind when using one to create distressed furniture. Read on to learn more!
Here is a picture of my church pew before I painted:

I tried really hard to save the raw raw wood and leave it as is, but the stain and varnish had done a number on it, and it was looking so very rough! I could not get the weird green tint out of the wood grain.

Now lets talk about how I got that distressed look in under 5 minutes.
How I Distressed Furniture Using an Orbital Sander:
I wanted to write this post so that you can see how easy it can be to distress furniture. It is not as hard as it may seem but you need to have a firm hand on your sander. The minute it touches the surface, you will feel resistance and you will want to keep a good hold on the sander.
This is all you need to create distressed furniture with an orbital sander:
- orbital sander
- variety of hook and loop sand paper 60 grit, 100 grit, 240 grit (start with a higher grit, such as a 240 grit, that way you do not overdo it.)
- air compressor or leaf blower
I usually like to sit and sand with a sheet of sand paper or a sanding block, but this method just cannot be beat. It is done so quickly that you will not believe it. You will have more time to sit back and enjoy your beautiful piece of furniture.
The only warning I have for you is to make sure you are comfortable using a sander. Since they vibrate and circulate at a fast speed, they can seem intimidating, but they really aren’t! If you are trying this for the first time, I would recommend testing it out on another piece of wood, so that you can see how much it will sand depending on the pressure you apply.
You can also start with a finer sandpaper, like a 240 grit. For my church pew I actually used an 80 grit, since that was what was already on my orbital sander and I knew how much it would take off, since I have used it before.
Distressed furniture tips
When sanding any piece of furniture, it is key to take a step back and see what parts of the piece would make sense to have distressed. My rule of thumb is this: Imagine people using the piece of furniture. What parts of the piece are going to be susceptible to more wear and tear. These are the parts that will have a more distressed look, so this is where you will want to focus.
- For a dresser, the spots could be the edges of the drawers, the corners of the dresser and the area around the drawer or cabinet pulls.
- For a chair it may be the arms, and the sides of the arms, as well as the seat, which is where it gets the most wear.
- For a table, I would also say the edges, and of course the tabletop.
- Another rule of thumb is any raised edges, or variations in the design will be a key place to sand, like a table leg.
Distressing My Church Pew
I used my orbital sander to distress my church pew, and this handy dandy video will show you just how I did it:
So to break down the process, I used the orbital sander, holding with both hands. I applied pressure as I ran the sander along the edges of the church pew, which I think is a spot that would generally get more wear and tear. They key is to keep the orbital sander moving. Do not just sit it in one spot or it will continue to grind the wood away. The goal is to wear away just enough to look like it was done naturally, over time.

I also used the orbital sander to distress the top edge of the back of the church pew, as well as the edge of the seat of the pew.

I also made sure to get some of the areas around the bottom of the pew, where there were raised edges.
Now, since it is a seat, I focused on where you bum would sit. Like it or not, our bums will give it plenty of wear and tear. I’d like to think that mine does not:) Think about it….if you were sitting on the chair, where would the most wear and tear take place? Chair seat, arms, and around the edges of the legs.

I focused the sanding in specific areas that would be in a spot where someone would sit for a longer period of time.
Once I have all the areas sanded, its time to clean up. I have another great tip on cleaning up the saw dust in one quick step!
Cleaning Tip for your distressed furniture!

If you are sanding outside, which I highly recommend, using a leaf blower or air compressor is the best way to get all the dust off. Especially in the cracks and crevices. It makes really quick work of this part of the job! Make sure you wear a mask and goggles so that you do not get any of it in your face, or breath it in. But, this is such an easy way to clean!
Once you have used a leaf blower to clean off the furniture, use a damp rag to get any other loose dust. You can also pull out a vacuum to finish the job.
And that my friends is how to create distressed furniture using an orbital sander in under 5 minutes!
Now all that needs to be done is some styling and your distressed furniture is ready to go!
Try this method of distressing furniture with an orbital sander. It will save you so much time and so much elbow grease. Your wrists will thank me!
Make sure you save it for later!


If you like this helpful tip, check out these:

How to Make a Simple Barn Door
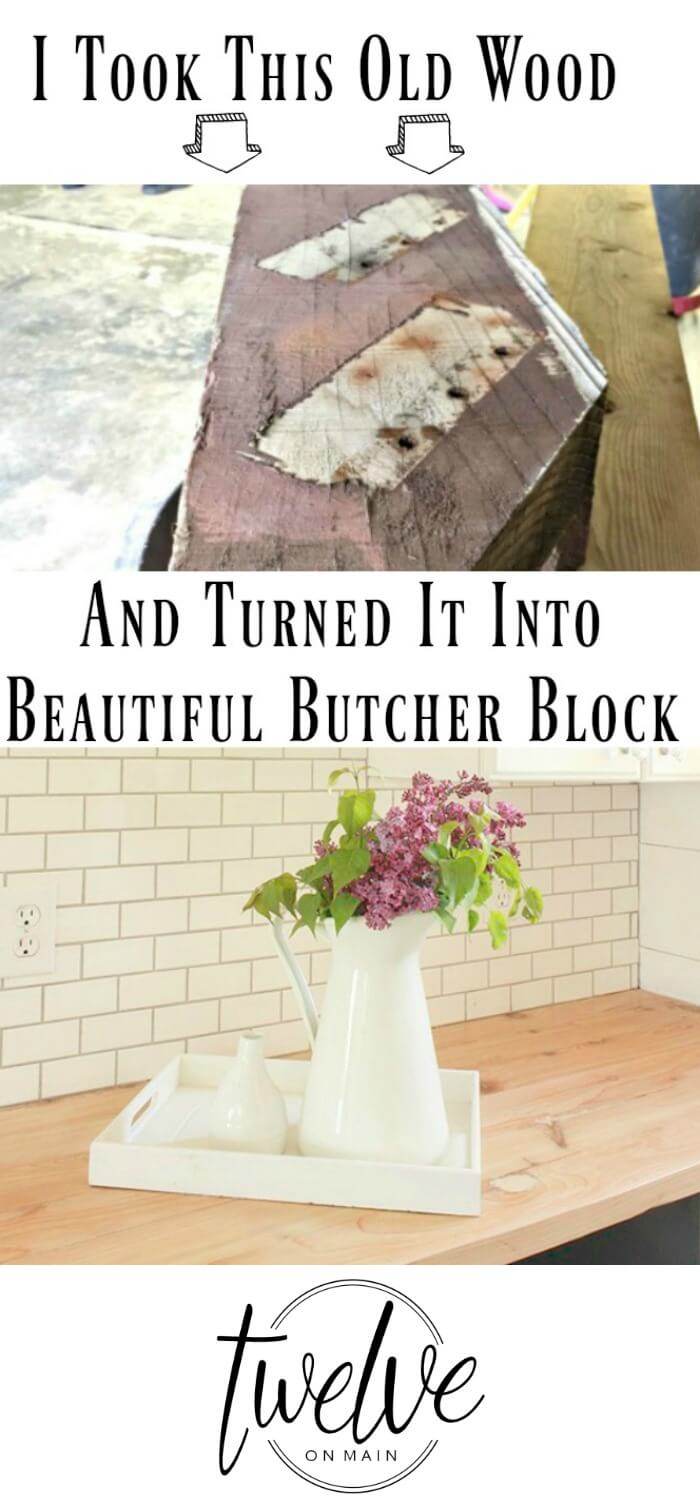
How to Make Butcher Block Countertops

Tips to Create an Organized Farmhouse Style Closet
Thanks for these tips and i want an old pew, yours looks great.
Thanks! And good luck in your search!
Great article blog sharing for orbital sander. Different blog idea sharing. I have a belt sander and i randomly work with this. It is comfortable to use and quickly leveler. What about your orbital sander?
Great guide and the results are fantastic – congratulations Sara and thanks for sharing!
You’ve explained it amazingly! Such an arranged guideline. Thanks a lot!