
The Ultimate Sourdough Starter Guide: Tips for Success
Looking for a comprehensive guide to all things sourdough and sourdough starters? You are in the right place! I want to share all that I know about sourdough and I want to keep it simple! Sourdough can become complicated really quickly, but it doesn’t have to be. Keep scrolling to find out all you need to know! This sourdough starter guide will teach you everything you need to know about getting started in sourdough!
Understanding Sourdough Starter 101

The first section of my sourdough starter guide is just that. Understanding your sourdough start. Honestly, I have never before given the idea of learning sourdough and sourdough starters a thought. It just never was something on my radar. But, like with my chickens, and my goats, suddenly without much reason, I want to know everything I can and I suddenly want to embrace everything about them.
I want to take care of my family, feed them well, and feel confident that we can sustain ourselves if needed. I think this year so far has proven that we definitely need to do this! If learning these simple but valuable techniques can help even in a small way, I think its worth it!
This is why I wanted to learn to make a sourdough starter and soak in all the information I could about sourdough and the techniques to make all the different recipes!
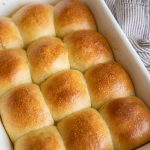
Did you know you can use a sourdough starter to make english muffins, pancakes, muffins, brownies, cinnamon rolls, biscuits, pasta, pizza dough, focaccia, donuts and so much more!! Oh yes, and you can make bread! You can make so many sourdough bread variations too! Hopefully this sourdough starter guide can help you on your journey!
WHAT IS A SOURDOUGH START ANYWAYS?
A sourdough starter is a live culture of flour and water. A starter is, in essence, acting as a natural yeast for your dough. It is a delicate balance of yeast and good bacteria, all harnessed in this doughy concoction. Sourdough starter comes in incredibly handy when you are unable to find yeast, or for some reason cannot use it. This also comes in handy because a sourdough breads have great health benefits and are easier to digest!

Some people say you are capturing the yeast in the air in your starter and as the starter ferments, the yeast get stronger and can stay alive for years. I have also ready that you are harnessing the yeast directly from the wheat in the flour you use. I am not really sure which one is accurate, and to me, it doesn’t really matter, as long as I can make my starter work!
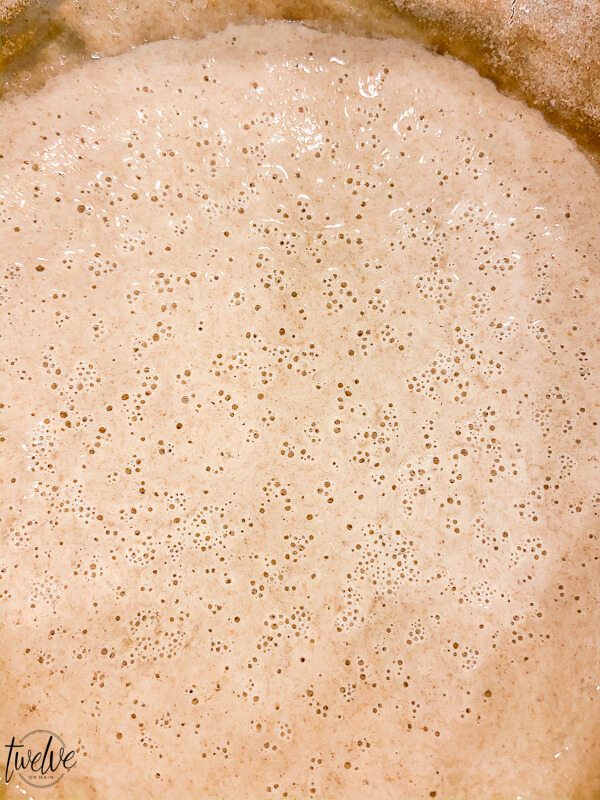
It is a goopy doughy substance that sits in a jar and bubbles. It rises and falls and it is the wildest thing! You need to feed it, and it can be stored on the counter or in the fridge(We will talk more about this part later).
Why is sourdough better for you?
Lactic acids make the vitamins and minerals in the flour more available to the body by helping neutralize the phytates in flour that would interfere with their absorption
Why is sourdough better for you?
Lactic acids make the vitamins and minerals in the flour more available to the body by helping neutralize the phytates in flour that would interfere with their absorption
Creating Your Sourdough Starter:

In all my research and experimenting with my own sourdough journey over the past couple of years, there are some very constant elements to sourdough. Everyone has a slightly different version of how to make a sourdough starter and theirs is always the right way to do it. Haha, I am dead serious. People are very passionate about sourdough starters! I do not blame them though, mastering a sourdough starter is quite the game changer in my opinion. Many sourdough starters use a kitchen scale to measure their ingredients. Would you believe that right at the beginning of the Covid pandemic, my scale broke and I has to figure out how to do it without!
I am a firm believer that certain methods just work better for some people. Some instructions I have found seemed much more complicated and I needed to keep it simple, and I found some great sourdough starter methods that work best for me.
Sourdough Starters are simple and really only require 2 ingredients!
- all purpose flour(white, wheat, rye and others) I have found the type of flour to not be a huge issue as many are successful with multiple types of flour. You can also use bread flour if you have it. The difference is the protein content
- warm water or cold water works (non chlorinated is best) If you use tap water, let it sit out for a couple hours. mI like to use room temperature water.
In addition to those ingredients, you need a few tools. You will need:
TOOLS YOU’LL NEED

- clean jar or bowl, or ceramic. Do not use metal because it will react with the starter. You can also use a weck jar. These are super convenient.
- Wooden spoon or chopsticks to stir the starter. Once again, using a metal spoon could react with the starter.
- Towel and rubber band if you are using a jar. You can also use the lid of a mason jar, set lightly on the top of the jar. Make sure that you DO NOT TIGHTEN THE LID. Your starter needs the air! You do not want to keep it in an airtight container.
- Plastic wrap
- You will also need a warm spot with an ambient temperature for it to sit. I would also recommend keeping it out of direct sunlight. I keep mine in the corner of my kitchen near the stove.
No joke. It really is that simple. But it’s not at the same time. You need to be able to give your sourdough starter time. Most starter take anywhere from 1 week to 10 days to mature to where to want it to be.
Some people say that you have to strictly use rye flour. But, I have read oodles and oodles of post and articles where people have used wheat, white, and many other flours. So, even if you have simple white flour at home, give it a try!
SOURDOUGH STARTERS CAN BE GLUTEN FREE!
Now, I am not an expert at this, but I did find some great resources if you are gluten free and want to go down that road. From what I have read you can use brown rice flour or buckwheat flour. You can even purchase one on Amazon!
I found this post about gluten free sourdough starter to be super helpful:
How to Make a Gluten Free Sourdough Starter
So, all hope is not lost!
Since I am not gluten free, I will be chatting mostly about the traditional sourdough starter, and how to start and maintain one.
HOW TO MAKE A SOURDOUGH STARTER(Step by Step):
The next step in my sourdough starter guide is how to make a sourdough starter from scratch.
Okay, so this is how I have been making my own sourdough starter. I got a ton of information from Farmhouse on Boone as well as The Prairie Homesteader for my first sourdough starter.
Here is a list of how to start your sourdough starter….
What is feeding your sourdough starter? This phrase will be used a lot. As you starter progresses you will need to feed it extra flour and water so the bacteria has something to eat. You need to do regular feedings. If you do not feed it, it will eat itself and create a layer if liquid that can make it more sour and give it a nasty smell. What you want is a sour smell. You do not want a vomit smell or anything similar to that.
Day 1
Mix one cup fresh flour(I used whole wheat flour) and 1 cup of water in your jar or bowl. Equal parts flour and water will be your goal. Make sure to mix it thoroughly. Place your towel or lid on the container and let it sit for 24 hours on your kitchen counter. You want it to stay somewhere that that the temperatures are consistent. I keep mine near my oven but not too close. Its a nice constant spot.
Day 2
At this point you probably wont see anything happen but you could start to see tiny bubbles. Discard half of the starter once again. You can save it for another starter if you want. Add 1 cup of flour and 1 cup water to your remaining starter and stir well. Cover and let it sit on your counter for 24 hours in a warm place.
(if you do not discard half the amount of starter you will have a ton of starter by day 4! You also want to make sure you are giving the right amount of flour to feed the good bacteria. The more starter you have, the more flour and water you will need to feed.
Day 3
On the third day, repeat day 2 ( you should be seeing small bubbles when you feed) You will do this for a couple of days.
Day 4: Repeat day 2
Day 5: Repeat day 2
Day 6
Discard half the mixture and feed it exactly like you did on all the other days but feed it every 12 hour instead of every 24 hours. A sourdough starter is a living thing and you should start to see some activity in the mixture. A new starter can take a little time, so don’t be discouraged!

Day 7
Do the exact same as day 6. (it should be getting so very bubbly!). It should be rising and falling within the 24 hours. You now have an active starter, but it needs a bit more time. At this point you should have plenty of good bacteria. You should be able to use your starter for baking, if you are worried about this, you can do the float test.
Troubleshooting your starter:
I ran into a few issues with my starter over the week and a half I was working with it. Yes, it took me longer than 7 days to get my sourdough starter to be right.
On about day 5, a layer of liquid showed up on the top of the starter, called a hooch. I was worried about it, but it is and totally normal for this to happen. I stirred it in and added my feed. You can either stir it in or pour it off. I should have poured it off.
This is where things got a little weird.
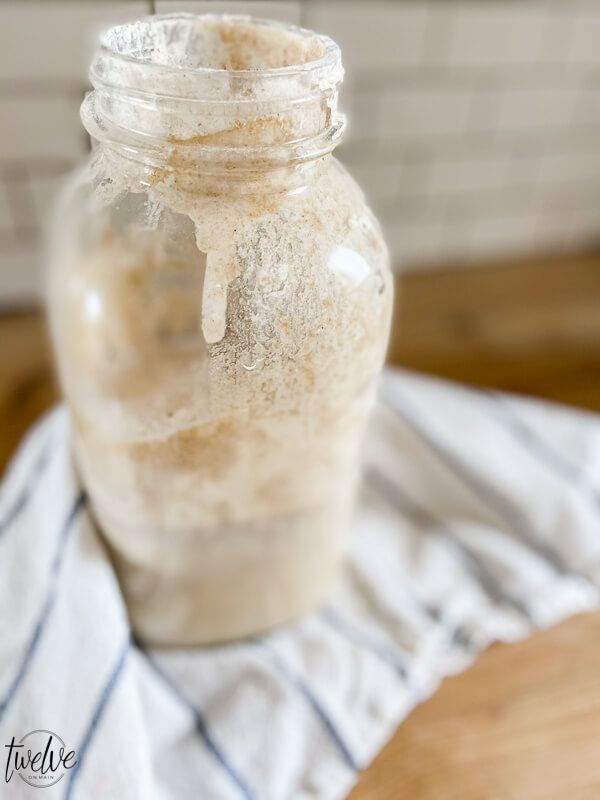
The next day, the starter smelled soooo bad. It was like a combination of stinky feet, vomit, and old parmesan cheese. This is not not the sign of a healthy starter. I was just about to throw it out. Then I read a ton of articles that it said that it is not being fed enough and you needed to feed it more. I poured off all the starter but kept 1 cup of starter and fed it again. I fed it every 12 hours. By the next day the smell was less, but it was still there. I kept at it. I moved the starter into a glass jar and fed it every 12 hours, pouring off half prior to feeding it.
By day 9 it was smelling much better!
It had changed to a sweet smell with a bit of sour. This is what it should smell like. It is the sign of a good sourdough starter. So, my point is, don’t throw it out! Keep at it. You can easily fix or heal a sick sourdough! Mine was sick. It needed to be fed more, and it was eating itself. It was also gaining more bad bacteria instead of the beneficial bacteria. The good news is, that by being persistent, it was able to turn a corner and now on day 10 it smells pretty amazing.
It is true what I have read. It is a pleasantly sweet smell, like yeasty bread, with a bit of a sour note.
Your sourdough starter can go through many stages of smells. It can be yeasty, it can smell like alcohol, stinky feet, vomit(the worst), and aged cheese(parmesan to be exact). From what I have read, this is all perfectly normal and you can fix them.
The feeding process is not complicated. But, you do need to be consistent with your feeding schedule for best results. There are many different things that can effect your sourdough starter quality including the air in your home. The starter takes the yeast and bacteria from the air.
Sourdough Start Recap:

The basic steps of making a starter consists of mixing flour and water together and letting it sit on your counter for 24 hours and then “feeding” it again, waiting 24 hours and doing the same. You will feed it every 24 hours for so many days and then feed every 12 hours.
You starter will go through some really weird and even very smelly stages. There were two days with mine when I could barely stand being in the kitchen. Turns out I wasn’t feeding it enough. But these starters are pretty cool, and you can revive them or doctor them and get them back on track.
The hardest thing about keeping a starter going is REMEMBERING. Remembering to feed your sourdough starter every morning or night can be super hard to do! I set a timer on my phone to remind me, because I was afraid I would forget! I think this must be the biggest downfall and fail of most starters.
Set a timer or reminder on your phone to remind you to feed it.
What have you learned so far from my sourdough starter guide?
Random Sourdough Starter Tip
How do you know if your sourdough starter is ready to use? It needs to ber mature. First, it should be bubbly and it should be doubling in size. Second, you can do a water test. This is where you drop a spoonful of starter into a cup of water. If the sourdough rises to the top, it is ready to be used. If it sinks to the bottom it is not ready, needs to be fed, or has not sat long enough to let those little bubbles appear.
How to keep your starter alive indefinitely: Maintaining Your Sourdough Starter
Once your starter is active and live, you can keep your sourdough starter for years! I have read that some use a starter thats a hundred years old! Thats crazy. Starters are often passed down in a family. This is a good thing to keep going. You feed your start daily and discard part of your start.
What is a sourdough discard?
When you are building up your sourdough starter, everyday, when you “discard” half of the starter, you can use that “discard” for other recipes. I use my sourdough discard for crepes, biscuits and pancakes! Essentially the discard is sourdough starter that is not active enough to make a loaf of bread but can be used for other things and get those beneficial nutrients.
Often sourdough discard recipes only need one cup of starter, which is usually how much I discard from my jar. This works out perfectly for all my discard recipes at the end of this post. Sourdough discard crepes are amazing! I have a recipe that makes them two different ways.
There is a list of recipes at the end of this sourdough starter guide that use sourdough discards as well as my favorite sourdough bread recipes. I do have a couple of recipes that can use commercial yeast as well to help guarantee an amazing rise and texture.
There are two ways to keep your sourdough starter active:
The next step in my sourdough starter guide is how to keep your new sourdough starter active.
First, you can keep your sourdough starter on your counter and feed it daily. If you plan to use your starter often, weekly of bi weekly, this is a good practice.
Second, you can also keep it in the fridge and this will cause the starter to “pause”. You should feed it once a week in the fridge to keep it alive. If you plan to go on vacation or simply do not plan to use it weekly this is a great option. Keep in mind that if you use this method, you will need to take your starter out of the fridge 24 hours prior to using it:
You will need to feed it and let it sit overnight. It needs to become active once again. You will discard half, add a cup of flour and a one cup of water.

A few things to remember before using your sourdough starter
Make sure to remember that if you plan to use your starter to make bread or pancakes one day. You need to make sure to feed your starter and let it sit out for about 12 hours.
When do you use your starter? You want to feed it 24 hours prior to using. if you keep it in the fridge and plan to make some pancakes Sunday morning, take the starter out Saturday morning and feed it. By Sunday morning it is ready to be used.
There is some planning and forethought involved in using a sourdough starter. But, the first time you make your very own sourdough bread recipe, you will find out how worth it all the work was. I hope you will try it!
How to use your new sourdough starter in baking:
Last in my sourdough starter guide is how to use your new sourdough starter in baking. Tehre are so many different ways it can be used!
As soon as your sourdough starter becomes active, you can use it as much as you want. Well, you can use it as long as you have enough starter. The secret to true sourdough bread is time. With a true sourdough bread recipe, it generally takes up to 24 hours from start to finish before the bread is ready to eat.
This is because the starter needs time to work with the flour to break down proteins and create those amazing yeasty bubbles. Sourdough does not need just an hour to rise. It needs hours at a time. This is what gives sourdough bread its wonderful flavor.
If you are looking to make sourdough but want a bread that can be made faster, you can use a small amount of instant yeast to help the dough along. I find that while these are not true sourdough breads, they have the amazing flavor and some of the benefits. While the time will be much faster, I still recommend letting the dough sit and rise for at least a couple hours.
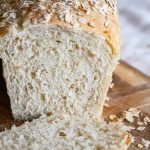
I use this method with my sourdough english muffins as well as my sourdough sandwich bread.
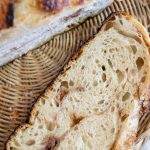
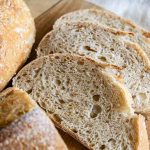
But, with my dutch oven sourdough bread, it is the tried and true slow fermented sourdough and it is amazing.
You can also make true sourdough pancakes and crepes, but you need to keep in mind that you need to have enough sourdough starter, that has been able to sit overnight. You want that flour to be fermented and broken down.
IF YOU ARE LOOKING FOR A SOURDOUGH RECIPE RESOURCE, I HAVE OVER 100 SOURDOUGH RECIPES IN THIS SOURDOUGH STARTER GUIDE!
Sourdough Recipes
From sourdough bread to cookies, sourdough muffins, brownies, english muffins, pancakes waffles and more! Check out all my sourdough recipes below!


My final thoughts on sourdough and sourdough starters
Making your own sourdough starter is a simple process. it may seem daunting, but literally with a little bit of effort you can create something magical. In the end, homemade sourdough bread is your reward, and it sure is worth it. By learning these old techniques we can become in touch with our heritage.
Learning this skill can also give you confidence in your ability to work with what you have. When yeast is hard to come by, or if you have dietary constraints that require you to use sourdough, you will be confident in the fact that you can do it.
Sourdough is a skill all its own. There is a learning curve to it, but it is worth it.
Here are some great resources that helped me in my sourdough journey…..
Troubleshooting Sourdough Starter Issues:
FAQs about cheesecloth
Favorite sourdough baking products and books!
Share this sourdough starter guide with your friends!
Don’t forget to pin this for later!
