
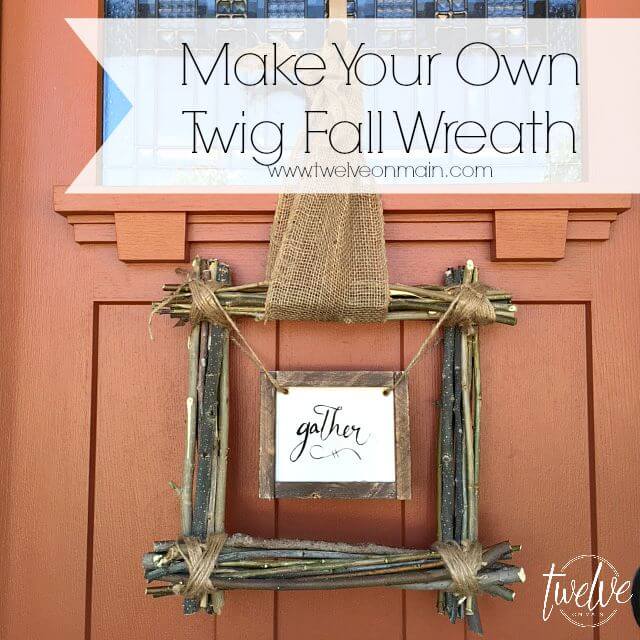
Make Your Own Fall Twig Wreath
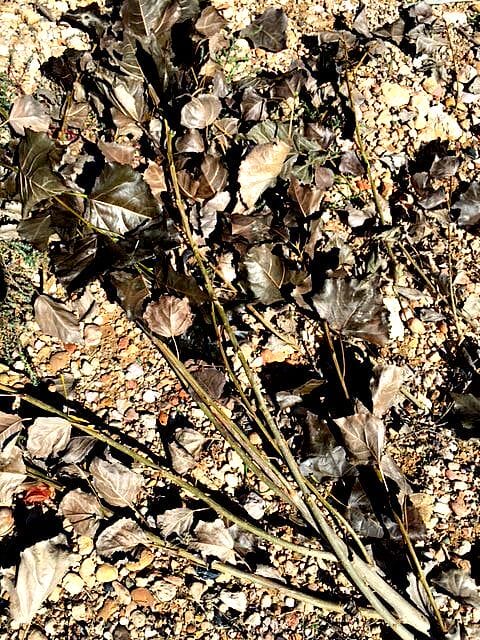
There is nothing I love more than adding natural elements to my design. There is such a sense of warmth, home, and ease about using these element. One other bonus for me is….its cheap. Practically free! About a week and a half ago, I was out in my yard trimming my trees. I have a great little maple tree that we have been babying for the last 3 years and it is finally growing and looking fantastic. Like most other trees, it had some wild and crazy limbs that needed a little care. So, I was out cutting down some ugly limbs, throwing them aside, headed for the burn pile. I am so excited to see this tree change colors in a few week. I will be posting a pic on my Instagram for sure! Make sure and follow me there!
Now, I struggle. I am kind of a brat. I don’t like having what everyone else has. I like to think outside the box. I want something new and original. That being said, I had an old and weathered wreath I used in my home for the last few years. I didn’t love it. I needed something more…..me!
So, out it I trudged through my backyard in search of those dead limbs. Imagine me sitting in my driveway. A pile of dead limbs at my feet, pruners in hand. I bet I was a sight for the neighbors. I don’t plan very well when I start a project. Like, as in, I am not looking my best. Still in pajamas. Hair a mess. You know what they say about creative people. Messy house. Projects all over.
Here are those limbs I spoke of. Nothing spectacular about them. But, it is so great to take something less than fabulous and turn it into something amazing! 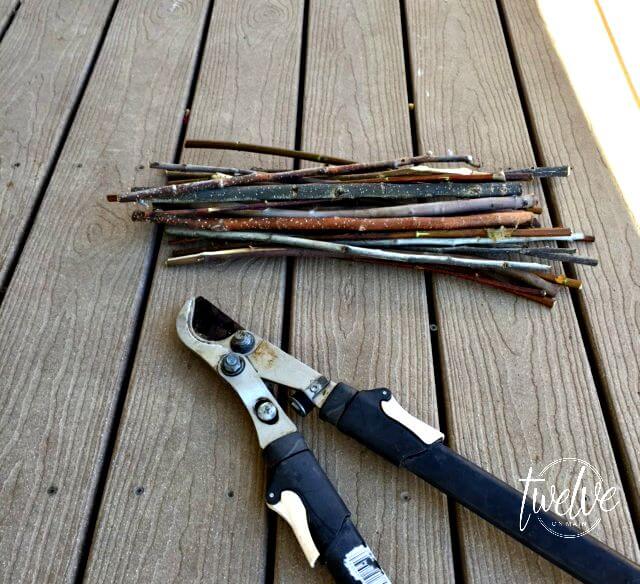
The first thing I did was decide how large I wanted my wreath. I cut all my twigs accordingly. Mine are approximately 14 inches long. I just eyeballed it guys.

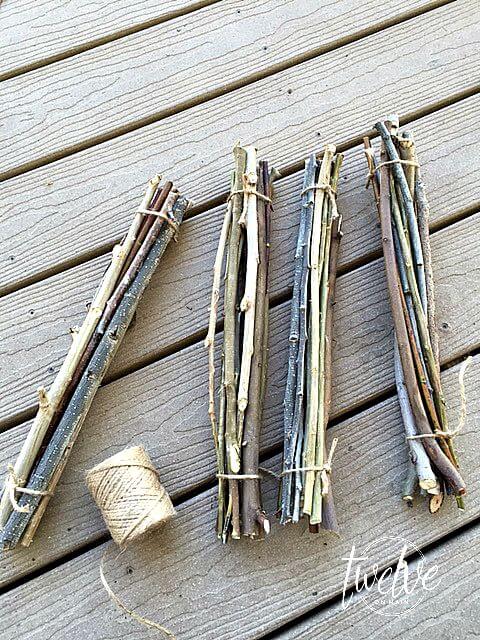
I divided my twigs into 4 groups. I tried to balance each group out adding and taking away twigs to make sure each group had a balanced number of thicker and thinner twigs. Once I had 4 piles, I tied each end with twine to make them easier to work with.
 Done and done.
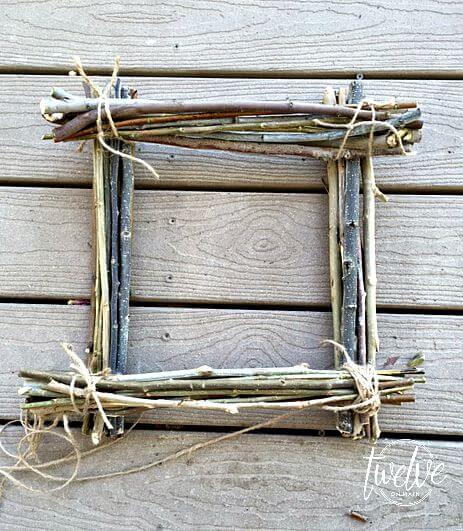
I laid out my bundles where I wanted them to sit. Once I had them in the right position I began tying the corners with more twine.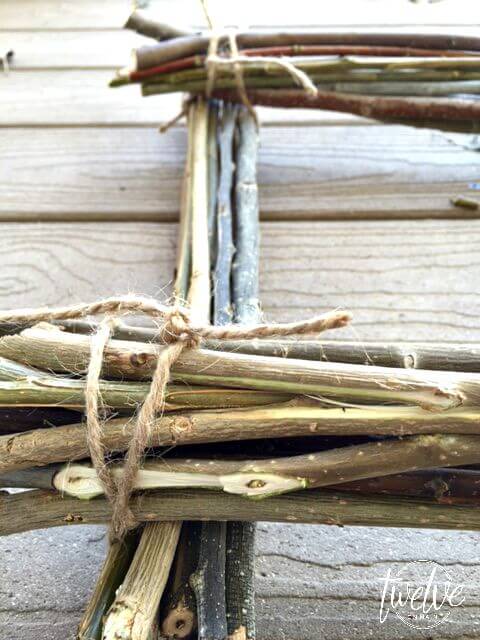
I used the method of latching to tie the corners. I learned that word from my hubby. He came home and saw what I had made and said, “oh, you latched the corners” with a blank stare I said, “you bet I did”.
 How lovely are these twigs? I mean, come on!
Once I had all four corners latched, I made sure the wreath was square. Once again, I just eyeballed it. I then had to decide what I wanted to add to the wreath. I thought about flowers, fall leaves, and I even made a mini fall banner, from my tutorial here. I ultimately decided I wanted to make a little sign to hang in the middle. They great thing about this wreath is that I can change the accessories anytime I want!
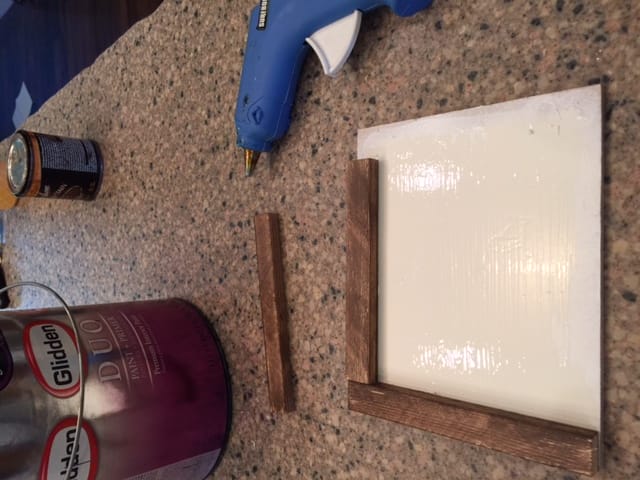
The sign was easy to make. I cut a small piece of thin MDF, painted it white, and super glued a frame to the top of it. I then drilled holes in the corner so I could hang it. I used ,my Sharpie Paint Marker ![]() to create the artwork.
to create the artwork.
Once the sign was complete, I hung it in the middle of the wreath and added a piece of burlap to hang it with.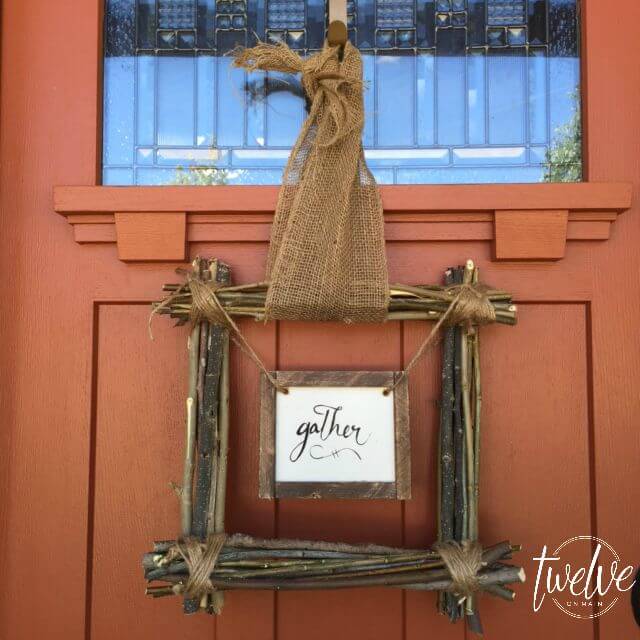
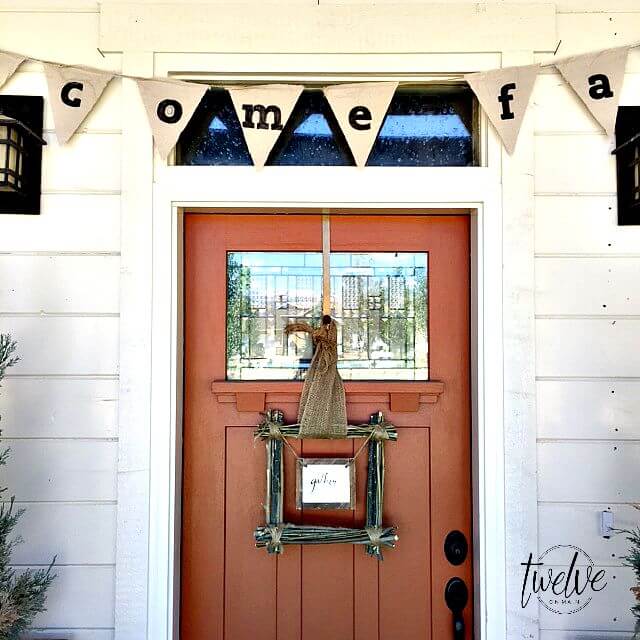
There it is! All done! I even submitted it to the #happyfallyall challenge on Instagram and won! This is definitely a project worth trying. I am looking into other possibilities for this wreath. I think if I added a small chalkboard in the center, I could use this wreath for more than one holiday. The options are endless. For now, I am extremely happy with the result. I hope you enjoyed this tutorial! I would love to hear from you! You can also follow me on Instagram, Facebook, Pinterest, and Twitter. I am also posting on Hometalk.com. Happy Fall Y’all!

This is so cute. Pinning!
Thank you Erin!
Thank you Erin!
I love the way this looks and also how easy it is! I may have to make one this weekend.
I love your wreath – it’s simple, but so decorative at the same time! How perfect that you cleaned up your backyard, and made a welcoming wreath!!
Thank you Jenny! It was a really fun project and I love that I was able to use items from my yard.
I love love love this. I live on 64 acres in a rough cedar house so this is perfect. Out to find some twigs as soon as the temp drops from 85 to a working temp today. Thank you for sharing.
Thank you Tammy! Good Luck making one, especially in that heat!
Creativity has no limits -like nature, so varied/ unique/ amazingly different. U kind of personify this phenomenon. Keep inspiring:)
Wow! What a great quote! This truly made my day.
How adorable!! Can’t wait to try this!!! Thanks so much for sharing!!
Thank you!
I love it! I’m going to try to do this for a Thanksgiving decoration! Thank you for the step by step photos! Pinning this one!
I would love to see a pic!
I like the rusticity of your twig wreath! It’s simple but states the reason for fall – gather your harvest, gather your friends, gather the food – praise the Lord with Thanksgiving. Very neat, Sara!
I gathered my twigs today, layed them how I wanted them and then hot glued them 1st, this just made it easier for me. Once the glue dried I “latched” the corners, tell your hubby thanks:) Im just getting ready to add my flowers and also want to add something in the middle (the wheels are turning with a bit of smoke). Love this project!!! Thank you so much for something so cute, fun, creative and doesnt require a whole day to make…I will have it done before its time to start dinner!!