
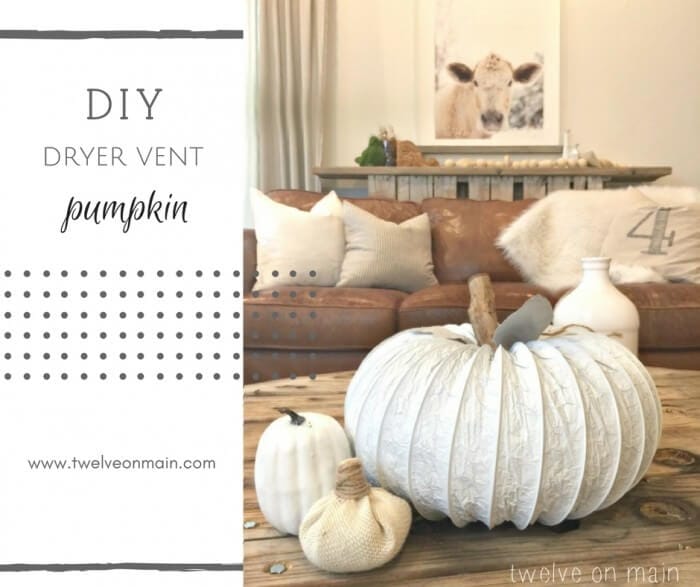
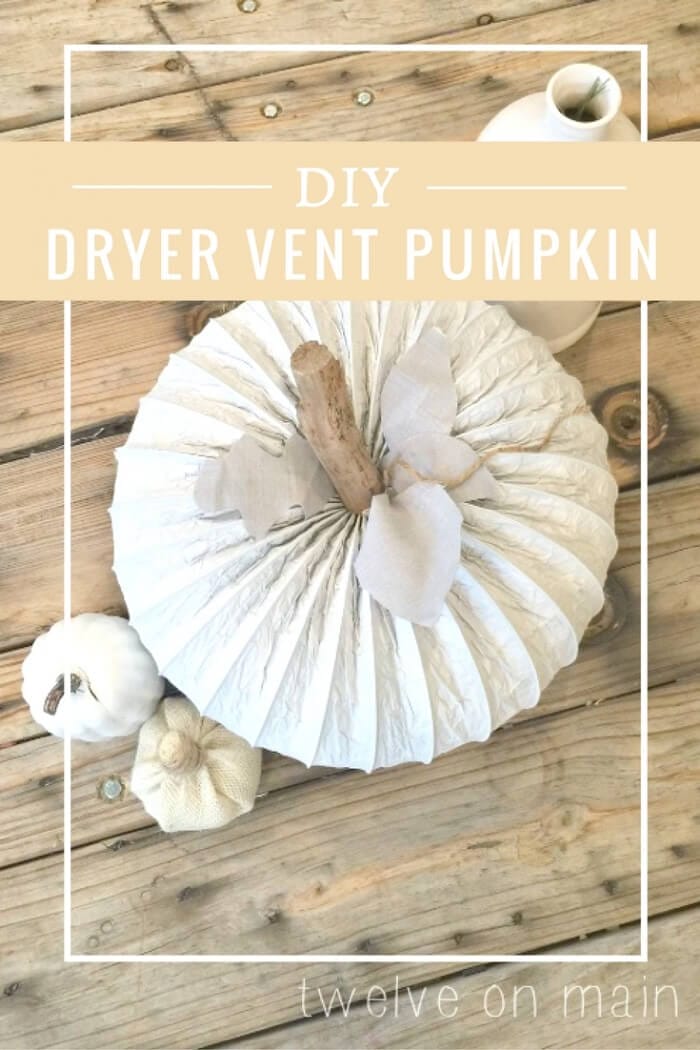
Make an Easy Dryer Vent Hose Pumpkin
Want a unique way to create pumpkin decor for your home for fall or Halloween? Try out this super easy dryer vent hose pumpkin and make many for just a few dollars!
I am a busy little bee this week. I am currently in the middle of making centerpieces for a hospital fundraising dinner. Did I mention that it needed to be 40 centerpieces? And that they want to auction them off? And that they are fall themed? Well, I definitely cannot just throw up some real pumpkins and call it good. We are no where close enough to any harvest holidays. So, I have taken it upon myself to create some really cute pumpkins that can be kept all year long.
I am making a few different kinds, and today’s project was so very easy, I couldn’t believe it. Who knew you could make a pumpkin out of a dryer vent hose? This project literally took 5 minutes to put together (not counting spray paint drying time).
Make a Pumpkin out of a Dryer Vent Hose
This is what you need to make these:
Dryer Vent Hose (I was able to get 7 large pumpkins out of one hose)
Spray Paint, I chose white, but you can do any color you want.
Wire Cutters
Scissors
Stick or piece of wood for the stem.
*This post contains affiliate links for your convenience*
I started by stretching the dryer vent hose.
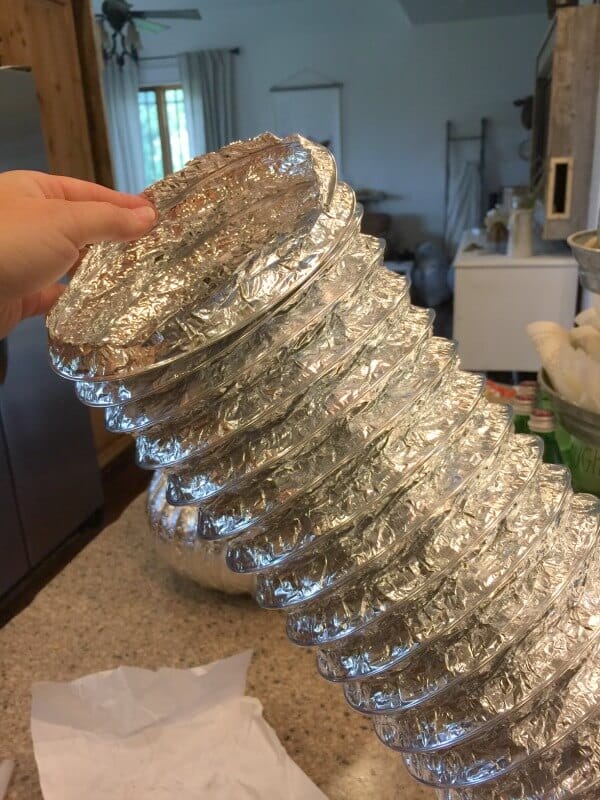
I then curled it into itself, to make an “O”. I cut with foil part with scissors, and there is one wire that will need to be cut with wire cutters.

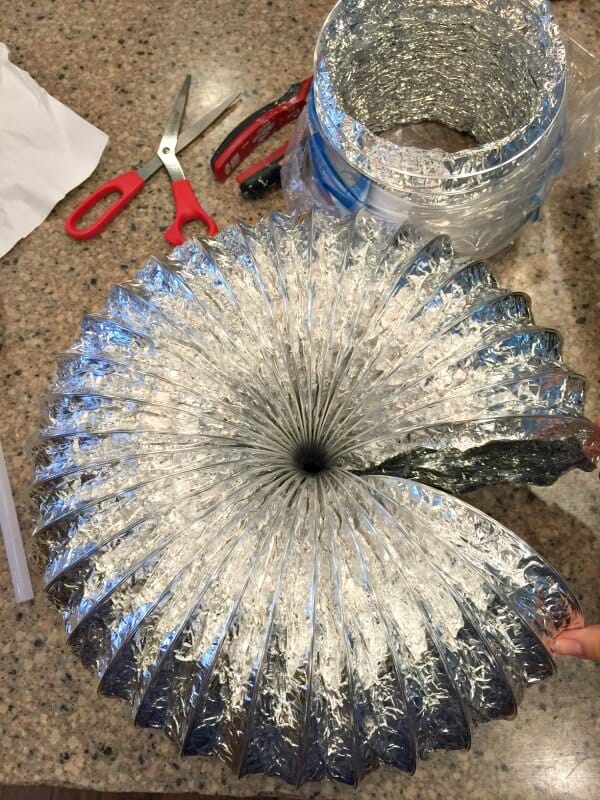
Once it was cut, I checked to make sure the ends could connect. I then added hot glue to the edge of one side of the hose and then pressed them together, making sure to hold it for about 1 minute, to make sure it is secure.
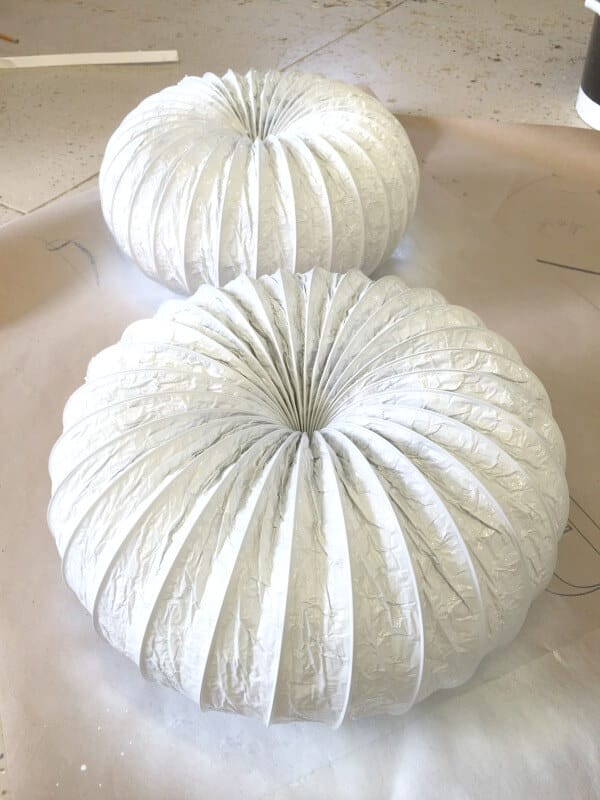
I then took them outside and painted them with my white spray paint.
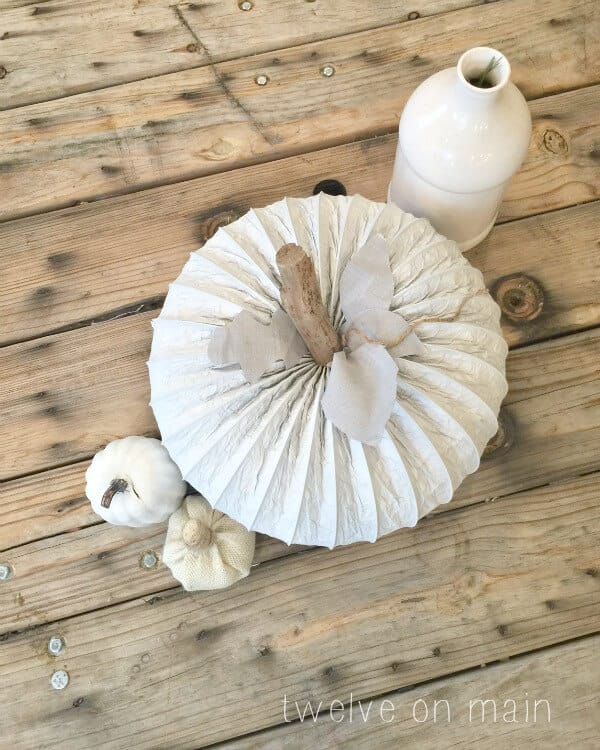
The last thing I did was cut a few leaves out of fabric, and found a few sticks in my yard for the stem.
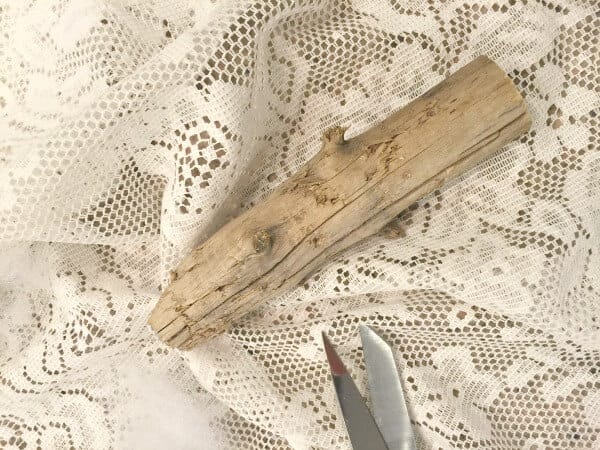
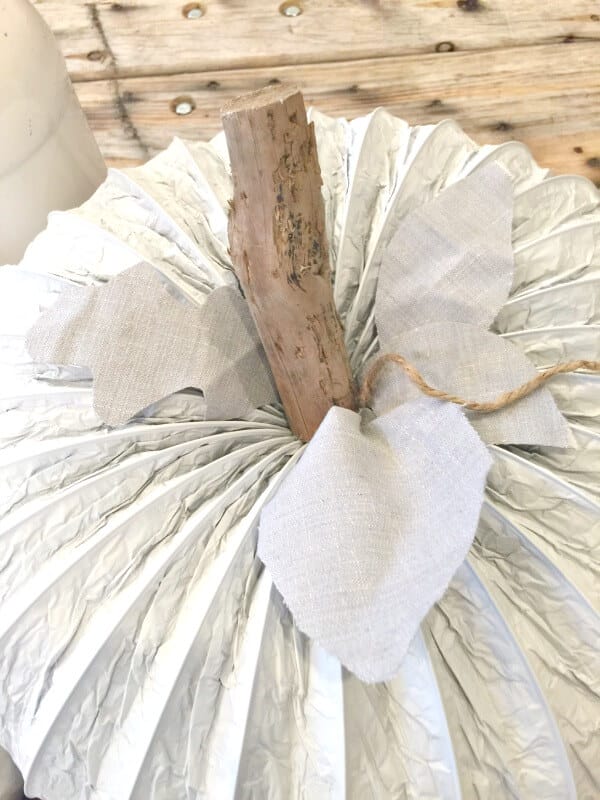
I hot glued the stick into the middle of the pumpkin and then added the fabric leaves as a fun accent.
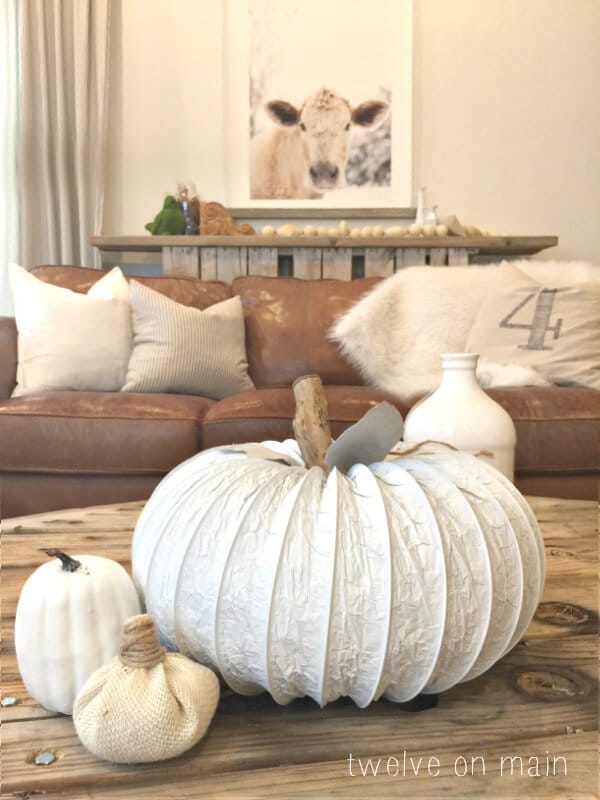
Guys, that is it, It was that easy. I wish all projects went this smooth. On top of being super easy, it was quite inexpensive as well!
So, I would say if you are looking for a new way to add some fall flare to your home, this is a great way.
Looking for some more fall decor?
Thanks so much for stopping by and remember…


If you like this post, you’ll love:
Transform Ugly Dollar Store Foam Pumpkins into Stylish Decor!
DIY Velvet Pumpkins In No Less Than 10 Minutes!
Paint Dollar Store Plastic Jack-O-Lanterns for an Updated Look
OMG this is going to be the most pinned fall item EVER! I want to do this!
What a great idea! They look awesome! It’s funny I will walk around depot looking for ways to repurpose everyday options. I never would have figured this out! love it!
Well, I hope you are right! That would be fantastic! Thanks so much! I also walk around Home Depot looking for cool ways to use their stuff. I bet they can spot us a mile away and giggle as we wander the aisles.
Oh.My.Goodness…..Sara these are adorable! I never would have thought to use a dryer vent hose to make pumpkins. So clever!!!
Thanks Katie!!
seriously Sara this is genius! Pinned, and thinking about making this now…LOVE IT!
What size of dryer vent did you purchase?
Its the 4 inch dryer venting.
Sara these are fabulous!! I love them way more than just buying pumpkins for your centerpieces. I bet they were a hit!
Super cute! This makes me want to run out and buy a dry vent and make a pumpkin. Love it!
What length of tubing did you use to get seven pumpkins from? I’ve seen it available in 8 feet or 25 feet lengths. I need to make 15 centerpieces for a church party. I’m just wondering how much tubing I would need to buy. Thank you!