
DIY Rope Plate Chargers
Hi all! I am super excited to be participating in my first Create and Share Challenge put on my Casa Watkins Living and Pocket of Posies. The Create and Share Challenge is a monthly blogger challenge where we are given a a specific subject or product and we are to use it and be as creative as we can in creating something of our style. This month we were given the subject of ROPE. I love to use rope and I quickly came up with what I wanted to create. Today I am showing you my DIY rope plate chargers.

These DIY rope plate chargers were a super simple project that are a perfect addition to any tablescape. I have seen many different rope plate chargers at various stores and have always loved them but just couldn’t bring myself to pay the higher prices. Especially when I know I can make them myself.
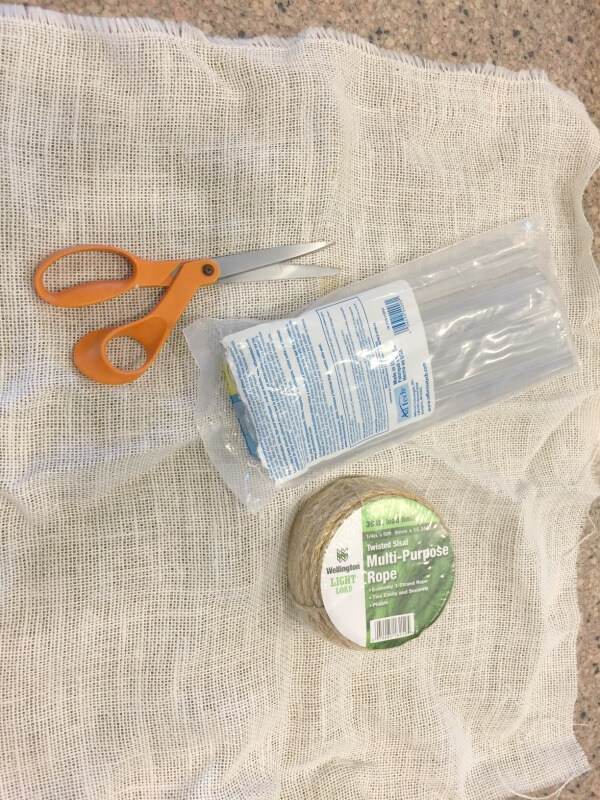
Here are the supplies I used to create these DIY rope plate chargers:
*This post contains affiliate links for your convenience*
- Sisal Rope 50 ft per charger
- Burplap or any scrap fabric you may have
- Hot Glue Gun
- Scissors
Now, on to the tutorial:
DIY Rope Plate Chargers
Okay, so to I purchased rope bundles that were 50 ft in length. This is the perfect amount of rope for one rope plate charger. By buying smaller bundles of rope, there’s no guesswork at measuring, and making sure they are all the same size.
I started by laying my fabric down. I used some leftover burplap I had laying around. You could really use any fabric you had, it wont be seen.

I eyeballed how much fabric I would need and found the center. Start by gluing the end of the sisal rope down, curving it into a tight circle.

Once that is secured, apply more hot glue, and start to wrap the rope around the small circle. Hold it a few seconds to let the hot glue cool. Watch out, though, that hot glue can get really hot! I know this from experience.


Continue to wind the rope around, gluing as you go. Keep the rope tight together so that you do not see the fabric below.

Once you have wrapped 50 feet of rope, I cut the end and glued it down, making sure to glue down all the stray pieces of rope as well.

The next step is to cut the leftover fabric off. I cut as close as I could, so that the fabric is not seen.

And that’s it!
The other day I posted about my outdoor fall tablescape and I used these DIY rope plate chargers in my table setting. They were the perfect addition to my decor. I love the way the rustic rope contrasts with the delicate lace on the table runner.


I will say one thing. If you feel that they arent laying flat when you first make them, add a few heavy books to the top of them and leave them for a day. This will help a lot.
What do you think of these DIY rope plate chargers? They would be perfect for any occasion and as the holidays approach, they will be the perfect rustic addition to any decor style.

Now, make sure you hop over and check out all the other amazing rope projects from some of my talented blogger friends.
Twelve on Main – DIY Rope Plate Charger
My Life From Home – DIY Sisal Rope Tassel Basket
Green with Decor – DIY Christmas Joy Sign
Our House Now A Home – Storage Box Using Rope and a Cardboard Box
A Shade of Teal – How to Make a Rope Lamp
Pocketful of Posies – DIY Boho Macrame Play Tent
Iris Nacole – Bohemian Wall Hanging
Kim Six Fix – Rope Wrapped Dollar Store Pumpkin
Vintage Romance Style – Easy Barn Wood Child’s Rope Name Sign
DIY Beautify – How to Make Pedestal Rope Bowl
Farmhouse 40 – DIY Upcycled Bar Stool
Knock It Off Kim – Fall Braided Rope and Burlap Wreath
C’Mon Get Crafty – DIY Rope Wire Basket
Casa Watikins Living – DIY African Inspired Jute Planter
Thanks for stopping by and remember….


If you like this post, you’ll love:
So cute!! I have been wanting these chargers also. I guess I’ll have to make my own. No excuses, now! Pinned.
I love this idea. A really nice touch to a Fall table setting. Thanks for sharing.
I love this idea, it’s the perfect diy for fall!!!
Thanks Cindy!
These are so pretty! What a great DIY!
I love this idea. They would be super cute at a cowboy themed birthday party too.. (I clearly have too many little boy birthdays to plan!) Love it! Pinning!
Thats a great idea!
Beautiful Sara! I love these chargers and they remind me of a set I have from Pottery Barn. Boy, it would have been so great to see this tutorial before hand. hahaha! Great tutorial!
Love these, Sara! They look so pretty on your table. Great tip on purchasing smaller spools so that they all end up the same size. So much easier than measuring!
I love how this turned out! I would have never thought to glue the rope to another fabric to make it more secure. Great idea!
Sara, these are ingenious!! I love the look of these rope chargers, perfect for multiple seasons.
Such a cute project Sarah! I have been wanting a set of chargers like these, I don’t know why I didn’t think of making them! Thank you so much! Pinning!
What a wonderful idea! Now I don’t have to brave the stores like a masked madwoman searching for the perfect fall placemat.