
How to Make Decals With Cricut Cutting Machines
*This is a sponsored conversation on behalf of Cricut. My opinions are all my own*
I am at it again, and this time we are making car decals using my Cricut Maker! I have wanted to make these for a long time and finally got around to it! I am excited to share how I did it and how easy it is. No more having to buy them online when I can create one just perfect. I also wanted to share how to make decals that stay put but can also be taken off without damage to your car.

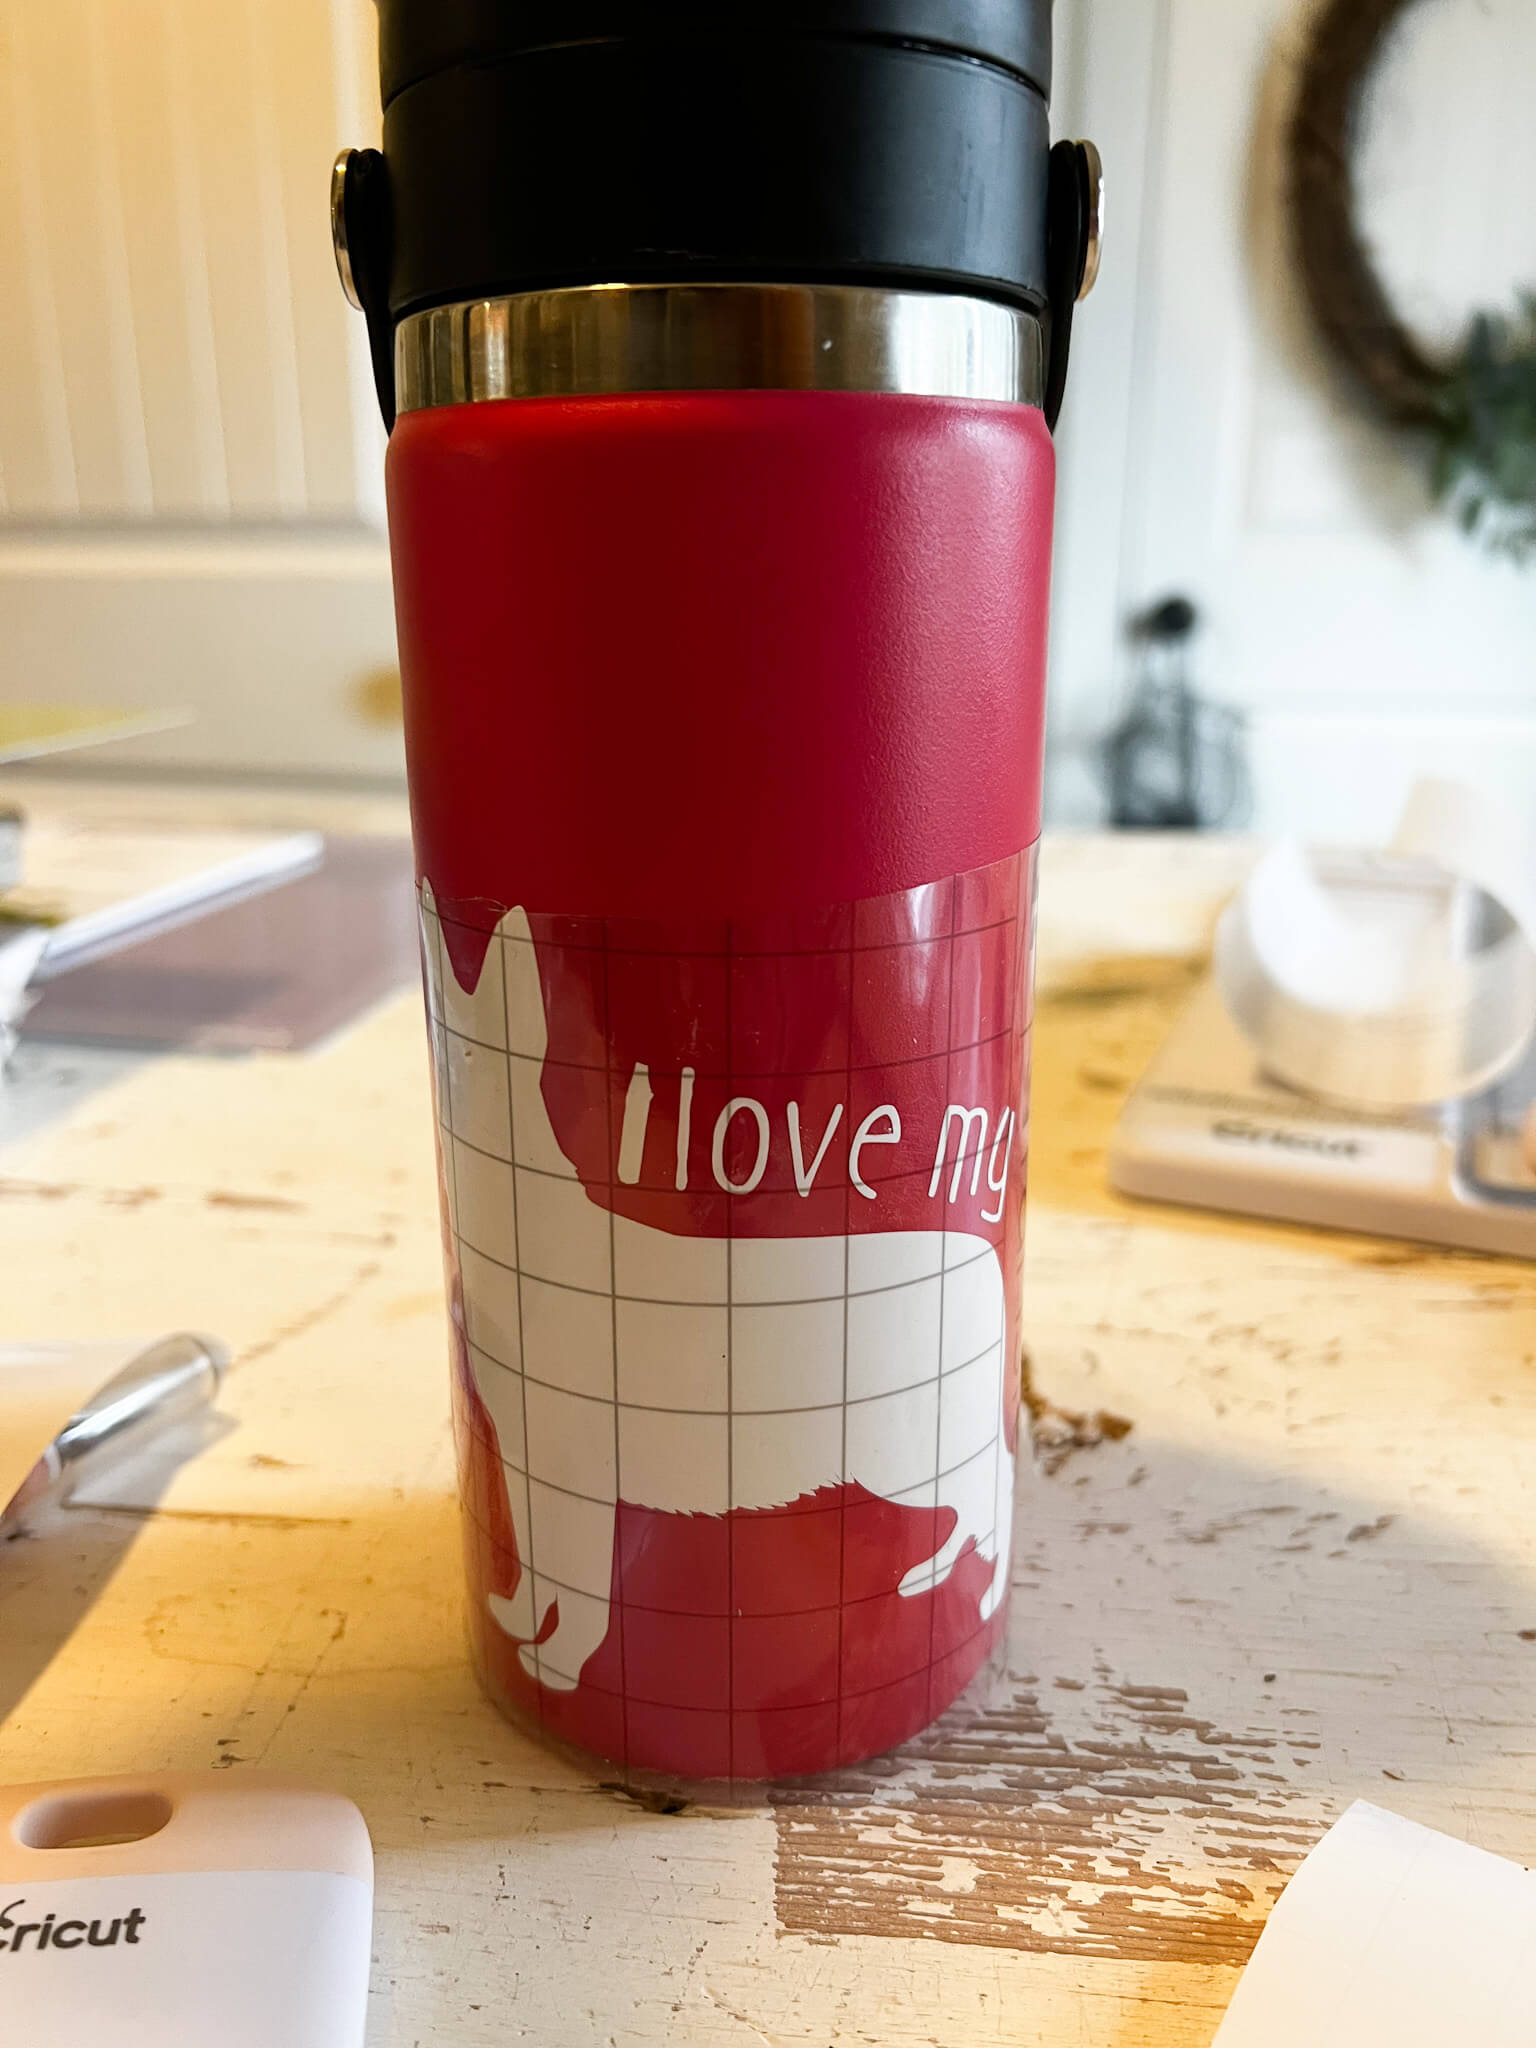
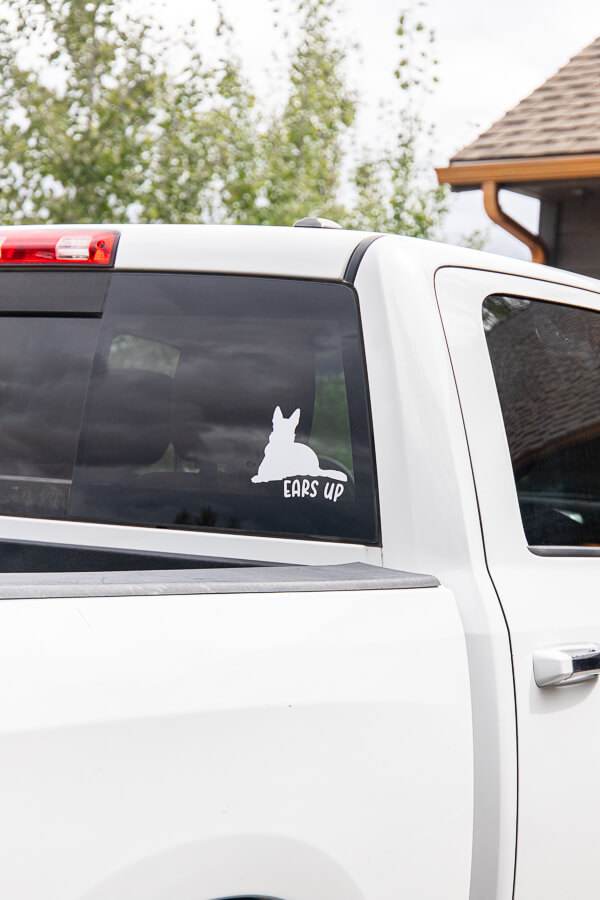
We love our German Shepherds here at my house. We in fact, have two. Besides the kids and my husband they are the next best thing. So, I wanted to create a fun car decal to add to one of our trucks to show our love for them. I also created one for my daughter Hydroflask, so I will share a couple of pictures of that as well. I used my Cricut Maker to create these!

This project is quite simple and I want to share how to make decals with Cricut machines:
Check out my video tutorial here:
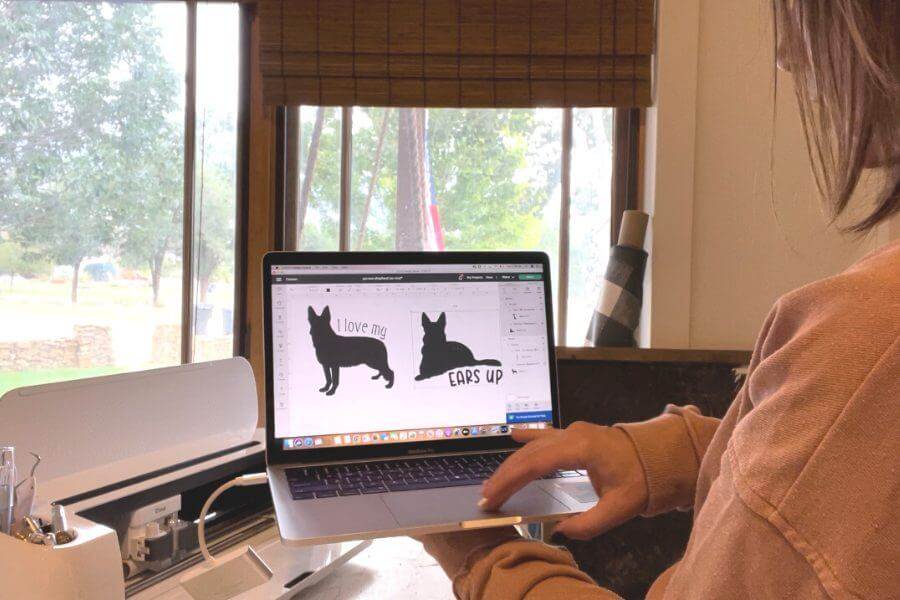
First step, you need to choose a design or create something yourself. You can draw up your own design on an Ipad ( I like to use Procreate) and upload it to Cricut to use. Just make sure that it is your own original design).
For the decals I wanted to create I went straight to Design Space and looked in Cricuts free resource library to see what they had. They had some great German Shepherd images to choose from, and after I narrowed them down I added them to my canvas. I wanted to use the “EARS UP” saying on it as well so with some text that I chose I arranged it where I wanted it, which was at the bottom of the dog silhouette.
Once I had everything lined up where I wanted it I selected the text and the image together and grouped them. I then attached them using the attach tool.
What type of Vinyl should you use to make decals?
I think it depends on the durability you want. I wanted to be able to put this on our truck window and also be able to take it off when we were ready for a new fun decal. So, I used removable vinyl. I would not recommend using permanent vinyl on a car. You can also use Cricut’s Outdoor Premium Vinyl. In addition to those, you can also use Cricut’s Printable Vinyl if you want to create something that you can print, then cut. I will have a separate post on how to create stickers using this as well!

What Cricut Machine can you use to make Vinyl Decals?
You can use Your Cricut Maker cutting machine as well as a Cricut explore 3 and the Cricut Joy (this does restrict the size of your decal).
What are the steps to making your own vinyl decals?
First, get the materials you will need, I use:
Now its time to get down to business:
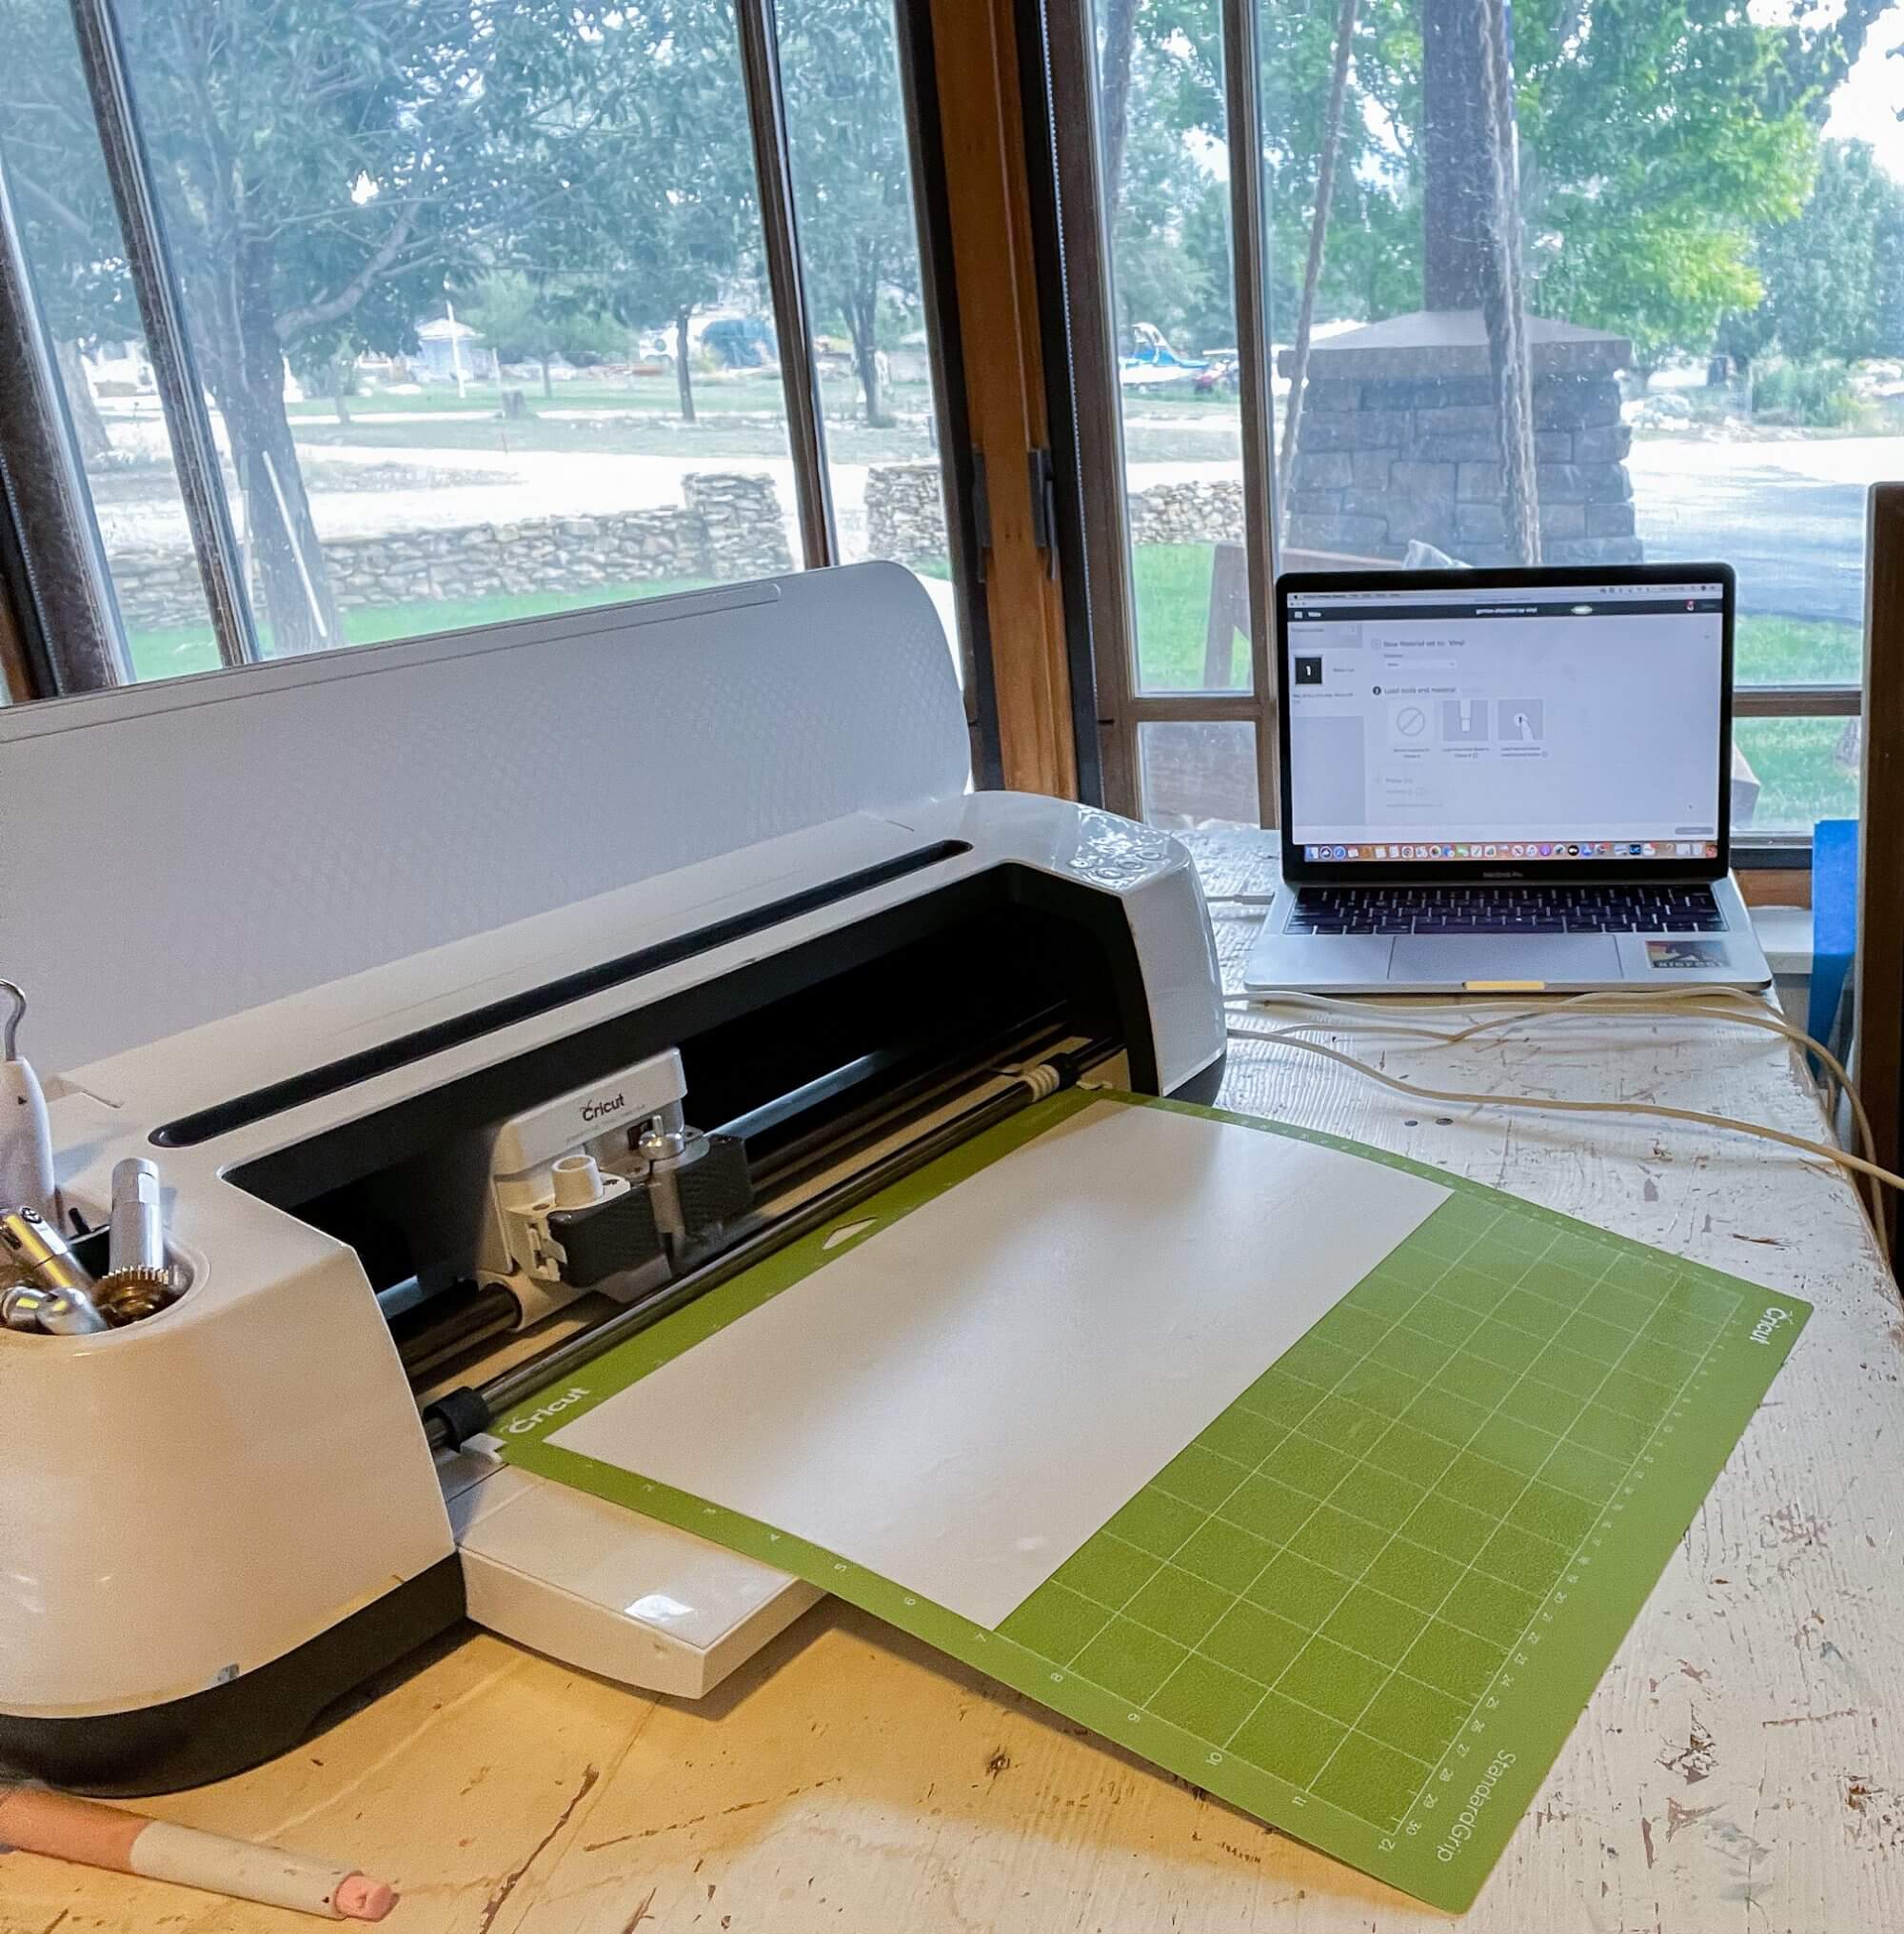
First, connect your Cricut to your computer. Once you have the Cricut connected, you need to follow the steps to cutting the design. Apply the vinyl to the cutting mat and get it ready to be fed into the Cricut machine. Proceed to cut the entire design per the Cricuts prompts.
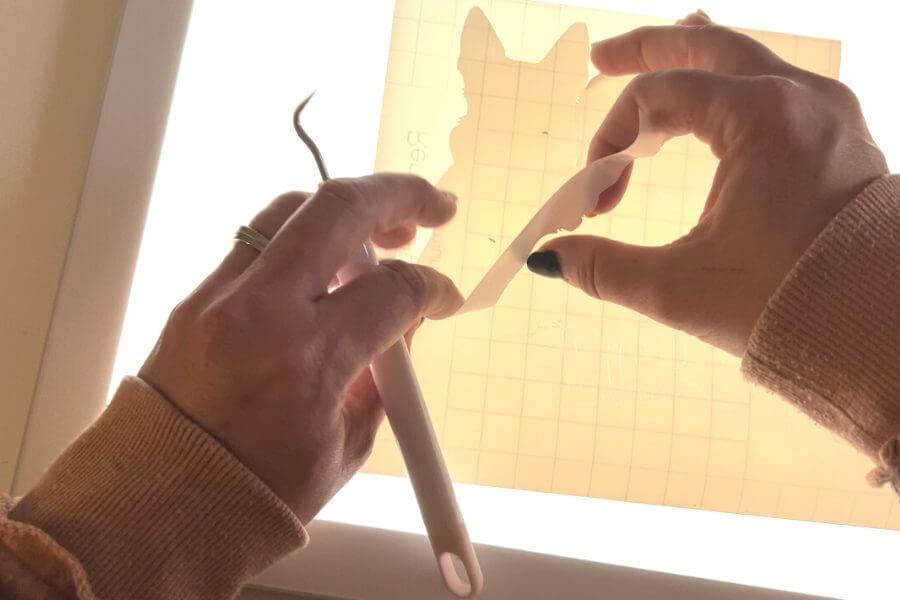
Once the design is cut, you need to omit the extra vinyl from the design. Make sure to take it slow and be sure that you do not remove any of the design. I like to use my Brightpad for this as well as my trusty weeding tool. If you have any excess vinyl that did not get used or cut, try to cut this off and save it for later. You can use it for small projects in the future.
Now that you have the design weeded and ready, its time to apply the transfer tape to the design. This is essential to make sure you get a nice clean design without it getting messed up.
Remove the white backing to the transfer tape and carefully apply the tape. I like to partially remove the tape backing and slowly remove the rest as I apply the tape to the vinyl design. Now I use my burnishing tool or scraper tool to make sure the decal is adhered to the transfer tape and to loosen its hold on the vinyl backing. Grab the transfer tape and you should be able to pull up the design without the backing paper. All you should have on the transfer tape is the cut image.

Now its time to put your new decal where you want it! We decided to put it on my sons truck. You could use it as a window cling on your home or elsewhere if you choose to.
Make sure to clean and dry the area you want to apply the decal to. Once you are ready, apply one side and carefully push the rest down, this will help prevent air bubbles. I like to use the Cricut scraper tool to get the vinyl to adhere to the window.
Once you have “burnished” the decal to the window, carefully and slowly begin removing the transfer tape. I like to start at a corner and slowly remove it as I go across the design.
And voila! You have your own custom decals that you made with your Cricut cutting machine.
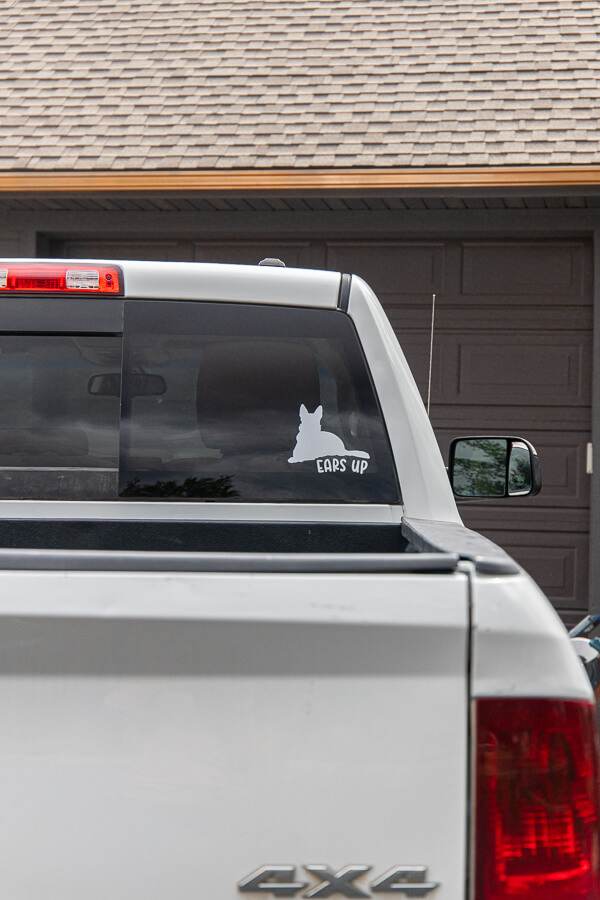
I think mine is so stinking cute! I love the German Shepherd silhouette too. Its the perfect size and the white vinyl is a nice contrast to the dark window. I find that a simple design seems to be more impactful when in contrast like this. Personally, I like a more simple design anyways.
With these basic steps you can make a small decal, a large decal and anywhere ini between! I am on my way to make a lot of decals haha. We also made a cute German Shepherd decal for my daughter to use on her water bottle. She loves it! She loves her puppies so much and loves being able to show that on her water bottle.

Easy projects like these are available to all skills of Cricut crafters. The entire process of making these decals was about 10 minutes. That does not include the time I took to design my cut. I hope these easy step-by-step instructions help you to be able to step outside your own box and create! With a little bit of desire and imagination you can create to your hearts content. This is the perfect way to customize and personalize. your car, home, water bottle and more without damaging or permanently changing them.
Learning how to make decals with Cricut machines is another step to being a pro at using your cutting machine. These window decals is just one option of so many different projects and things you can do.
Check out these other great Cricut posts!
Which Cricut Cutting Machine is Right For You?
How to Choose the Right Cricut Machine
Easy Beginner Project Using Your Cricut Machine
Get Familiar with Cricut Terminology To Improve Your Craft Game