
How to Make An Easy DIY Cedar Planter Box

A couple weeks ago, after we had built our raised garden planter boxes, I had a bit of cedar wood left over. Something I was really wanting was some small decorative cedar planters box for the garden. I wanted something super cute that would be just for the pretty flowers, but could also be used as a planter for veggies or herbs. Soon, I will be sharing by large scale planter boxes, but right now I want to show you how to make super easy cedar planters that only require a couple pieces of lumber, are very inexpensive, and look super cute.

These were made using scraps of lumber from our large raised garden beds.
I want to show you how I made these all by myself, without the help of my husband. They were quite easy to make and I truly enjoy creating these kinds of projects and being able to do things myself.
I want to stress how inexpensive these were to make(that stating I did already have the saws to cut the wood, so that will always be a one time investment but can be used so so much!)
Here is a list of the supplies I used for these cute cedar planters using cedar fence posts:
I have been using cedar picket fence posts from Home Depot to make my planter boxes. I conveniently ordered them online and picked them up at the store! They are very affordable, I made 7 very large 4 ft by 12 ft planter boxes for under 300 dollars!
This will make 1 cedar planter
- 16 – cedar picket fence boards cut 15 1/4 inch long. You can make these longer, I was working with this length to use the most of my picket fence posts.
- 4 – 2″ by 2″ wood pieces cut to 21 1/2 inch long(for the inside frame)
- 1 box 1 1/2 inch screws
- drill
- impact driver
Cedar planter box trim supplies:
These could vary depending on finished box. Make sure to measure before cutting any of these lengths.
- 2- 1 inch by 2 inch pieces of wood cut at 12 5/8 inch long(trim for the top)
- 2-1 inch by 2 inch pieces of wood cut at 18 inches long(trim for the top)
- 1/2 inch by 1 inch trim (slightly thinner than the trim on top)This is the trim for the corners going vertical. Again this can change depending on how you want it to look it can be wider.
- 1 inch by 1inch trim pieces for the bottom
- Battery powered nail gun to make this easy. I love this one.
How to make these easy and inexpensive cedar planter boxes:
Here are my supplies to build the box, without the trim. I made all the cuts prior to assembling and since I give a list of the exact cuts, you can easily make your own cuts and have them prepped.
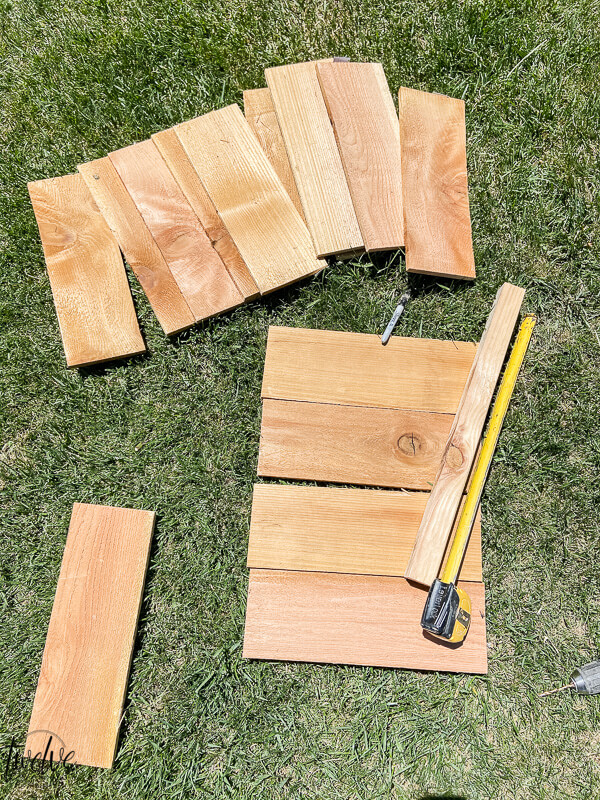
First, lay out two of your 2″ by 2″ boards cut to 21 1/2 inches. Make sure ot lay them on a plat surface. These are the corners of your cedar planter box.
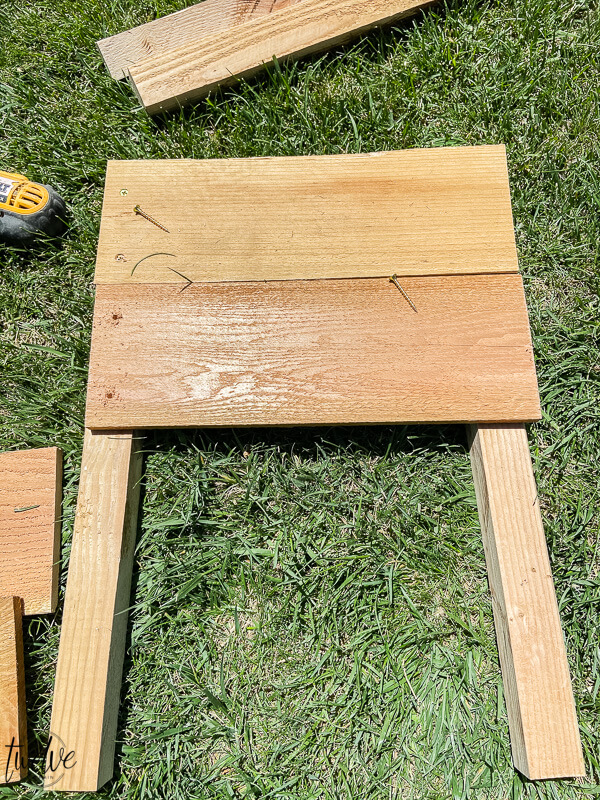
You will lay 4 of the cedar fence post picket pieces on the two 2 by 2 pieces. You want to pre-drill the holes so that the wood does not split. I like to start by screwing in the first piece, making sure to line up the edges on one, screwing it in and and then lining up the other side and screw it in. You want to make sure the edge of your 2 by 2 is lining up exactly with the cedar posts.
Screw all 4 pieces on. Make sure not to over sync the screws and risk splitting the wood. They need to be parallel and not have any overhang or overlap.

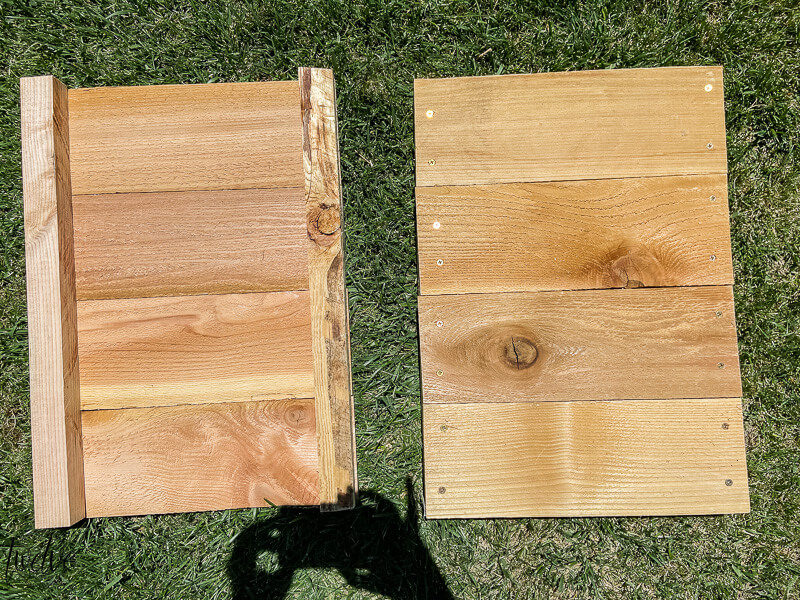
Here I have done that to the first side and then finished off the opposite side. You can see that they fit nicely over the 2 by 2 inch posts we are using in the corners.
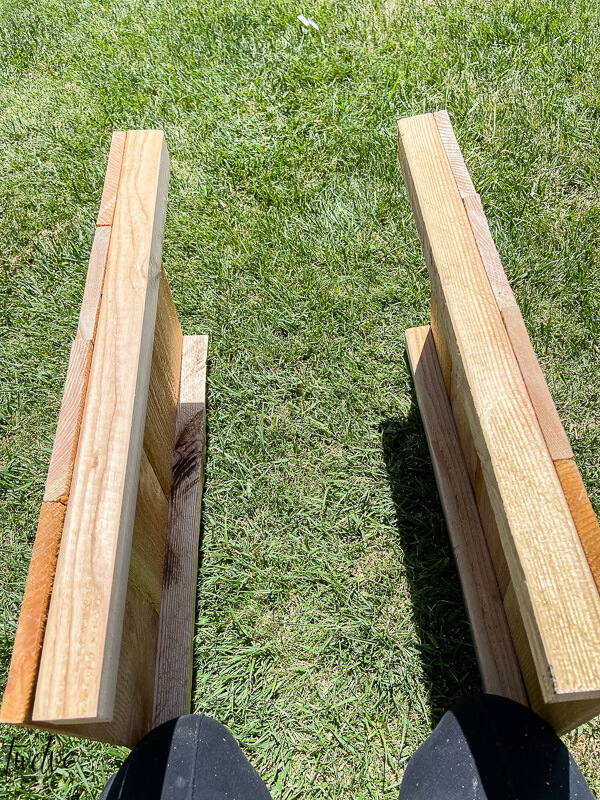
Now we are going to start assembling. I set the two finished pieces up on their sides. Insides facing each other. If you need someone to help hold them, that is a good idea. I did not find it necessary, and was able to lime them up and that they stayed vertical on their own.
The next step is to lay 4 more of the cedar fence pieces and line them up, and pre-drill and screw them in.

You are doing the exact same thing with this that you did with the first two pieces you assembled. You want to make sure you line up the boards so that they will create a nice square box.
Make sure to pre drill your holes. Also make sure that the holes will line up over the 2 by 2 inch posts and not too far towards the end of the board. This will cause you to drill into the thinner cedar plank and can cause splitting and other issues.
Once you have that side screwed in, flip it over and you will now add the last side of the planter box.
Repeat the exact same steps that you did to add the third side. Line up your 4 planks, always starting with the top one, and making sure it lines up exact before adding the next one.

You will end up with a nice tall box like this with no top or bottom. At this point you csn easily just stop and leave it as is, but by adding a bit of trim you can give this cedar planter box more personality and style.

You can measure from corner to corner to see if it is nice and square. It will actually be slightly a rectangle shape because you sandwiched the sides on.

Now its time to trim our cedar planter box:
This can be done in many different ways. I chose to use some trim I had cut down on the table saw, just using up some scrap wood that we had. I also wanted to make it easy and did not use and miter angles to add the trim.
The top pieces were put on first, and then the bottom pieces of trim.
For the top, I installed the two 18 inch long and 12 and 5/8, making sure they all overlapped 3/4 of an inch over the side of the planter. For these, I used my battery powered nail gun. This thing is such a great tool to have, was very affordable and makes these kinds of projects so easy! Plus there is no need for a compressor.

We used a smaller trim for the base of the planters.
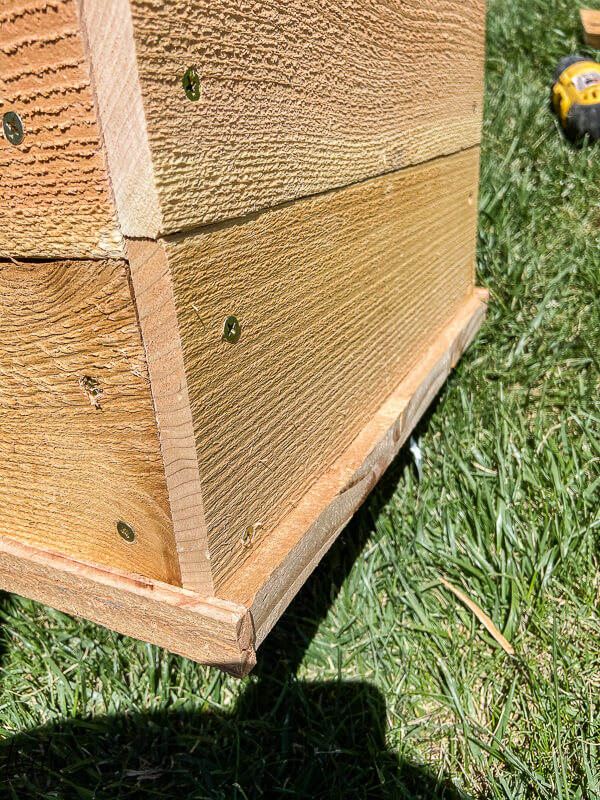
I did the same thing, and sandwiched the trim instead of cutting those impossible angles. I think it looks better anyways. These are a rustic planter. Plus, those angles are not my strong suit.

The trim on the sides was just butted up to each other, not overlapped. I used a slightly thinner piece of trim, so that it did not stick out since the trim on top only hangs over 3/4 inch.
Now, if I had more wood, I would have possibly made the vertical trim wider to hide the screws, but I did not have any and wanted to keep these as inexpensive as possible.

I love how these simple cedar planted boxes turned out!
I added these to the garden, as a way to break up the walkaway towards the greenhouse. My daughter is in charge of the flowers in these cedar wood planters. She loves coming out to water them and see how much they have grown.

These were made with leftover cedar wood from our garden planter boxes, so they literally cost me almost nothing because I used scraps from a previous project. But, these are also really cheap to make if you go and buy the wood, because the cedar pickets are inexpensive.
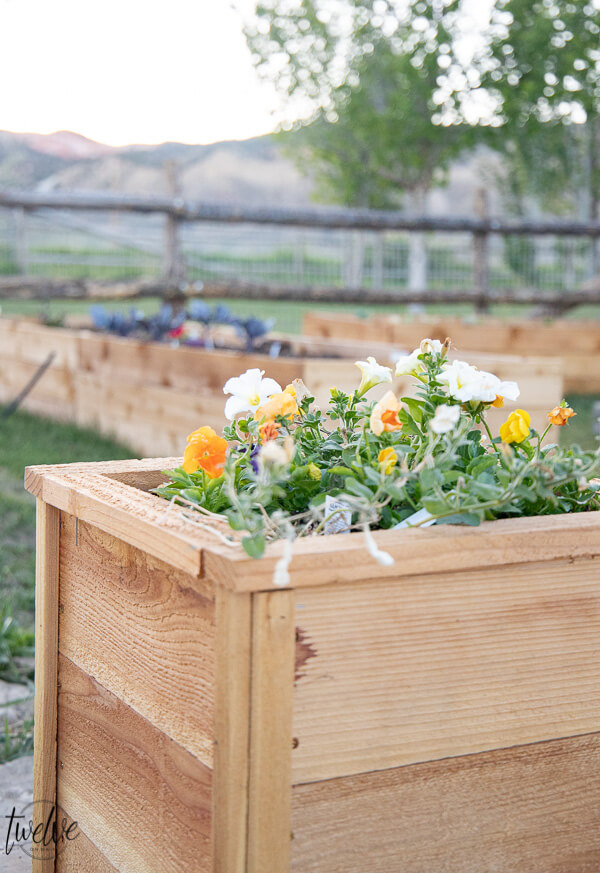
They also match my garden planter boxes, which is a really nice style element for the garden. No matter what the project, I am always working on how to make it look cohesive and stylish.

Want a bottom to your cedar planter box?
Mine do not have a bottom, since I am using them in the garden, but you could easily use the same cedar wood to create a bottom to it. I would then line it with plastic or landscape fabric.
I filled the bottoms of these with hay and wood, and then the top 8 inches is good garden soil to prevent them from being super heavy and also to cut out how much soil I would need to use.
Make sure to PIN IT and follow me on Pinterest!

Want other great outdoor ideas? Check these posts out:
How I Turned A Pallet into Planter Boxes
13 Summer Inspired Outdoor Planter Ideas
Mason Jar Herb Planters | 10 Minute DIY
DIY Farmhouse Style Wall Planter
DIY Hanging Planter Boxes in 10 Minutes!
Upcycled Farmhouse Hanging Fruit Basket
These look great! We have been in our new house for a year now, and are hoping to start working on our yard soon. We have a great backyard, but it needs a lot of TLC. I’m definitely going to keep these in mind, as we are fixing things up back there. 🙂
Love these cedar planters, Sara! Very pretty and yet just enough rustic to coordinate with your raised beds and greenhouse (and goat house, and chicken coop and tree house).