
DIY Built In Floating Corner Desk – Inexpensive and Easy To Do
Hi friends! I am excited to share a super easy DIY project with you today! We spent a lot of time over the past couple weeks remodeling my teenage sons bedroom. One project that we didn’t spend a ton of time working on was the DIY built in desk we built for him in the corner of the room. We chose to build this DIY floating corner desk ourselves. I want to share how we did it with you!

When my son told me he wanted a floating corner desk in his room I was excited. I started brainstorming all the different options of what we could purchase or build for him. We love doing DIY projects and knew we could create a wooden corner desk easily and for cheap! He initially wanted a desk from IKEA, but my design heart wanted something that looked a bit more built in. I wanted it to fit with the bookshelves under the large window that it was going to be attached.
I wanted the bookshelves and desk to look like they were built in. My son wanted it to be a large floating desk, so we compromised and figured it all out together. It was important to not spend a lot of money either. I try my hardest to do things inexpensively. We looked through DIY corner desk ideas on Pinterest found a ton of great ideas. I knew we could come up with the perfect desk for my son so that h could enjoy his personal space.
Thinking of how I wanted this desk to look, I wanted the bottom of the desk to match the paint on the bookshelves. I wanted to break it up by adding some butcher block to the top. Anyone that has shopped for already made butcher block, its a bit pricey. I could have made my own DIY butcher block like I did in my laundry room, but I didn’t have that kind of time.
So, I went on a hunt to find some way to get a gorgeous butcher block top without spending hundreds of dollars. In the end, I only spend about 45 dollars for this wood top! The table legs were a separate purchase, cost 20 dollars a piece and we used three of them. So, for just above 100 dollars, I was able to create a nice custom looking desk that worked with our space.
We took some inspiration from our laundry room folding table, and I am super happy with the result.
How to make inexpensive faux butcher block countertops for a built in desk:
The secret to the inexpensive butcher block top on this built in desk was a specific piece of wooden board I found when I was at Lowes. On my journey to find their pre made butcher block tops, I came across something on the entirely opposite end of the store. On the aisle with the lumber and table legs, I found these sheets that were 24 inches deep, 1 inch thick and 4 foot long. The best part is that they were only 15 dollars! I thought I could just double up two of them to make them have that thick 2 inch butcher block look. I think I had a great idea .
What happened next came completely by accident. I was hesitant to buy 4 of the board without getting my husbands opinion, so I bought two of them, since we wanted a corner desk. I then grabbed some 1 by 4 inch pieces of pine trim just to have as a back up in case we needed them for anything.
So, we had
- 2 pieces of this by 24 inch board
- 2 pieces of pine trim, 8 ft long
- 3 table legs.
We also used these tools for this project:
- You might want to use 4 table legs, depending on if you can see all the legs, but one of ours was completely hidden by the book shelves so we decided not to put one there. It saved us 20 dollars.
With the pieces of trim and the 1 by 24 inch pieces we were able to create the look of butcher block and have a place to install the table legs without seeing where they attached.
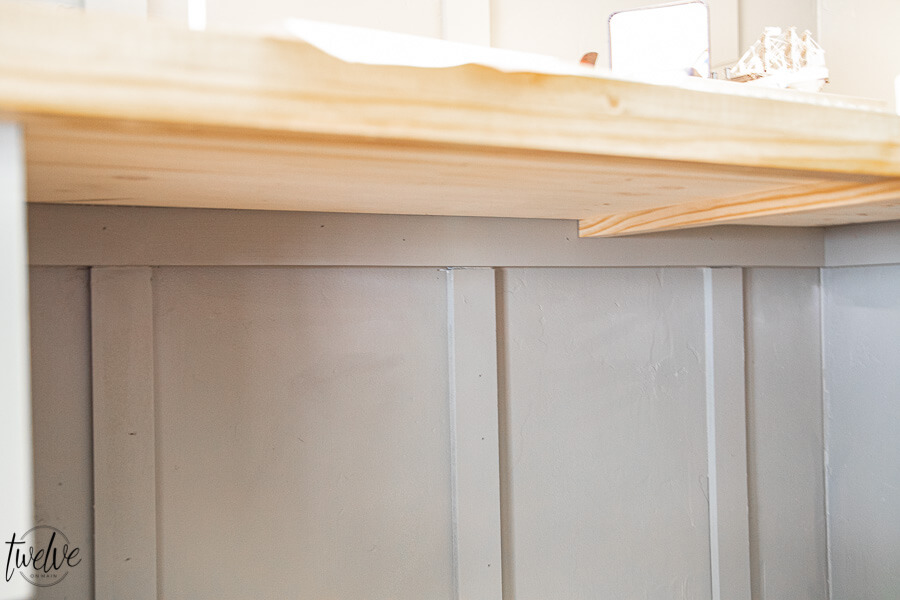
I failed to take pictures of the actual process, but I think I can explain it easily. We took the pine trim that was 4 inches thick and we glued and nailed it to the edge of the wood shelves with wood glue and a nail gun(our brad nailer to be exact). We were creating a bullnose edge. Once the trim was secured to the bottom edge of the 24 inch wide board, we puttied any holes and sanded down the edge until it was nice and smooth. We did this to all the sides of the desk that would be revealed on the front and sides of the desk.

It looked gorgeous, especially after I added a stain to it. You can see the underside in this picture above. Its only thin in the middle and 2 inches on the edges.
We then proceeded to install the desk and built it in place.
How to install and build your built in desk:
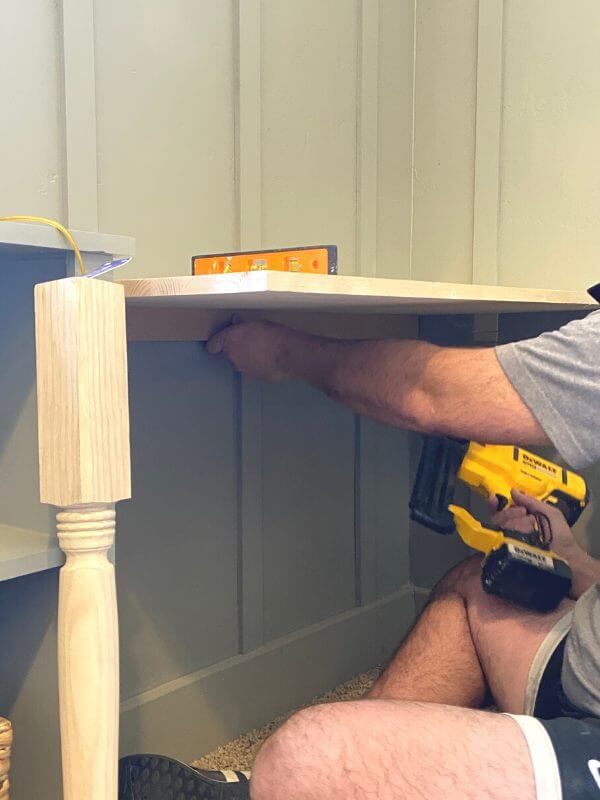
Now that the table top was built it was time to install the desk. The first thing we did was measure and install a ledger board along the wall where the table top would rest. We made sure to measure up the same height that the table legs would be which was 29 inches. We made sure to screw it into the studs(using a magnetic stud finder) so that it would be nice and sturdy. Since we had installed the board and batten DIY wall already, we cut a section out of the boards so that the table would slide right in and fit right inside the board and batten.
Once the ledger board was up, we then started to add the tabletops and the legs. We used a level to make sure the top was straight and level on all sides. With two people, we were able to hold the one side of the L shaped table up against the wall, where it rested on top of a ledger board. We then added a table leg under the table to give it some strength while we checked for level.
Since this was a corner desk, we opted to not miter the pieces in the corner. We decided to square it up, which was so much easier to do. Once we had the counter up and the legs underneath, (just holding there, they were not secured yet), we then added some pieces of the trim board as a brace and secured it under the tabletop. We secured both pieces together running from the wall to the end of the tabletop.
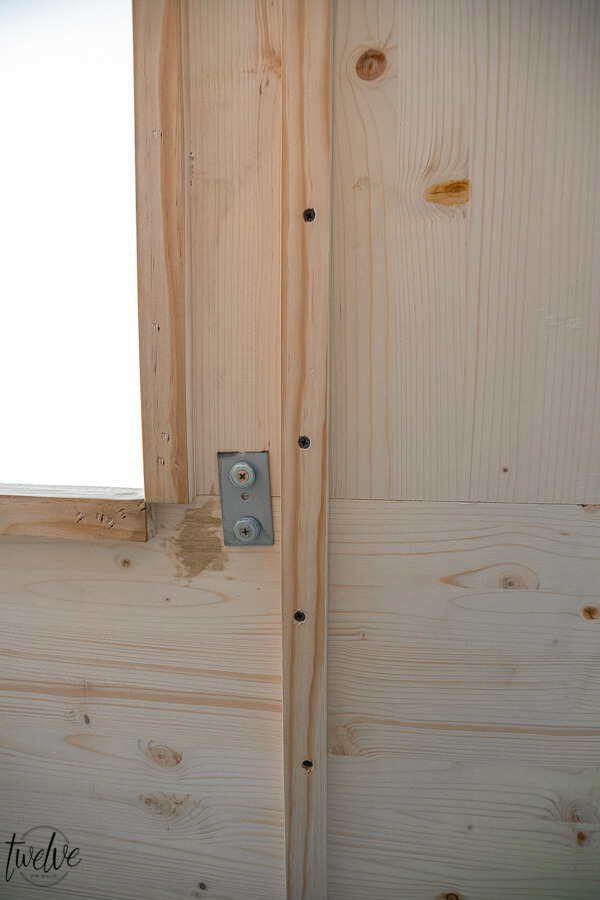
We did this where the two pieces of wood intersected. Since we did not want a leg in the center of the desk where the chair could go, this was an important addition. It strengthened the center of the desk without adding a vertical pieces coming from the floor. ( I hope that all makes sense) We also added a couple metal brackets to give the joint more strength.

Once we had bracing underneath we then put a level on the tabletop and checked all the sides for level. We then lined the legs up under the table, against corners of the bullnose edging of the table. The bullnose created the perfect spot for the legs to be installed. We used tiny L brackets to install it to the bullnose and the tabletop. It worked perfectly.
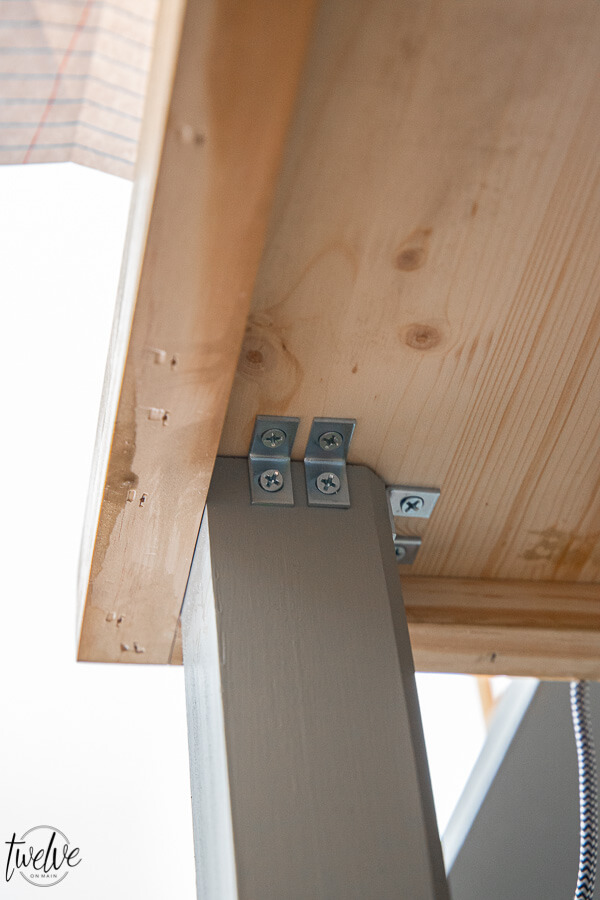
This concealed the very top of the legs and gave us a place to secure them as well.

The last step was to sand and stain the top of our desk. We painted the legs prior to installing them, which makes it so much easier! You can see in this picture how the table fits into the board and batten.
I used an oil based stain in the color Weathered Oak on our DIY floating corner desk which is a new color for me and I love it! We decided not to stain the bottom side.

The faux butcher block top is gorgeous on our DIY floating corner desk. The tone on tone paint is exactly what I wanted for this new desk. It took a regular desk and gave it personality.

I love the way it looks with the entire new room.It is the perfect space for our growing teenage son. We chose the L shaped desk design for this custom built in desk because it worked well with the space. There is enough space for him to do his homework and all his projects. You could easily create a straight desk if you want it on one wall for a home office. You could also build one and leave it freestanding and facing the room.
It can be customized for a small room, an area where to need extra space, where a small corner desk would be key.
The only difference would be that you would need 4 table legs.
This is a very simple built in desk. We could have added many other features to make it more functional including some kind of drawers. But we did not feel that was necessary because my son has ample storage options on the desk.
This built in desk was just one of the features of my sons new bedroom that has me so in love with the entire space! I feel like it is such a cozy and masculine space perfect for a growing teenage boy.
On a side note , we focused very hard on making sure our son had tons of storage space between the built in bookshelves and his minimalist corner desk. It is the perfect addition to his bedroom. The desk top is the star of the show.
See what I am sharing on Pinterest!
Want more great projects? Check these out:
Easy DIY Garden Markers Using My Cricut Maker
How to Make Easy DIY Cedar Planter Boxes
Gorgeous Office Bookshelves with a Built In Electric Fireplace
It looks great, I love that desk and looks perfect in his room.