
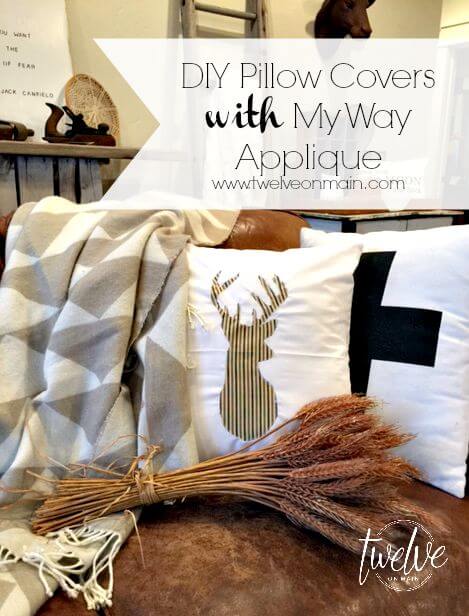
DIY Fall Pillows With My Way Applique
I will announce right here. I am not a sewing expert. Yes, I have sewn some pillows, I have even made a quilt or two, and its a darn good thing my mom is quite the expert. If I act dumb enough she will take pity on my and help a girl out. I do like to sew, but I am not a patient person, so I want it done ASAP. This project was an experiment. An experiment that had a great turnout!
Once again, I should have been packing for my trip to Hawaii, but I couldn’t help myself! I decided to do it anyways. Plus, I could focus more on packing once my project was done right?
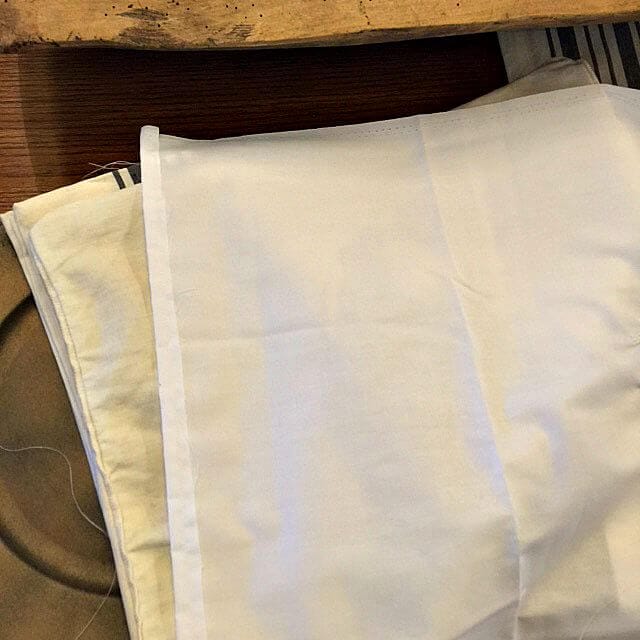
I started with some white remnant fabric I bought at Walmart. If you check out the fabric section, you can usually find remnants for pretty cheap. The next fabric I chose was for the deer. This fabric I purchased at a fabric store that was going out of business and everything was 1 dollar a yard. You bet I stocked up on anything I thought I might be able to use.
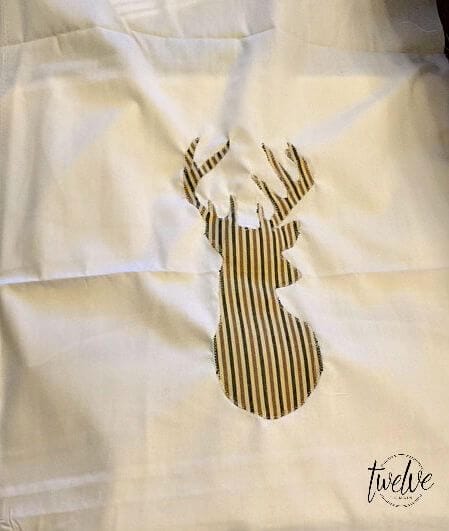
I then decided what I wanted to put on the pillow. I decided on a deer head. I have created this printable that you can print off if you would like.
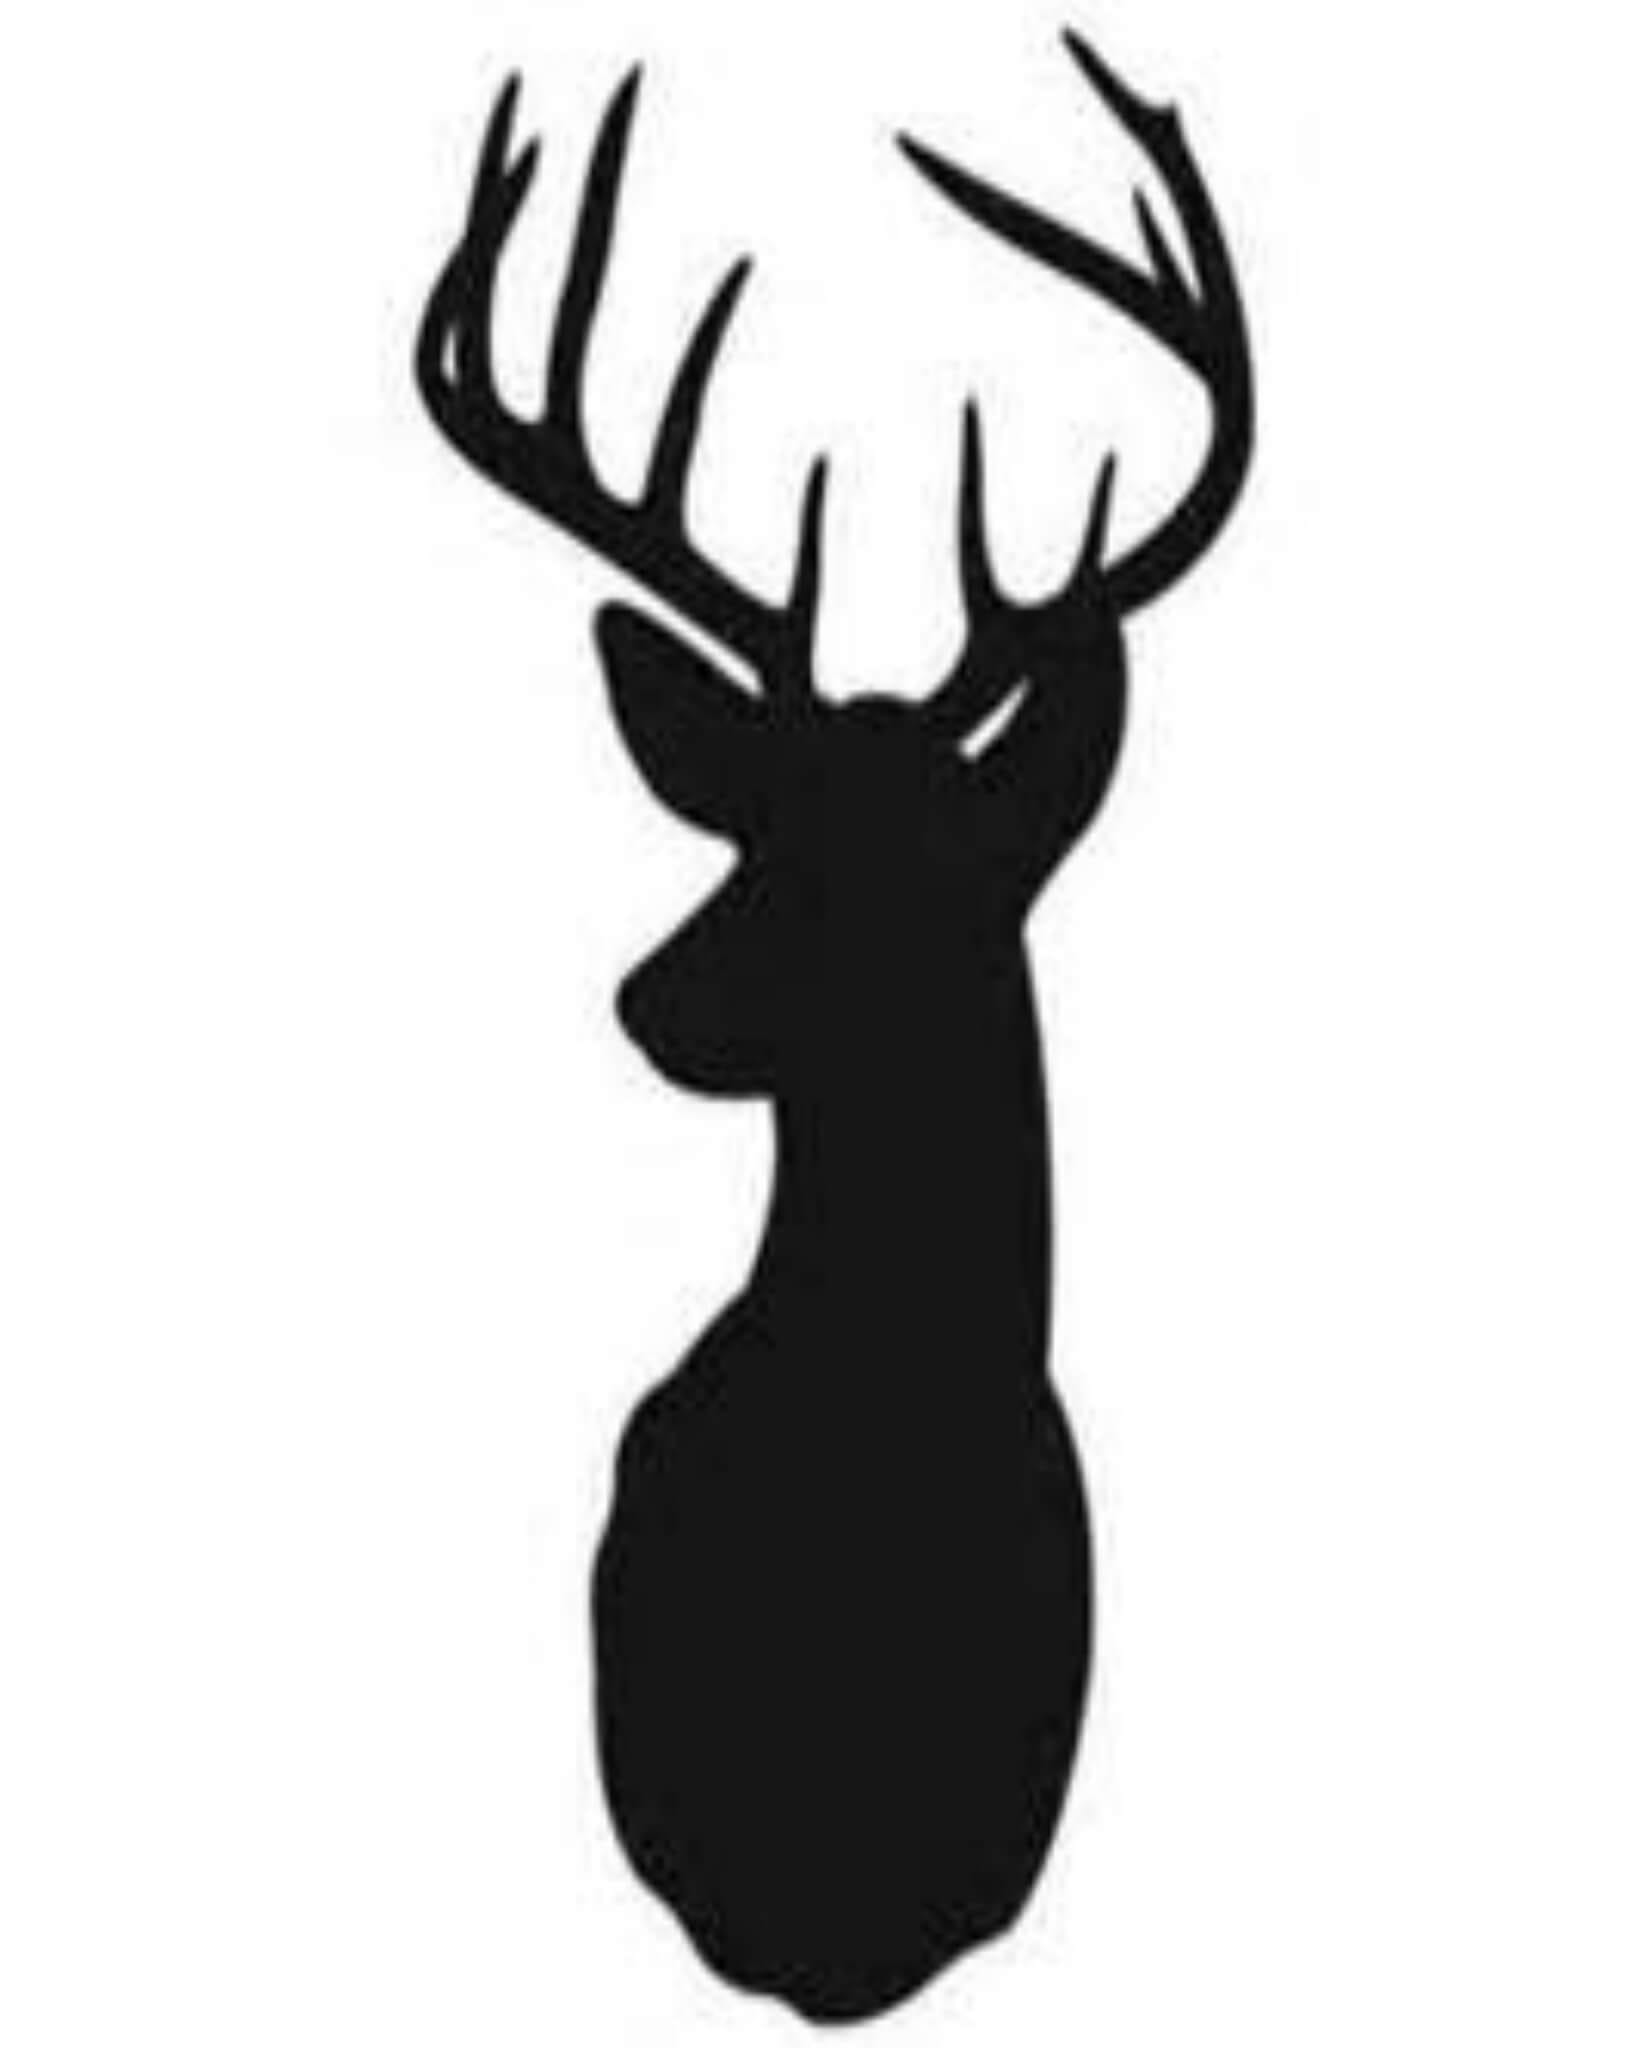
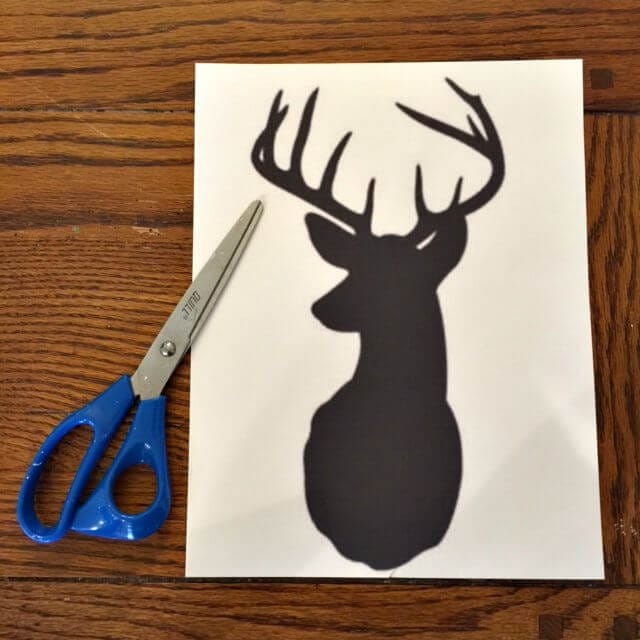
Once I printed out the deer head, I cut it out.
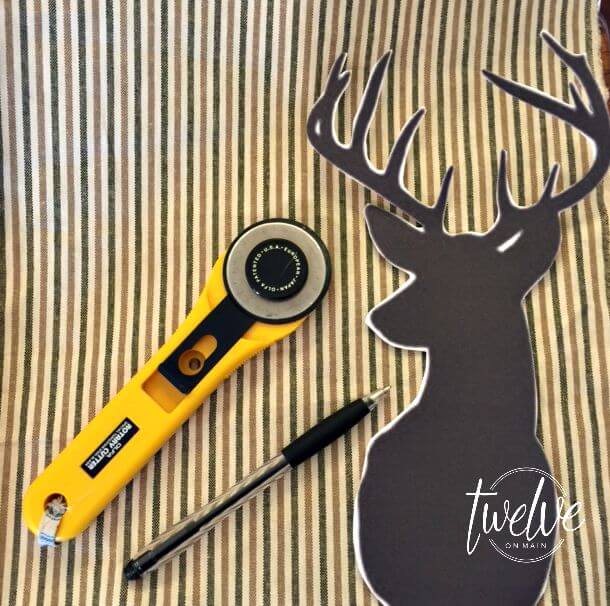
I then traced the deer onto my fabric.
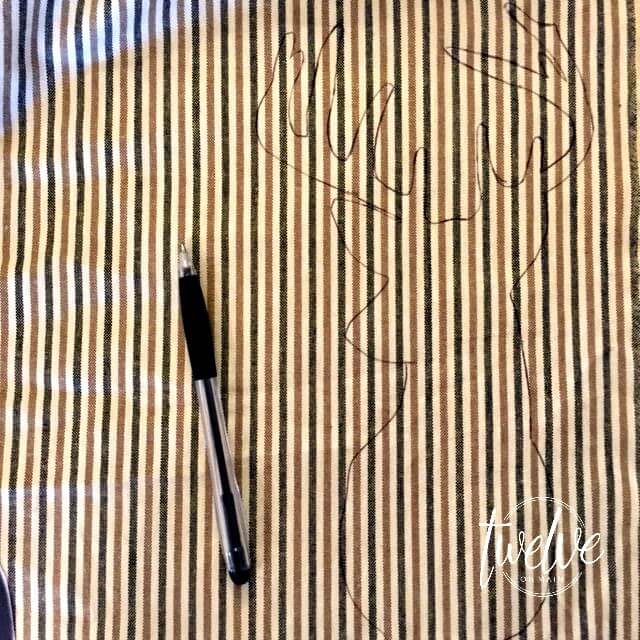
I then cut out said deer head. WOW I think I am saying “deer head” too often.

Okay, so I don’t have Wonder Under, and if you do, you could definitely use that. But with my limited options here in our little town, I found this glue at my local True Value. So, I thought I would give it a whirl. This is different from regular Elmers Glue, this is good to glue fabrics together.

I brushed a good coat of glue on the deer. I then let it sit for about an hour while it dried.
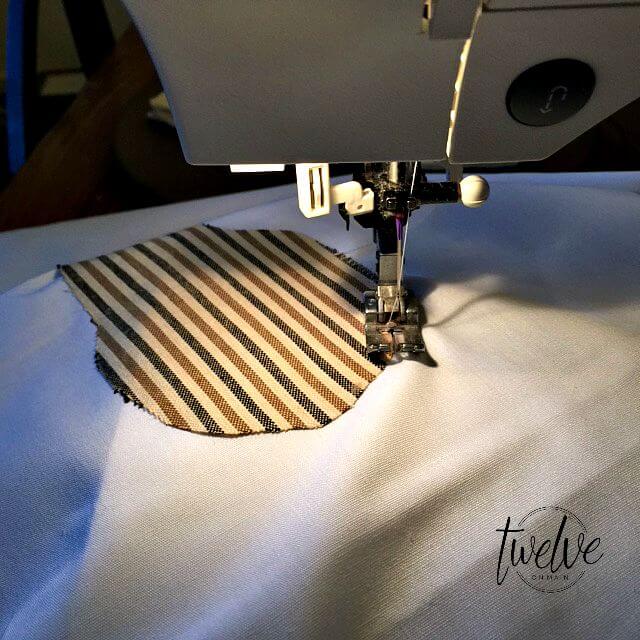
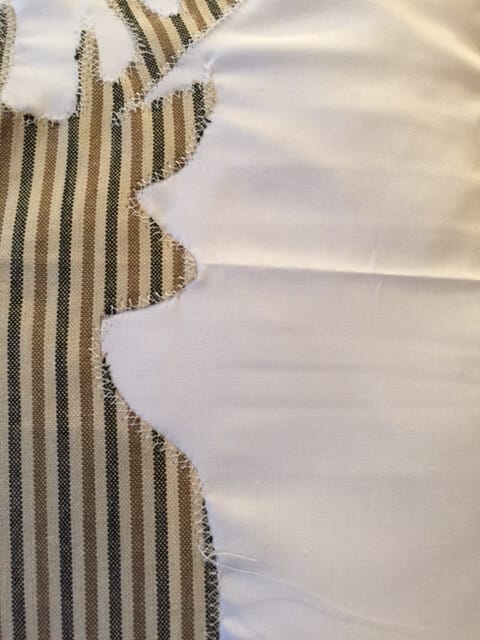
Here is where my mad sewing skills shine. I used a zig zag stitch and sewed around the while deer head. Let me tell you. Those antlers? What a pain! But they look good now!
Up close of my mad skills.
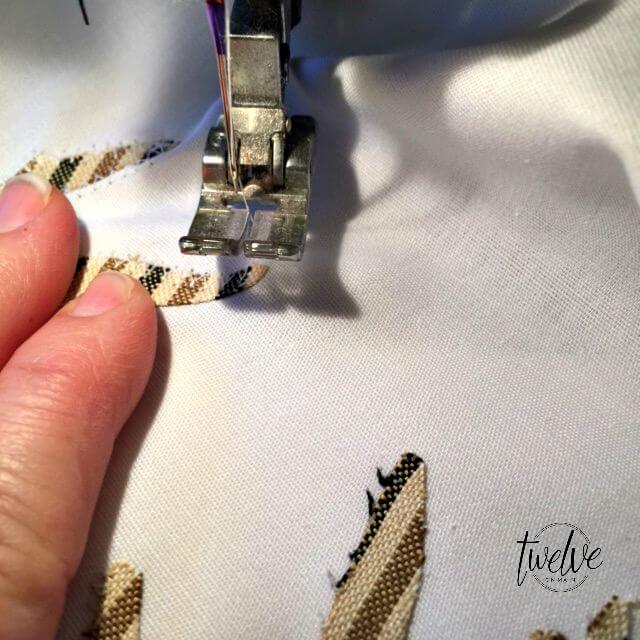
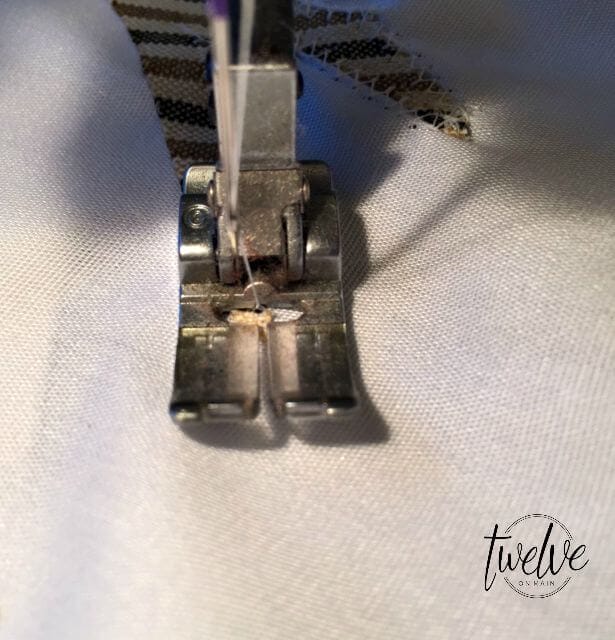
Now, those antlers. I don’t know if I did this the right way, but it worked for me. I lifted the foot on the sewing machine when I came to the tip of an antler, and would then rotate the fabric and continue stitching. Those sharp angles were a bear to sew around otherwise.
I guess I should tell you, I sewed the deer head on before I created the pillow envelope. Here I folded the ends over about an inch and sewed them down. I then folded the fabric inside out to create an envelope and sewed the sides down. This creates the pillow cover.
Please ignore some of the not so perfect parts of the deer. It was my first time! It could also use a good ironing.
Up close and personal. My sewing skills once again.
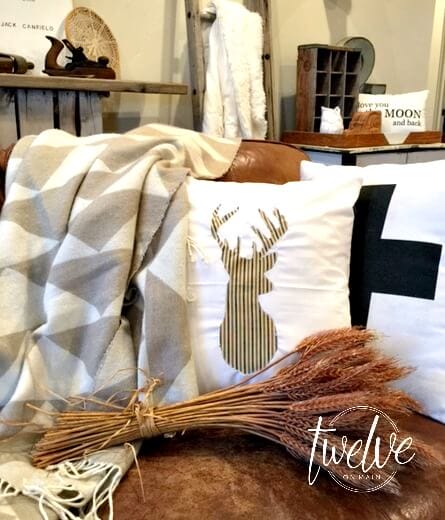
Here it is all finished. I am really excited it turned out! When I started, I wasn’t so sure. I can’t wait to make more pillows for the upcoming seasons. Christmas will be a blast, and I might need a support group to stop me from making too many!
Thanks for stopping by! I love to hear from you! I’d also love it if you followed me on social media!
Have a great day! Try something new, I dare you.
HI Sara, thank you so much for joing Friday Favorites last week! I would love to feature one of your posts, but every link gives a 404 Error. This happens also with your Social Media follow buttons. Please join us again this week…I would love to feature oneof your posts!! Take care – Christine at Must Love Home
Oh, shoot! I will take a look at it right now! So Sorry!
Christine, I am having trouble with my permalinks, I hope I fixed the problem. Let me know!
Great job and thanks for the tutorial! I would’ve never thought of this but I’m doing to give it a try 🙂
Thank you! I hope it works for you!
Love this idea! It came out so well 🙂 I have very little sewing skills as well but you make this look so doable!
Thank you Haley! It was really quite easy!
Great tutorial! I love your site! just stopping by from the Fall Home Decor Link Party on Live Laugh Rowe.
Thank you so much for stopping by!
This is such a creative idea! It is so simple and so cute. I never would have thought of doing this.
Daily Opulence | http://www.DailyOpulence.com
Thank you so much!