
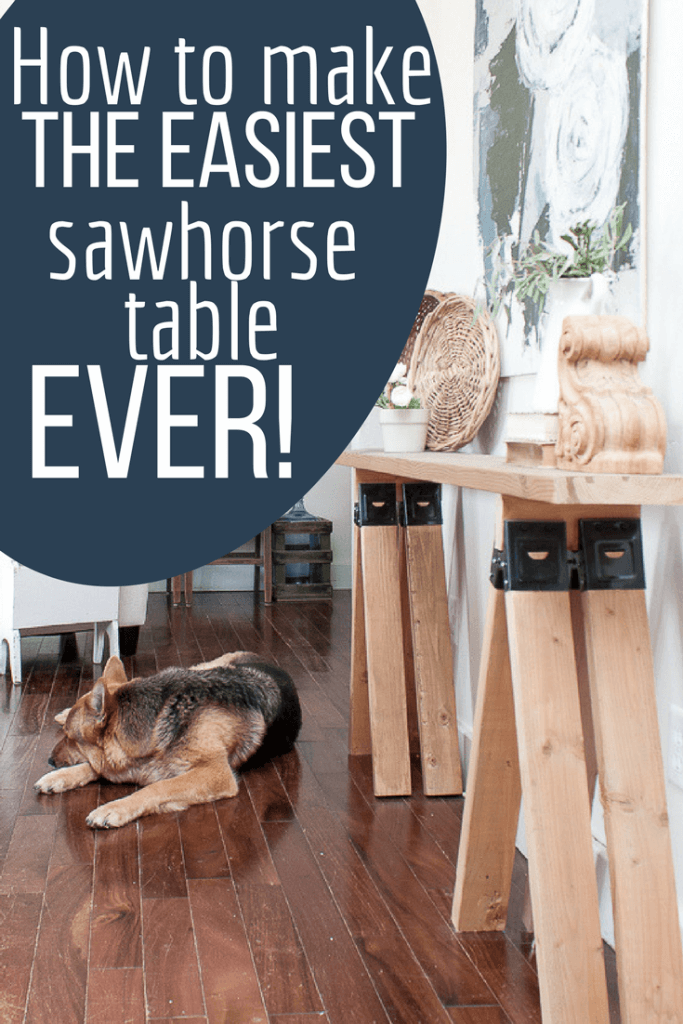
How to Make the Easiest Saw Horse Table in Under 1 Hour
Want to add some rustic, industrial design to your home without spending much time or money? I want to teach you how to make the easiest wooden saw horse table ever! This DIY project was started and completed in under 1 hour!

This post was originally featured on Remodelaholic.com
I have wanted a new sofa table for so very long. I guess I should say I have wanted A sofa table, because I never really had one. I wanted something that would look great with my farmhouse decor, but would be beautiful on its own or with rustic and industrial friends.
There are so many different ways to make a wooden sawhorse table, and you can vary the style and size to fit your own homes decor. I actually am planning on making a smaller one as a nightstand in my sons room. The possibilities are endless. And what is great that this only took about an hour to make! So, that instant gratification is way high up there on this project.
If you have a wood pile that you stash old wood this is a great project for that. Find yourself an interesting piece of wood for the top! This is an easy build that can be completed in under 1 hour.. Let me show you what you need to build one.
You really only need a few things to make this wooden saw horse table:
- 4 Metal sawhorse brackets (I got these at th hardware store)
- 2 by 4 pieces of wood. I got 8 foot lengths. You will need 8 pieces cut at 27 1/2 inches long(these will be the sawhorse legs)
- You will also need 2 pieces cut at 1-2 ft long depending on the width of your table
- circular saw or miter saw
- nails
- hammer
- wooden top- you can make this as deep as you would like but I find 10-12 inches to be just right. I went with a 2 by 12 inch piece of wood.
- wood screws
- cordless drill (get the impact driver and cordless drill combo and you will thank me!)
Step-by-step to making your own wooden sawhorse table:
- The first step you will need to do is cut the sawhorse table legs. As I stated above, they need to be cut to 27 1/2 inches long. You will need 4 sets of legs. We use 2 sawhorse brackets on the legs on either side of the table so you need 8 legs cut.

You can also cut the two pieces that will go underneath the table in the saw horse table brackets. We cut ours at 10 inches long because my table is a bit more narrow to fit my space.
- Now you can take your legs and insert them into the metal sawhorse brackets.

These simple sawhorses brackets are pretty straightforward. They have instructions on how to use them, and its quite easy.
You simple put the 2 by 4 pieces in the ends of the bracket. This is the easy way to do it.You can sand the end of each leg to make them more smooth.

You will want to then screw the pieces of wood into the brackets. Make sure to pre-drill your screw holes. This will prevent the wood from splitting and it will make it easier to screw into a 2 by 4.

Next you are going to put the smaller pieces of wood in the top part of the sawhorse bracket. Now, these brackets generally have some sharp teeth on the inside of the bracket so that when you put the wood in there and give it a gentle tug, the teeth will become lodged in the wood and hold it in place.

You can then screw them into place. BUT…before you screw them into place you need to make sure they spaced where you need them to be and that both sets are equally spaced. You will use 2 brackets on each side of the table.
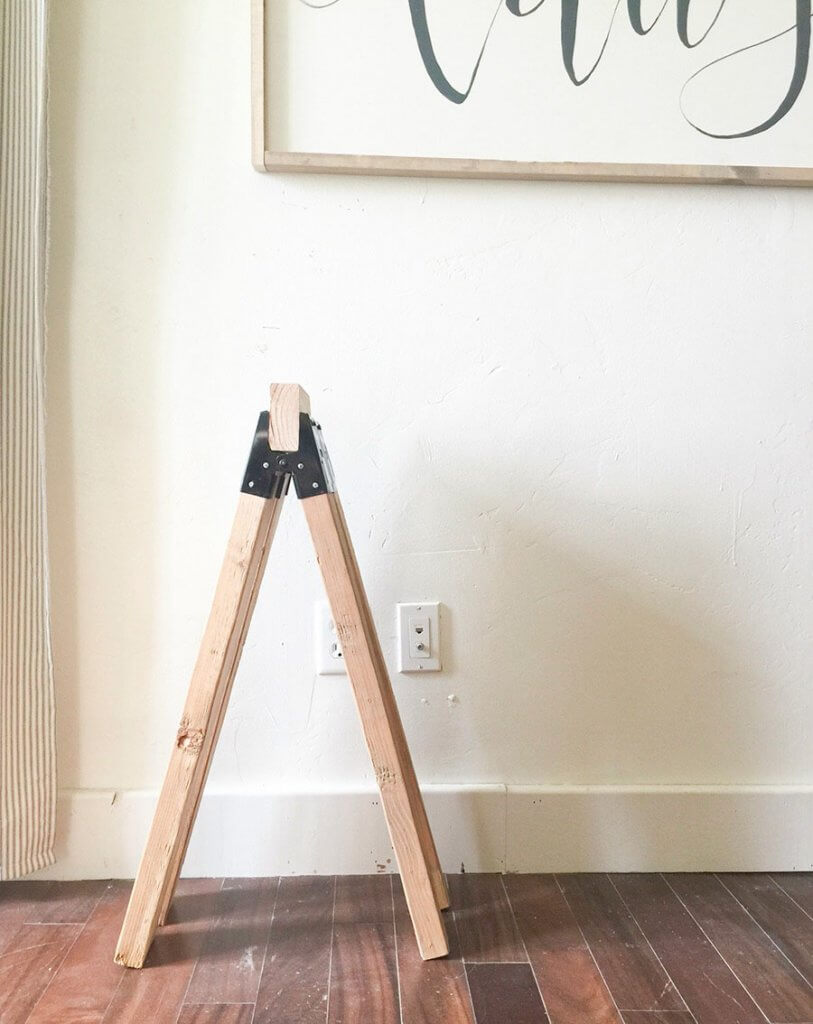
Here is one side of the legs done.

Now it is time to add the tabletop. I used 2 by 10 wood and put my favorite weathered wood stain on it as well as the legs of the table.
I measured in 9 1/2 inches from each end and that is where I placed my table legs. 
Once the top was put in the right place, I drilled some holes into the tabletop and into the piece of 2 by 4 in the table legs.

I used 3 inch screws so that they would go through the table top and into the wood beneath.
You need to make sure to pre-drill these holes so that the wood does not split, the screw does not strip and it just makes in easier to screw it all together. This is where having the impact driver comes in really handy. It has a lot more force behind it than the regular screw gun. And this is key for a small girl like me, who finds it hard to really get “my back into it” as my husband would say. It makes screwing things so effortless!

You can putty these holes and stain them or paint the whole pieces, whatever you choose!
I decided to leave it as is, since I am a fan of the rustic and industrial, and the just not quite perfect pieces of furniture.
Last week I posted about my spring decor in the living room and this sweet baby got a feature.

This easy wooden sawhorse table is thew perfect accent to my homes decor. I love the raw wood and the slight modern/industrial look. This was a fun project and so easy to make! It took me less than an hour and is a great beginner project.

If you make one of these tables, you will find that you may have to adjust the legs a bit until you get them in the right position. Its easy enough and they look so good once they are straight and parallel with each other.
And you want to know what is great? If you even get sick of this table and want something new, you can always use the base legs in your other DIY projects as real sawhorses! I think mine will stay in the house and may even end up in the dining room.
,
This DIY saw horse table project was easy, and so very forgiving. You cannot make too many errors on this and even if you do, its an inexpensive table to make! The entire table probably cost me around 35 dollars. Thats not bad! And if you have leftover 2 by 4’s from a project, it could end up costing less! Imagine if you had an old vintage door or some shutters. They would make a great tabletop on something like this.

I love to create. I am a creative person my nature. These kinds of projects are like therapy for me. I feel grateful everyday that I am able to do this and have created a job out of it.
I am so grateful to you for stopping by my little corner of the Internet, because without you here, this site would be nothing.
I hope you have a great day, what ever that day may be!

If you like this post, check out these:
DIY Ikea Tea Towel Farmhouse Pillows 4 Ways!!
Easy DIY Bike Rack | 10 Minute DIY
What a unique table! You are truly great with tools.
Maria
I love the rustic, industrial look of these wooden tables. I’m amazed you can DIY in an hour! Pinned. Stopping by from the #HomeMattersParty link up. Thanks for partying with us!