
Gorgeous DIY Wood Candle Holder Using an Old Beam
I wanted to share a little story. A story all too typical for this mom/wife and the life that we lead. its quite humorous really. I love working on projects, but let’s get real here, it rarely goes as planned. I wanted to share just how they usually go with my gorgeous DIY wood candle holder that I made using an old beam!
These old beams really have been used in s many different applications in my home. From my bathroom(as a faux beam), rustic shelves, to so being used as stairs to our treehouse and more! And now I am using a discarded piece as a gorgeous wood candle holder.
I have been wanting to make one of these rustic candle holders for quite a while, but honestly I was out of good wood….or so I thought. That was until I took a trip to my wood pile in the back lot of our property. I was thrilled to find that I had not only this piece but about 5 others plus some larger, longer pieces as well! Looks like the projects will just keep on coming! Be prepared. You have been warned.
So, as I do with most projects, I jumped in. I forgot to change out of my nice clothes(however you will see in the video that I am wearing my torn jeans, so my mom will think I am wearing my grubbies). I also assumed I would have all the tools right where I needed them….right where I left them.
But you see, things rarely go that smoothly at my house.
Here is what you will need if you want to make one of these wooden candle holders for your home decor:
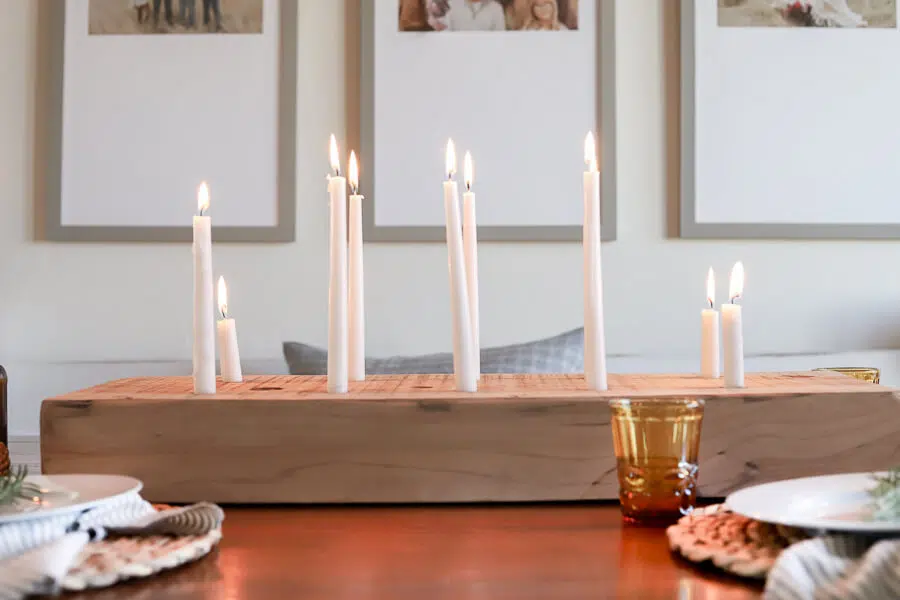
- Piece of wood cut to the size you want. I used a quite large one but you can use any size you want. Mine is 30 inches long by 12 inches wide and 5 inches thick. I love using old unloved wood, but if you want to use new, thats perfect too!
- Drill, I love this set!
- Spade drill bits(make sure you husband does not misplace them) or Forestner bit, whatever you have or what works best for you
- Candlesticks of your choice. You want to make sure you match your spade bit to the base of your candle to ensure a tight fit. You could also use tea light candles
- Sander (to smooth out once you’ve drilled your holes)
Do you want to see the entire project done? Check this video out! It’s kind of hilarious!
Forever by Peyton Ross | https://soundcloud.com/peyton-ross-edm
Music promoted by https://www.free-stock-music.com
Creative Commons Attribution-ShareAlike 3.0 Unported
https://creativecommons.org/licenses/by-sa/3.0/deed.en_US
Now, like I said, I got distracted and did not change my clothes…this always happens. Then, you have my puppy dog, who is concerned with the amount of sanding I am doing. Suddenly the UPS driver arrives mid project, and I am now there to prevent attack/licks/fetch by Bruin the said dog. He is protective at first, and once he realizes you’re a friend, he wants nothing more than to play fetch….and the UPS driver quickly figures this out.
Once the UPS man is out of sight, I was ready to measure and drill my holes. I measure the center of the beam which is at 15 inches. Then, I decide how far in I want the rows of candles to be, and I choose 4 inches from the edge. I mark my center holes and then measure out every 5 inches as I move to the ends of the beam. That gives me 6 holes on each row, 12 candle holders in all.
When I was ready to drill the holes for this rustic candle holder, I suddenly realize that my spade drill bit is no longer installed on the drill. After an exhaustive search and a call to my husband, it is confirmed that he doesn’t have the slightest idea where he left the drill bit…and I was advised to head to the hardware store to get another one. Ah, my favorite thing is to purchase multiples of items that only occasionally get used. I hope you can sense my sarcasm.
A little tip, if you are purchasing new spade bits, get the ones with the threaded tips to help with better control.
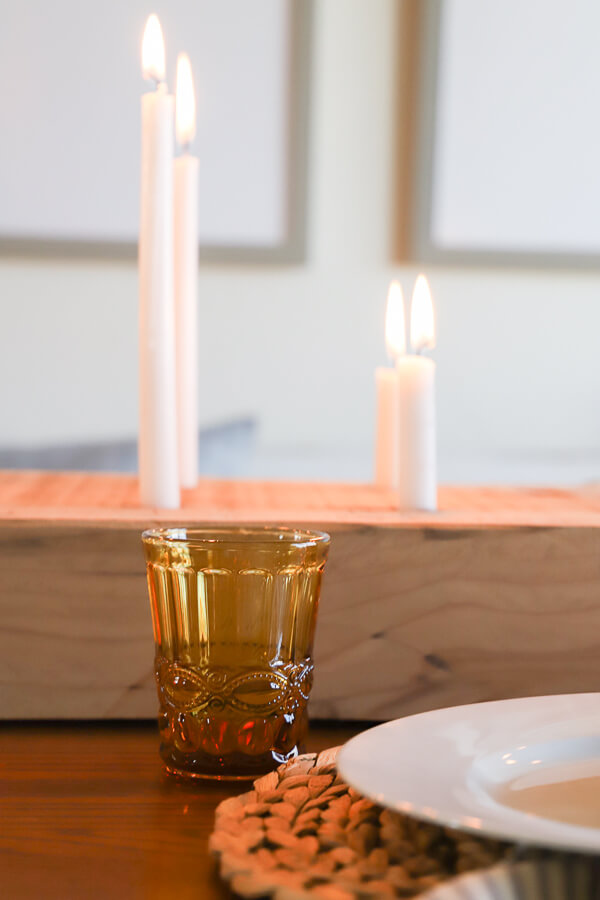
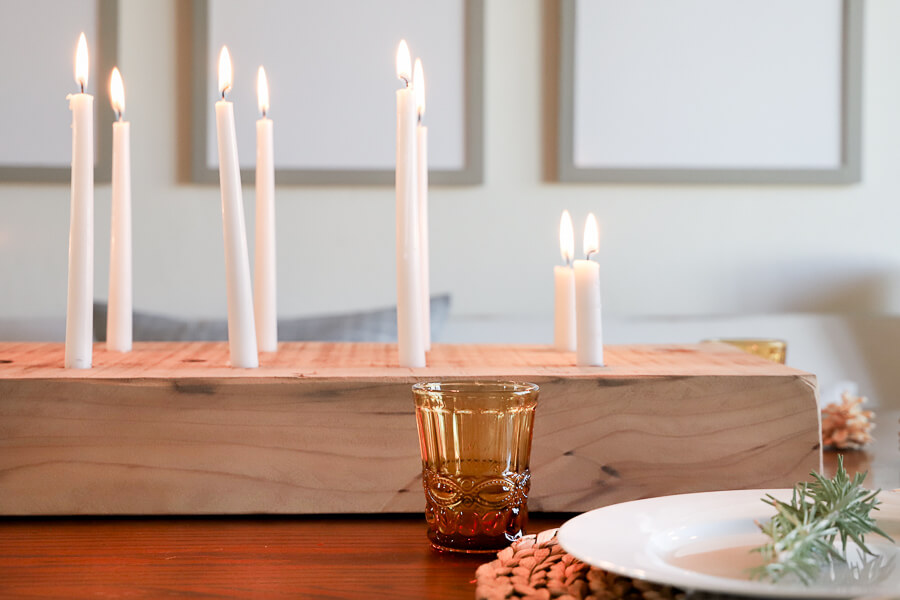
That is quote a centerpiece. I have wanted to create one of these for the holidays for some time. The gorgeous glow that the candles give are such a gorgeous setting for a cozy and intimate dinner.

I am using this wood candle holder in my most recent Thanksgiving table no my dining table, which will be going live tomorrow, so make sure to check that out too! Can you imagine surrounding yourself with loves ones around this for a cozy and intimate dinner? I will just say that my kid have already begged for some candlelight dinners, which I will gladly allow!

This is really quite an easy project. The hardest part of this rustic candle holder projects for me was getting the measurements right! I am no mathematician. The solid wood beam has so much character without having a thing done to it. It gives the room a rustic look and a warm glow.
I find these kinds of projects to be hilarious, satisfying, and a great reminder that sometimes, there are bumps along the way. Rarely does everything go our way, and we need to learn to laugh at the process.
I love my job, and I love that I get to share these successes with you! I love that I also get to share my failures, of course, we aren’t perfect.
Make sure to save this for later!!

Have a great day!
Check out these amazing projects too!
DIY Butcher Block Countertop from Old Trashed Lumber!
12 Quick and Easy DIY Projects for Beginners
DIY Wedding Backdrop with Dropcloths for Budget Friendly Style
Fall Bedroom Decor Tips to Bring a Cozy Feel for the Season
The Best and Easiest DIY Faux Wood Beams to Make Yourself
Pre-made Faux Wooden Beams Delivered Right to your Door!
A New Look, Our New Black Armoire!
This candle holder is so nice!
I have an unused old beam, I will make one.