
Super Easy DIY Hanging Planter
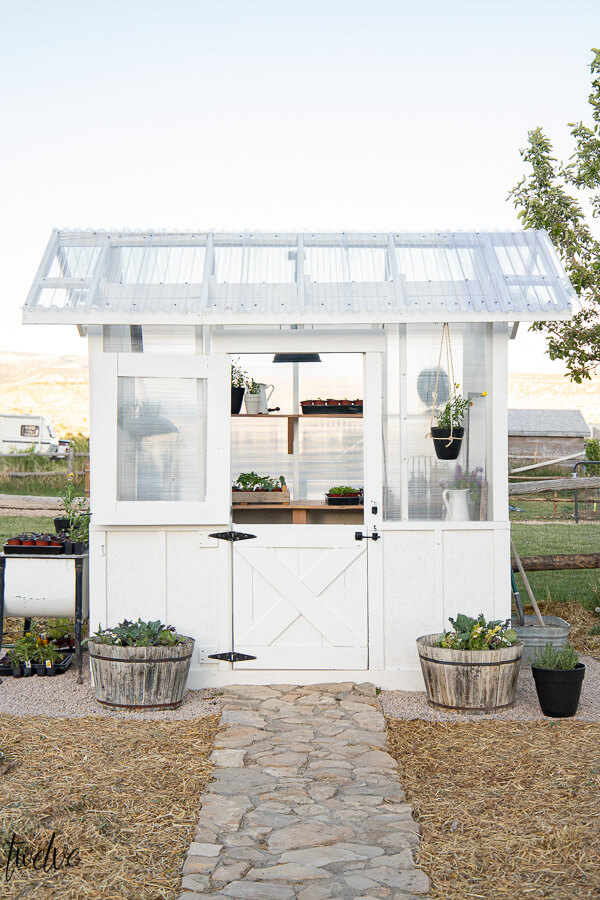
Hey friends, I am here today to share a super easy DIY that I recently added to my greenhouse! If you haven’t seen my new custom built greenhouse, you should check it out! But today we are talking about a super cute and super easy DIY hanging planter that I made to hang outside the greenhouse.
I had gone back and forth, trying to decide how I wanted to deck out the area outside the greenhouse. I wanted something and I kept jumping around from one idea to the next, never fully committing to one. Then one day I was watching an episode of Outlander, and my jaw dropped. I noticed the most adorably simple hanging planters on their porch and I knew I needed to make one for my greenhouse. This was the DIY hanging planter I needed in my life.

I do that a lot, you know. When I should be watching a movie, or a show i am usually distracted by something in the background, a piece of artwork, or the design of a space. Its a problem I tell you.
They could not be more straight forward and simple, but the task of trying to find some hanging planters like this to purchase was pretty difficult.
Until one day I was walking down the aisle at The Home Depot when I came across the most perfect black plastic planters!
I wasn’t even looking for them at the time, but there they were, in all their glory, a handful of different sizes, all ready for the taking. They were incredibly affordable too!
I bought a couple extras to add more flowers to. You can see a larger version on the ground by the greenhouse.
Now I had to figure out how to hang it!
I noticed in the Outlander episode that they were all hung with rope. Easy enough.
I got some thick twine, since it would be a bit more durable in the outdoors.

The process could not have been easier. I tied apiece of rope around the pot, just below where the lip widens.

I then tied three different pieces of twine to the first piece and made sure to space them out evenly. I used a simple square knot to do this. You could use a bit of hot glue to hold the knots together if you are nervous about it, but mine have held up amazing and we have had some of the worst wind and weather over the past couple weeks.
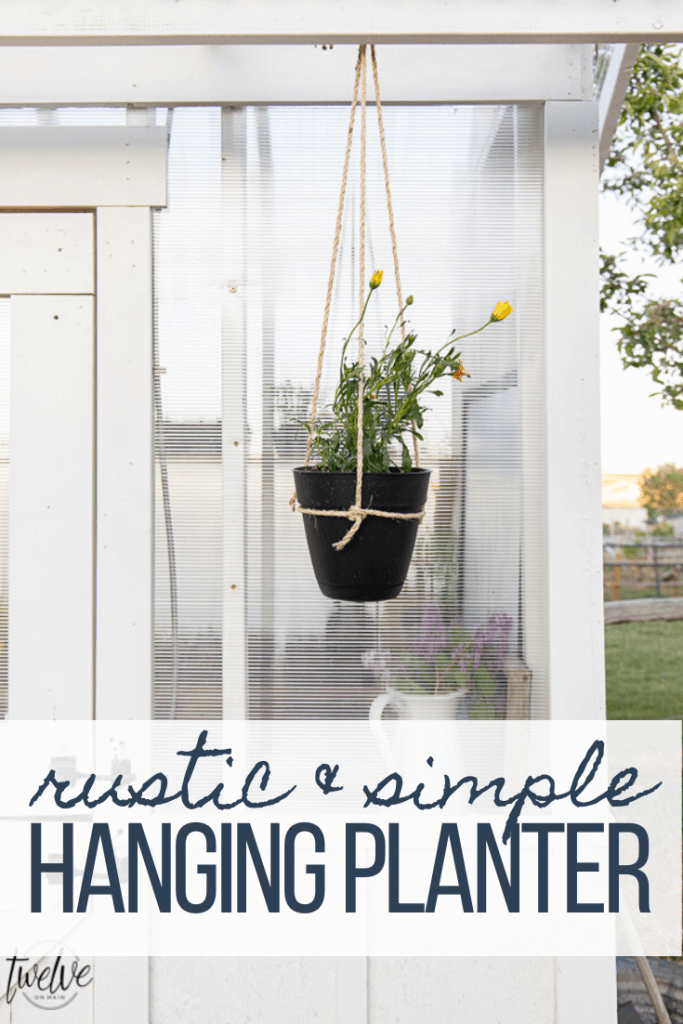
I then tied all the pieces together at the top, where they all come together. This gave me a place to hang it from. I used a hook to hang them. These DIY hanging planters were literally done start to finish in about 20 minutes.
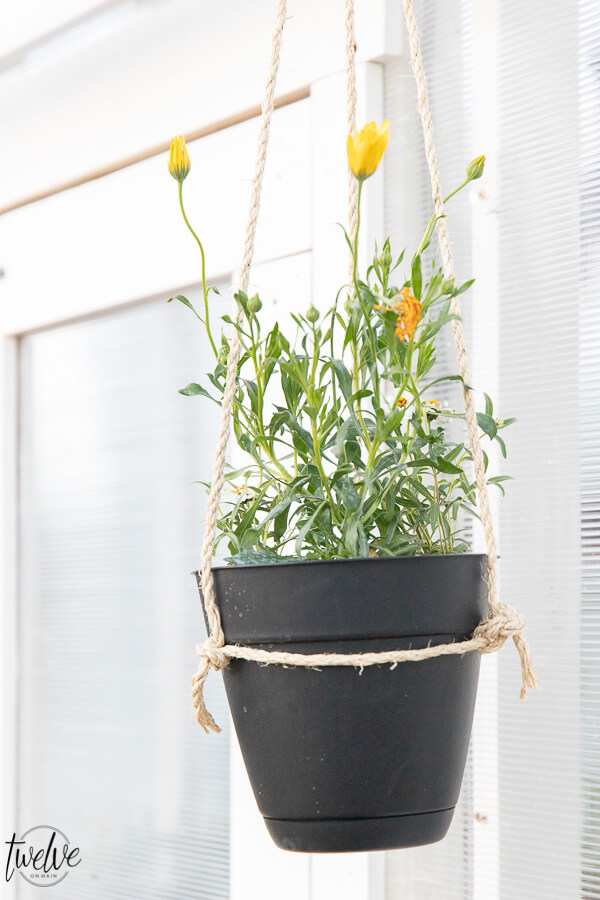
This DIY hanging planter is simple and a bit rustic. A bit primitive but with a modern edge with the clean lines of the pot. They are just perfect for what I was looking for.

It is exactly what I was looking for to add to the front of my greenhouse. I have considered adding a couple more at different lengths, but I also think I might add them to my front or back porch!

This DIY hanging planter is super easy to make! I am definitely going to make more for my home. They were inexpensive and I can imagine with a handful of them hanging at different lengths, they could look really interesting.
Make sure to check out these great posts as well!
How I Turned A Pallet into Planter Boxes
13 Summer Inspired Outdoor Planter Ideas
How to Make Easy DIY Cedar Planter Boxes
How cute! Great project for kids. Thanks!